Low-Cost Mulching Options for Weed Control and Soil Health

Low-Cost Mulching Options for Weed Control and Soil Health

Mulching is a key part of gardening. Mulching offers soil improvement which makes everything in your garden grow better. It is also one of the most versatile and cost-effective solutions for curbing weed growth in a garden. This guide explores the significance of mulching, its broader benefits, and various low-cost mulching options for reaping the benefits without adding expenses.

Why Mulching Matters for Weed Control and Soil Health

There are many different reasons to utilize low-cost mulching in your garden. The two key benefits are weed control and soil health.

Low-Cost Mulching for Weed Control

Mulching serves as a formidable defense against weeds by creating a physical barrier that suppresses weed growth. Mulch smothers weed seeds. Moreover, it hinders the weeds and their seeds from access to light. Therefore, mulch effectively reduces the emergence and proliferation of weeds. This minimizes the need for constant manual weeding. Additionally, it reduces any need for more costly forms of weed control.

Low-Cost Mulching for Soil Health

Mulch also acts as a protective layer over the soil. It shields the soil from erosion caused by wind or water. It regulates soil temperature, preserving moisture levels by reducing evaporation and preventing soil compaction. Over time, organic mulches break down, enriching the soil with essential nutrients and improving its structure. It is one of the best things that you can do to improve the health of your garden overall. And it doesn’t have to cost much.

Other Benefits of Mulching

These two benefits are key to why you want to consider low-cost mulching. However, there are other benefits of mulching as well.

  • Enhancement of biodiversity by supporting diverse soil microorganisms
  • Reduced need for frequent watering
  • Improvement of nutrient availability as organic mulches decompose
  • Prevention of soil splash, keeping plants clean and disease-free
  • Aesthetic enhancement by providing a neat appearance to garden beds
  • Protection of delicate plant roots from extreme temperature fluctuations
  • Creation of a natural habitat for beneficial insects and organisms
  • Sound insulation by reducing noise levels in urban or noisy environments
  • Prevention of fruit and vegetable spoilage by keeping produce off the ground
  • Prevention of erosion on slopes and hillsides, preserving the landscape
  • Encouragement of earthworm activity
  • Reduction in the spread of certain plant diseases by maintaining soil hygiene

Low-Cost Mulching Options for Weed Control and Soil Health

Generally, the cost of mulch can vary based on factors such as the material used, availability, and the region where it’s purchased. Mulches made from specific hardwood barks or exotic woods can be more expensive due to their limited availability or processing costs. You can spend a lot of money on mulch if you want to go that route. For example, you can buy specialty mulches such as cocoa mulch, rubber mulch, or dyed mulch. However, if you’re looking for low-cost mulching options, you don’t have to look far. There are so many great options.

Organic Mulch Options

Several low-cost organic mulch options are effective for gardens and landscapes. You probably already have them in your yard or garden. Alternatively, you can typically get them at a low cost. Examples include:

Wood Chips / Bark

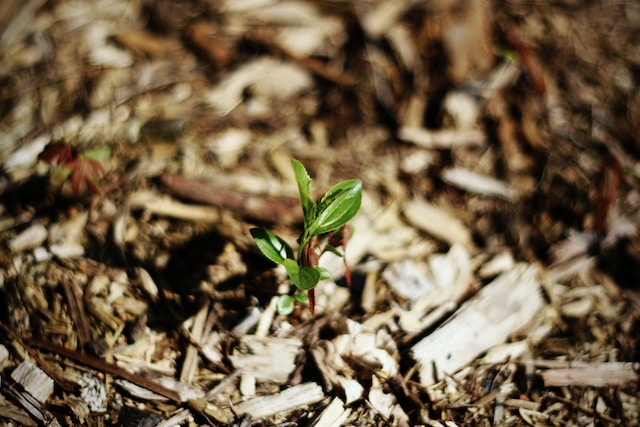
These organic materials slowly decompose, enriching the soil with organic matter. They are very effective for weed suppression as well as for moisture retention. You can often get the material free or at a low cost from tree trimming services.

Leaves

You probably already have plenty of free leaves, especially if you live in a place where the leaves fall during fall. Free. This organic material provides insulation and retains moisture. You can spread out or shred the leaves for faster decomposition.

Pine Needles

Often free for collection in areas with pine trees, this option provides a lightweight and long-lasting mulch. Their acidic nature benefits acid-loving plants like azaleas or blueberries. That’s a point you want to consider; different organic mulches offer different benefits for different plants.

Grass Clippings

This option is high in nitrogen, providing nutrients as it decomposes. Spread thin layers of grass clippings to prevent matting and odor. If you live in a grassy area, this is a free option.

Straw/Hay

Unless you happen to live on a farm, this might not be a free option. However, it’s typically affordable. Straw/ hay are available in bales at garden centers or farm supply stores. It’s an effective mulch for weed suppression and moisture retention. And it adds organic matter to improve the soil as it decomposes.

Livestock Manure

This option adds nutrients and improves soil structure when aged or composted properly. It can be sourced from local farms or stables for free or cheap.

Recycled Materials

In addition to organic materials for mulch, you can use recycled materials. And some of these (like coffee grounds/ compost) fall into both categories.

Newspaper / Cardboard / Shredded Paper

Layer newspapers or cardboard sheets over the soil. You can combine this with any of the organic mulch options above to easily keep them in place. This technique suffocates weeds while breaking down over time.

Cloth / Fabric Scraps

Old fabric pieces or burlap sacks serve as effective weed barriers. Lay them over the soil and cover them with organic mulch for added insulation.

Compost

Homemade compost from kitchen scraps and yard waste can be one of the best low-cost mulching options you’ll find. It is rich in nutrients, promotes soil health, and aids plant growth.

Coffee Grounds

Often available for free from local coffee shops or your own kitchen remnants, coffee grounds are high in nitrogen, which is beneficial for soil and plants. They can be used as mulch alone or incorporated into compost.

Natural Ground Covers

You can also plant natural ground covers in your garden to add beauty while adding mulch. Options like clover, vetch, or even certain types of low-growing herbs serve as living mulches, providing numerous benefits to gardens. These ground covers act as living carpets, suppressing weed growth, retaining moisture, and protecting soil from erosion. Their root systems enhance soil structure, fostering a healthier environment for plant roots while reducing the need for additional mulch. Additionally, these ground covers often require minimal maintenance, making them a cost-effective and sustainable choice for gardeners aiming to improve soil health and curb weed growth without hefty expenses.

Read More:


Top 13 Benefits of Using Rice Hulls in Gardening

rice hull

Rice hulls have a variety of unique properties that are great for home gardening. They have a neutral pH, are lightweight and sustainable, and have a diverse array of benefits for your garden. Additionally, you can mix rice hulls with other soil amendments or potting mix ingredients to create a well-balanced growing medium for your plants. They’re a useful, versatile addition to your gardening routine.

What Are Rice Hulls?

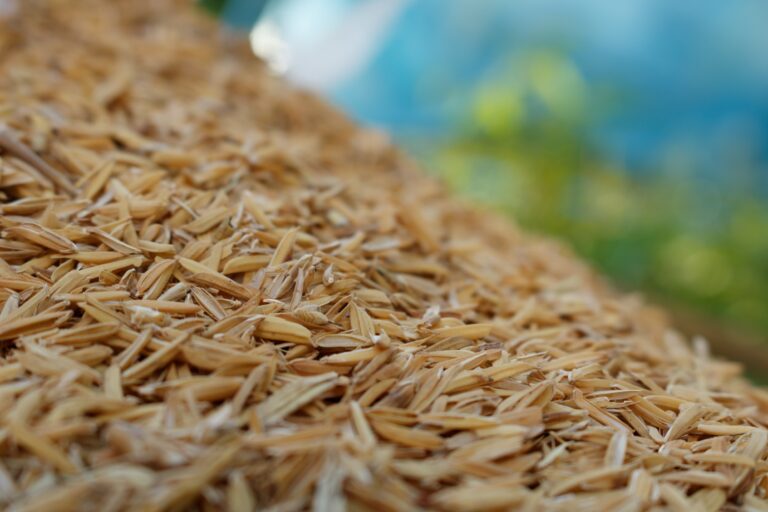
Rice hulls are the protective outer layers of rice grains. They are the hard, outer covering of the rice kernel that is removed during the milling process to produce white rice. In other words, they are a rice milling byproduct.

Benefits of Using Rice Hulls in Gardening

Using them in gardening can provide several benefits. Here are some of the advantages of incorporating them into your garden:

Benefits for the Soil in Your Garden

The main reason that you use them in your garden is because it offers many benefits for the soil. Good soil means good plants. Here are some of the specific benefits for the soil.

Improved Soil Structure

Rice hulls help improve soil structure. They do this by reducing compaction in clay soils and enhancing aeration in sandy soils. This creates a more hospitable environment for plant roots to grow, regardless of soil type.

Enhanced Drainage

They promote better drainage in heavy or poorly draining soils. This then prevents waterlogged conditions that can harm plants.

Moisture Retention

What’s interesting about the way that they hold water, though, is that they retain the moisture. They can hold moisture and release it gradually, helping to keep the soil consistently moist. This is particularly useful in arid or drought-prone regions. So, you don’t just get enhanced drainage but also get controlled moisture release.

Temperature Regulation

They act as an insulating layer, helping to regulate soil temperature. Therefore, they keep the soil cooler in hot weather. In contrast, they keep the soil warmer in cold weather. This can be especially beneficial for temperature-sensitive plants.

Organic Matter

Over time, they break down and add organic matter to the soil. This further improves the health of the soil.

pH Neutral

Rice hulls are pH-neutral. This means that they won’t significantly alter the pH of your soil. Therefore, this makes them a safe option for a wide range of plants.

Erosion Control

They can help prevent soil erosion. This is especially true if your garden is on a slope. They do this by stabilizing the soil and reducing runoff during heavy rainfall.

Other Benefits of Using Rice Hulls in the Garden

The soil benefits are a key reason to consider using them in your garden, but rice hulls also offer additional benefits:

Weed Suppression

When used as mulch, rice hulls create a barrier that suppresses weed growth. This reduces the competition for water, nutrients, and sunlight, benefiting your gardening.

Lightweight

They are lightweight and easy to work with, making them a convenient addition to potting mixes and garden pathways.

Sustainable

They are a byproduct of the rice industry, so their use in gardening contributes to recycling agricultural waste and reducing the environmental impact of rice milling. By using rice hulls, you are making use of a readily available, renewable, and biodegradable resource, contributing to sustainable gardening practices.

Pest and Disease Resistance

While not a direct pest control measure, they can reduce the likelihood of certain pests and diseases because they create a physical barrier that makes it more difficult for pests to access plant roots. When mixed with diatomaceous earth, rice hulls can help control garden pests very effectively.

Overwintering Plants

For plants that need winter protection, they can be used as mulch to insulate the root zone and protect plants from frost.

Vermicomposting

If you use worms for composting then you might want to consider adding rice hulls. They offer a comfortable environment for worms and a source of food as they break down.

How to Use Rice Hulls in the Garden

If those benefits sound great to you, here are some ways to begin using them in your garden:

  • Spread a layer of them around the base of outdoor plants to act as mulch.
  • If you have container plants, mix them into the potting soil. You can add it to other potting mixes.
  • Use for seed-starting by adding to peat moss or coconut coir.
  • Add to compost; they are carbon-rich so will offset the nitrogen-rich greens in your compost.

Where to Get Rice Hulls for Your Garden

Getting rice hulls for your garden is relatively easy. Here are a few ways to obtain them:

  • Purchase from Garden Centers or Nurseries: Many garden centers or nurseries sell bags of them specifically packaged for gardening. These are often labeled as “rice hull mulch” or “rice hulls for gardening.”
  • Contact Local Rice Mills or Processors: In regions where rice is a significant crop, you might be able to obtain them directly from local rice mills or processing facilities. They may provide them for free or at a low cost as they are a byproduct of rice processing.
  • Online Retailers: You can purchase them from online retailers and have them delivered to your location.
  • Ask Local Farmers or Gardeners: If you live in an area with rice production, you might be able to connect with local farmers or gardeners who have access to them and are willing to share or sell them to you.
  • Rice Hull Suppliers: Some companies specialize in supplying rice hulls for various applications, including gardening. They may sell them in bulk or offer delivery services.
  • Farm Supply Stores: Some farm supply stores or agricultural co-ops may carry them or have access to agricultural-grade rice hulls that can be used in gardening.

Read More:


Top 7 Eco-Friendly Peat Moss Alternatives

Top 7 Eco-Friendly Peat Moss Alternatives

Peat moss has a long history of gardening benefits. However, it also poses significant problems for the environment when you use peat moss. Therefore you might want to explore peat moss alternatives. There are plenty of great options that do the job without damaging the earth.

What Is Peat Moss?

Peat moss is a type of organic material that comes from the decomposition of plants in peat bogs over thousands of years. A peat bog, also known as a peatland, is a type of wetland ecosystem formed over thousands of years through the accumulation of dead vegetation.

Reasons People Use Peat Moss in Gardening

Peat moss is used in gardens for various reasons:

Soil Amendment

Peat moss is an excellent soil amendment that improves soil structure and texture. It helps to loosen dense soils, improving drainage in clay soils and retaining moisture in sandy soils. The fibrous nature of peat moss also enhances aeration, which is vital for root growth.

Water Retention

Peat moss has a high water-holding capacity, enabling it to retain moisture in the soil. This characteristic is especially useful during dry periods, as it helps to keep the soil consistently moist, providing a more stable environment for plants.

pH Adjustment

Peat moss is acidic, and its presence in the soil can lower the pH level, making it more acidic. This is beneficial for acid-loving plants, such as blueberries, rhododendrons, and azaleas, which thrive in slightly acidic conditions.

Organic Matter

As an organic material, peat moss contributes to soil fertility by slowly releasing nutrients as it breaks down. It also serves as a substrate for beneficial soil microorganisms, improving the overall health of the soil ecosystem.

Seed Starting and Potting Mixes

Peat moss is commonly used in seed-starting mixes and potting mixes for container gardening. Its light and fluffy texture provides an ideal medium for young seedlings to establish their root systems.

Soil Conditioner

When applied as a top dressing or worked into the soil, peat moss acts as a soil conditioner, improving the overall quality of the soil and enhancing plant growth.

Environmental Problems with Peat Moss

Unfortunately, using peat moss creates problems for the earth. Peat bogs are unique ecosystems that store a significant amount of carbon and provide a habitat for various plants and wildlife. Unsustainable harvesting of peat moss can lead to the depletion of these valuable habitats and release stored carbon into the atmosphere. Additional problems related to using peat moss include impact on water quality and quantity, increased flooding in over-harvested areas, and the loss of species diversity.

Top 7 Eco-Friendly Peat Moss Alternatives

Several peat moss alternatives are available for gardeners who want to reduce their environmental impact. Gardeners can create healthier soils, support sustainable practices, and reduce the impact on sensitive peatland ecosystems. Some of the best peat moss alternatives include:

Coconut Coir

Coconut coir is a renewable resource derived from coconut husks, which are usually discarded as waste. Using coconut coir as a peat moss alternative helps recycle this agricultural byproduct and reduces the need for landfill disposal. It has similar water-holding capacity and aeration properties but is more sustainable and environmentally friendly. And yet, I]it is a more sustainable option compared to peat moss.

Do note that the production and transportation of coconut coir might have some environmental impact. This includes energy consumption and carbon emissions associated with processing and transportation. However, these impacts are generally lower compared to peat moss extraction.

Compost

Compost is made from organic waste, such as kitchen scraps and yard trimmings, which would otherwise end up in landfills. By composting organic materials, gardeners divert waste from landfills. This reduces methane emissions. Moreover, it creates a nutrient-rich soil amendment that improves soil health. There are very few potential drawbacks to using compost as a peat moss alternative, which is why it’s a common peat moss alternative.

Leaf Mold

Leaf mold is the result of decomposed leaves and is a valuable organic material for improving soil structure and water retention. It is an excellent source of nutrients for plants and can be made by composting leaves over time. Note that leaf mold may take a longer time to break down compared to compost, though. Therefore, gardeners may need to plan and start the decomposition process in advance.

Well-Rotted Manure

Well-rotted manure is a byproduct of animal husbandry and agriculture. Using well-rotted manure as a soil amendment can help recycle organic waste. Aged and well-rotted animal manure can enrich the soil with nutrients and improve its fertility. It also enhances soil structure and microbial activity.

Note that manure from intensively farmed livestock may contain residual antibiotics or other substances that could impact soil and water quality if not properly managed. Ensuring that the manure comes from a reputable and sustainable source is essential if you want to use it as a peat moss alternative.

Pine Bark

Pine bark, when aged and ground, can be used as a soil amendment to improve aeration and drainage in the soil. It is particularly useful for plants that prefer acidic conditions. Since it is a byproduct of the timber industry, you’re making use of something that would otherwise go to the landfill. Note that some pine bark products may contain chemicals or preservatives used during timber processing. That’s just something you want to check for before adding it to your garden.

Rice Hulls

Rice hulls are lightweight and provide good aeration to the soil. They can be used as mulch or mixed into the soil to improve its structure. Like with pine bark, they are waste from another industry that we can use as gardeners. Like with coconut coir, there may be environmental impacts of transport but these should be less than with peat moss extraction.

Peat-Free Potting Mixes

Many commercial potting mixes now come with peat-free formulations, using various combinations of the alternatives mentioned above. These mixes provide suitable growing mediums for various plants. Note, however, that some commercially available peat-free mixes might still contain non-renewable resources or synthetic materials. Checking the ingredients and sourcing sustainably produced mixes is important as a result.

Read More:


5+ Cheap Ways To Make Soil More Acidic

Cheap Ways To Make Soil More Acidic

Every garden’s soil has a pH level. You can work with different pH levels using different plants. However, you have to know where you’re starting. And in some instances, you might want to change the pH level. For example, if your soil is too alkaline for the plants you want to grow, then you need to add acid. Luckily, there are cheap ways to make soil more acidic.

Why You Might Make Soil More Acidic

Your garden soil might be alkaline, neutral, or acidic. None is necessarily better than the other overall. However, different plants have different needs. Therefore, you might need to make your soil more acidic in order to best grow the plants that you want to grow in your garden.

Rural Sprout notes that you might add acidity in order to:

  • Improve nutrient consumption by your plants, making them healthier
  • To change a specific plant’s color; for example, to turn hydrangea plants blue
  • To grow specific plants that only grow well in more acidic soil

Cheap Ways To Make Soil More Acidic

Rural Sprout also notes that it’s easier to choose the right plants for your soil than to change your soil. In other words, if you have alkaline soil, then choose plants that love that. However, you don’t have to settle for this if you don’t want to. You can, instead, find cheap ways to make soil more acidic.

Use Diluted White Vinegar to Acidify Soil

YardKidz notes that vinegar is one of the fastest cheap ways to make soil more acidic. You use distilled white vinegar to increase the acid in your garden soil. You can add it to the water that you use to water your garden, whether that’s through an irrigation system or a watering jug. In addition to acidifying the soil, adding vinegar has other benefits. For example, it is a great form of natural pest control.

Add Coffee Grounds to Soil

YardKidz adds that coffee grounds are another cheap and quick way to acidify your garden soil. Note, though, that you have to use fresh coffee grounds. Ones you’ve already used to make coffee don’t have an extreme enough pH level to acidify your garden. So, yes, this is a cheap option, but it’s not the same as recycling your used coffee grounds for free.

Add Compost to Garden Soil

Rural Sprout points out, however, that adding compost to your soil can help acidify it over time. Therefore, if you add your used coffee grounds to your compost, then they do work in this way. This method is slower and less effective than the vinegar or fresh coffee grounds. Often, it’s used to make an alkaline soil more neutral rather than specifically acidic.

However, you can increase the acidity of your compost by being selective about what you add to it. Choose acidic ingredients including citrus rinds, oak leaves, or pine needles.

Pine Needle Mulch

Speaking of pine needles, Rural Sprout also notes that you can use these, oak leaves, and other acidic leaves to create your own mulch. Add this over your soil to acidify it.

Citrus Watering Your Soil

And speaking of citrus rinds, use them liberally in your garden to acidify the soil. You can also add citrus to your watering process. For example, add lemon juice to your watering can to improve soil acidity.

More Ways to Acidify Soil

Happy DIY Home explores some of the pros and cons of some of the above methods as well as other ways to acidify soil including:

  • Sphagnum Peat Moss
  • Elemental Sulfur
  • Acidifying Fertilizers
  • Iron Sulfate
  • Aluminum Sulfate
  • Natural Liquid Plant Feeds

Read More:


The Importance of Crop Rotation


The Importance of Crop Rotation

It’s that time of year again! Gardeners are starting to plan out the season. Usually, I spend this month sketching out a rough plan for my garden—taking crop rotation principles into account. I also start some seeds in my basement. This year, though, the pandemic has me changing up my plans. I’m giving my garden a break. I’m still going to grow stuff, but it’ll be less intensive. My focus will be to support pollinators and beneficial bugs by growing food sources like nectar-filled flowers. I’ll also try to build healthy soil by sowing cover crops. I’ll grow a few edibles in containers on my patio, but I think it’s time to give the soil a break this year.

Growing food is an inherently taxing process. It requires a lot from the soil. Over time, if you continue to grow and grow without returning anything back, you’ll end up with depleted, unhealthy soil.

Rotating crops and planting nitrogen-fixing plants like beans can help reduce soil “fatigue.” By introducing crop rotation into your gardening routine, you also:

  • Reduce instances of pests
  • Limit disease
  • Improve the soil’s ability to retain water
  • Recycle nutrients
  • Reduce the need to use store-bought products like fertilizer and pesticides
  • Improve soil condition

What does it mean to rotate crops? By rotating crops, you don’t plant stuff from the same family in the same spot for several years.

You can also let some of your beds rest for a season—which is what I’m doing this year.

It definitely involves a lot of planning, so I recommend using a spreadsheet or notebook to keep notes. I know you think you’ll remember your plan a few years down the road, but it’s unlikely that you’ll remember what you planted in bed ‘A,’ 3 years from now.

Other considerations for successful crop rotation:

  • Test your soil. Test the soil for nutrients and pH every year or so. Never fertilize for no reason. You should know what’s missing before you dump fertilizer willy-nilly.
  • Keep a close eye. Carefully monitor your garden to catch pests and diseases before they become a huge problem. You may need to alter your plans if a specific pest is an issue.
  • Use cover crops. Recycle nutrients into the soil and prevent carbon from getting released into the atmosphere by sowing cover crops or green manure.

Source: https://www.nrcs.usda.gov/Internet/FSE_DOCUMENTS/stelprdb1167375.pdf 


5 Things To Consider When Recycling Soil


5 Things To Consider When Recycling Soil

It’s the end of the growing season, and you’ve tossed your spent container tomato plants in the compost. Can you reuse the soil next year? Here’s a soil recycling checklist to go through before repotting plants in old soil or using last year’s soil leftovers in the spring.

Pitfalls of Recycling Soil

Reusing soil is the perfect way for a frugal gardener to save money, but there are some risks involved in potting up new plants with old soil. Here are a few things to keep in mind:

  • Diseases may be lurking. Soil may contain diseases like viruses or fungi that can infect newly planted plants. Don’t reuse soil from a pot with a plant that died of or showed signs of disease.
  • Food may be scarce. Recycled soil may be deficient in nutrients. Old soil will be depleted of nutrients. You’ll need to cut the soil with fertilizer or compost for the best results.

Soil Recycling Checklist

Here are a few things to keep in mind for your soil recycling checklist:

  • Check for diseases or pests. Was the previous plant showing signs of disease such as yellowed leaves, stunted growth, or general poor health? If the last plant that grew in that soil was diseased. Toss out the soil rather than recycle it or try to sterilize it.
  • Eliminate weeds. Are there weeds actively growing in the pot or container? Are there weed seeds hidden inside? Pull the weeds, sterilize the soil, or use it for something other than potting soil.
  • Fertilize. Old nutrient-depleted soils need to be revived with a fertilizer like compost. Mix some in to boost fertility before recycling the potting soil.
  • Do some testing. Get the soil tested to check for pH or nutrient imbalances that can affect nutrient uptake and plant health.

You can also use old soil for things other than potting up or planting new plants. Use soil to patch up holes in your lawn or add bulk to very large containers. You can also mix old soil into your compost.

How to Sterilize Soil

Let it sit in the sun to kill insects, weed seeds, and pathogens. Alternately, you can also use your oven to zap all the nasty things hiding in old soil.

https://www.youtube.com/watch?v=-RNNQPxnUYE

Source:

https://www.bhg.com/gardening/yard/soil/how-to-reuse-potting-soil/


Why You Should Test Your Soil


Why You Should Test Your Soil

Along with water and sunlight, soil is the lifeblood of a garden. Without healthy, nutrient-filled soil, plants simply won’t thrive.

It’s tempting to believe that spraying your garden with fertilizer will encourage lush growth. But if you’re spraying without testing your soil, you may be in for trouble down the line.

Why should you test your garden soil? There are several important reasons to test your soil.

Too fertilizer is bad

If you fail to get your soil tested, you have no clue about its nutrient makeup. By adding fertilizer without knowing what nutrients are already there, you risk harming plants and the environment. When you add too much fertilizer, you upset the soil’s delicate ecosystem.

If you toss on tons of fertilizer without checking if it’s really necessary, you also risk wasting a lot of money. Fertilizer is expensive! Don’t bother adding any unless it’s absolutely necessary. Getting a soil test might just save you money!

Too little fertilizer is also bad

If your plants miss out on nutrients, that’s also bad news. But how can you help them out unless you know what they need? A soil test can provide you with essential information about which nutrients are lacking in your garden. If you know exactly what to add, you won’t waste precious dollars buying the wrong kind of fertilizer.

Soil tests are informative

They not only explain the nutrient makeup of your soil, but they also tell you other valuable information. Many extension offices that provide soil testing services provide gardeners with important information regarding the composition of their soil, including the amount of organic matter present. If you’re short on organic matter, you can add more to improve the condition of your soil, which can increase its drainage and water retention properties.

A few soil testing tips

Soil testing is a bit more involved than just taking a vial of dirt and sending it off to a lab. Doing it right ensures you will receive accurate results. The more accurate the results, the less likely you are to waste money and time!

  • Don’t take any soil from areas that have recently been fertilized
  • Take different soils samples from different spots in your garden
  • Label each soil sample appropriately
  • Let the soil samples air dry before mailing them

Here’s a handy video on how to take soil samples for mail-in testing:

https://www.youtube.com/watch?v=3_U9Z3fy0Ig


How Much Dirt Does my Raised Bed Garden Need?

One of the benefits of raised bed gardening is the ability to use your own soil mix. It’s a serious advantage for those stuck living in places where the soil quality is poor or where there’s no soil to speak of (e.g., those who have a concrete yard). 

But how do you figure out how much dirt you need for your raised bed? It seems daunting, but it’s really a simple math problem. 

How much soil do you need?

Here’s what you need to calculate how much soil your garden bed requires:

The Dimensions of Your Garden Bed(s): What’s the total volume of the bed’s interior? Think back to high school math class now. Volume is determined by multiplying width, height, and depth.

Here’s a real-world example:

  • My beds are 4 feet by 4 feet, with a depth of 3 feet. The volume of the interior is 4 x 4 x 3 = 48 cubic feet. 
  • If you have more than one bed, you’ll need to multiply that total to get your final volume required. 
  • I have four beds of this size, so I’ll need a total of 48 x 4 = 192 cubic feet of soil. 

Thankfully, most soil is sold by the cubic foot, so it should be reasonably easy to figure out how many bags or truckloads you’ll need to be delivered. 

Buying from somewhere that uses a different unit of measurement? Use a simple conversion calculator online. 

Your Soil Mix

You’ve figured out how much soil you need to fill your raised beds. Great! Now it’s time to decide what type of mix you’ll use to fill them. 

Some garden centers sell and deliver soil mixes in bulk, but they’re not always the right blend for a vegetable garden. Ask what the mix consists of before ordering.

The Square Foot Gardening Foundation recommends equal parts of the following when creating a homemade soil mix (also called Mel’s Mix) for raised beds:

  • Compost (preferably from a variety of sources)
  • Peat moss
  • Vermiculite 

The mix promotes proper airflow and drainage. It’s also filled with nutrients and doesn’t dry out as quickly as other soil mixes.

Soil Mix on a Budget

Struggling with the high cost of bags of soil, compost, vermiculite, and peat moss? Check with your local garden center to find out about the cost of soil delivery. Deliveries in bulk — dumped in your driveway or on your property and not in bags — are typically cheaper than buying bags separately. 

If that still seems too pricey, consider filling your boxes with compost only. It’s not an ideal solution, but it’s a workable and affordable one.

Because my boxes are quite high, filling them was a huge and expensive challenge. I had to find workarounds to be able to fill them without enough soil.


Bulk Up Your Beds

If you’re on a tight budget, consider the use of filler materials to reach the desired soil level in your raised beds. 

Use inexpensive things to bulk up your raised beds. Examples include:

  • Dead leaves
  • Sand
  • Layers of cardboard
  • Leftover dirt from construction projects (check online marketplaces for free dirt available around town)
  • Rocks
  • Poor-quality soil (snatch up cheap bags of filler soil at your local hardware store when it goes on sale . Fill up the bottom of your beds with the lower-quality stuff before adding a premium or custom mix on top)