I’ve got a little bit more work to do than usual this spring because of the mistakes I made when installing my raised beds five years ago. I was eager to get started and didn’t think I’d have issues with weeds since my beds were waist-high. I assumed I’d have to deal with the occasional…
5 Free Garden Marker Ideas to Keep Track of Plants
Why should you consider these free garden marker ideas? I don’t care how great your memory is, find a way to label all of your seedlings and transplanted crops—knowing what you’ve planted (and where) is equally important when you’re direct-sowing. If you forget to label the spot where you’ve just sown seeds, you might accidentally…
Victory Garden Planning during a Pandemic

We’re in the thick of it now. Areas are going into lockdown, and non-essential businesses are closing until further notice. It feels weird. It’s scary. I’m exhausted. But I feel motivated, now more than ever, to keep up my gardening efforts. I’ve seen interest in gardening skyrocket. Is this the return of the victory garden?…
Profitable Greenhouse Crops: Money in Your Pockets

You’ve been growing for a while. You’ve built a DIY greenhouse (or invested in one) and decided that you want to turn your hobby into a profitable small business. Which plants should you focus on growing to ensure steady cash flow? Here are the most profitable greenhouse crops that you should consider growing: Tomatoes Tomatoes…
The Pandemic: a Gardener’s View
It’s been a tough week. Because of what I do for a living, I’m unable to unplug and decompress amidst all this. I feel overwhelmed, exhausted, and mentally spent. But while the future seems uncertain and I’m anxiety-ridden at all hours, I try my hardest to look on the bright side. It could always be…
Can You Grow Potatoes in Containers?
Growing potatoes is so incredibly fun. With a little bit of patience, you’ll be digging up spuds towards the end of the season. The taste of freshly dug potatoes is unparalleled. People say the same about tomatoes, but I genuinely think potatoes win the contest for best-tasting garden edible. Compared to a storebought potato,…
Soil Block Success!!!
Whenever I experiment with something new during the seed starting season, I feel incredibly anxious. What if it goes wrong? What if I end up with unhealthy starts? Believe me. I’ve made my fair share of mistakes that have resulted in disaster. I tried using jiffy pellets one year, and my seedlings were stunted. Another…
How to Get Free Worms for Your Garden
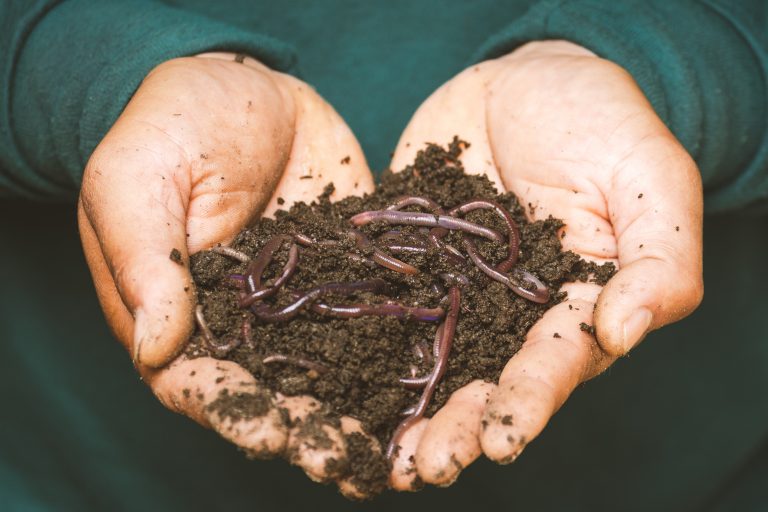
Composting is an economical way to recycle household waste like kitchen scraps and yard refuse (dead leaves, grass clippings, etc.). It requires minimal effort, and in return, you get free fertilizer for your garden! Using your homemade compost in place of commercial fertilizers is not only cheap, but it’s also better for your garden. Compost…
I’m New to Gardening: Is Starting From Seed Worth It?

‘Tis the season to start fielding questions from curious friends interested in starting a garden. One of my friends recently moved into a new home and is keen to grow a few incredible edibles in her available outdoor space. She’s unsure of whether to bother with seed starting and wondered if she’d be better off…
5 Common Reasons Why Your Houseplant Isn’t Blooming
You brought home a gorgeous houseplant or received one as a gift. You admire it for a week or so while it bloomed gloriously. Soon after, the flowers fell away and the houseplant isn’t blooming anymore or doesn’t look as radiant as it once did. Are you struggling to get that plant bloom again? Maybe…