The Dark Side of Gardening: 14 Common Mistakes That Can Ruin Your Garden

Common Mistakes That Can Ruin Your Garden

Gardening is a beloved hobby for many, offering a sense of peace, accomplishment, and connection to nature. However, even the most well-intentioned gardener can fall prey to common mistakes that have the potential to turn this rewarding activity into a source of frustration. Understanding these pitfalls is crucial to maintaining a healthy, vibrant garden. This article sheds light on 14 common gardening mistakes, providing insights into how to avoid them and ensure your garden thrives.

1. Overwatering: The Silent Killer

Overwatering The Silent Killer

One of the most frequent errors in gardening is overwatering. While plants certainly need water to survive, too much can lead to root rot, a condition where roots can’t breathe and effectively absorb nutrients. This mistake often stems from a well-meaning desire to care for plants, but it’s crucial to understand that different plants have varied water needs. Overwatered soil can also become a breeding ground for fungi and pests, further harming your plants. Learning to check soil moisture before watering and investing in a simple irrigation system can prevent this common issue.

2. Neglecting Soil Health

Neglecting Soil Health

Soil is the foundation of any garden, and neglecting its health can lead to numerous problems. Many gardeners make the mistake of planting without first testing and amending their soil. Poor soil can be too acidic, too alkaline, nutrient-deficient, or lack proper drainage, all of which can stunt plant growth. Incorporating organic matter, such as compost or well-rotted manure, can vastly improve soil structure and fertility, leading to healthier plants.

3. Planting at the Wrong Time

Planting at the Wrong Time

Timing is everything in gardening, and planting too early or too late in the season can doom plants from the start. Frost can kill tender seedlings, while heat stress can affect those planted too late. Understanding the growing season in your region and the specific needs of each plant is essential. Utilize local planting guides and be mindful of last frost dates to ensure your plants get the best start possible.

4. Ignoring Pest and Disease Management

Ignoring Pest and Disease Management

Pests and diseases can wreak havoc in a garden, and failing to manage them proactively can lead to significant losses. Regular monitoring of plants for signs of trouble, such as discolored leaves, holes, or wilting, is vital. Natural pest control methods – like introducing beneficial insects and practicing crop rotation – can help manage these issues without resorting to harsh chemicals that can harm the ecosystem.

5. Overcrowding Plants

Overcrowding Plants

Overcrowding is a common mistake that not only stunts plant growth due to competition for light, water, and nutrients but also increases the likelihood of disease. Proper spacing allows for adequate air circulation, which is essential in preventing fungal infections. Always follow the spacing recommendations for each plant, and be prepared to thin seedlings when necessary to give each plant enough room to grow.

6. Using Chemicals Recklessly

Using Chemicals Recklessly

The misuse of chemical fertilizers, pesticides, and herbicides can not only harm your plants but also negatively impact soil health and local wildlife. Organic gardening practices are not only better for the environment but can also lead to a more resilient garden. If chemicals must be used, always follow the instructions carefully and consider the potential impact on beneficial organisms.

7. Choosing the Wrong Plants

Choosing the Wrong Plants

Not all plants are suited to all environments, and choosing plants that are not compatible with your garden’s conditions can lead to disappointment. Consider factors such as sunlight, soil type, and climate when selecting plants. Native plants are often a good choice, as they are adapted to local conditions and require less maintenance.

8. Ignoring Companion Planting

Ignoring Companion Planting

Companion planting involves placing plants together that benefit and support each other, either by deterring pests, improving growth, or enhancing flavor. Ignoring these beneficial relationships can result in a less productive and more pest-prone garden. Researching and implementing companion planting strategies can lead to a healthier, more harmonious garden ecosystem.

9. Forgetting to Mulch

Forgetting to Mulch

Mulch is not just an aesthetic addition to the garden; it plays a crucial role in retaining soil moisture, regulating temperature, and suppressing weeds. Forgetting to mulch can lead to dry, hard soil and a weed infestation, both of which can stress plants. A layer of organic mulch, such as straw or bark, can make a significant difference in the health of your garden.

10. Improper Pruning

Improper Pruning

Pruning is essential for the health and productivity of many plants, but doing it incorrectly or at the wrong time can lead to poor growth or even kill a plant. Each plant has specific pruning needs, and understanding these is key to encouraging healthy growth and flowering. Avoid heavy pruning outside of the recommended periods, and always use clean, sharp tools to make precise cuts.

11. Lack of Planning

Lack of Planning

A well-planned garden is more likely to succeed than one thrown together haphazardly. Lack of planning can lead to issues like poor plant placement, inadequate space for growth, and an unbalanced design. Taking the time to sketch out your garden layout and consider the needs of each plant can save time and resources in the long run.

12. Ignoring Vertical Space

Ignoring Vertical Space

Many gardeners forget to utilize vertical space, which can significantly increase your growing area, especially in small gardens. Trellises, climbing plants, and vertical planters can add depth and interest to your garden while maximizing space.

13. Watering Inconsistently

Watering Inconsistently

Inconsistent watering can stress plants, leading to poor growth and susceptibility to disease. Establishing a regular watering schedule that accounts for the needs of your plants and the local climate can ensure your garden remains healthy and vibrant.

14. Failing to Adapt

Failing to Adapt

Finally, one of the biggest mistakes gardeners can make is failing to learn from their experiences and adapt their practices. Gardening is a continual learning process, and what works one year may not work the next. Being open to changing your methods and trying new approaches is essential for long-term gardening success.

Don’t Let Common Mistakes Stop You!

Don’t Let Common Mistakes Stop You

Gardening is a journey filled with learning and discovery, and mistakes are all part of the process. By being aware of these common pitfalls and taking steps to avoid them, you can ensure your garden remains a source of joy and beauty. Remember, every mistake is an opportunity to grow, both as a gardener and in your garden.


6 Tips To Revive Wilted Plants

Tips To Revive Wilted Plants

I mentioned recently that I have a little bit of a brown thumb. However, I’ve kept at gardening and learning about plants. I’ve improved over time. Along the way, I’ve picked up lots of tips to revive wilted plants. I wanted to share some of those with you today.

What Causes Plants to Wilt?

I made one of the biggest rookie gardening mistakes for a really long time. I assumed that if a little water is good for plants, then a lot of water is better. Therefore, I would always overwater just about everything. Many of my plants died as a result.

Many different things can cause plants to wilt, including:

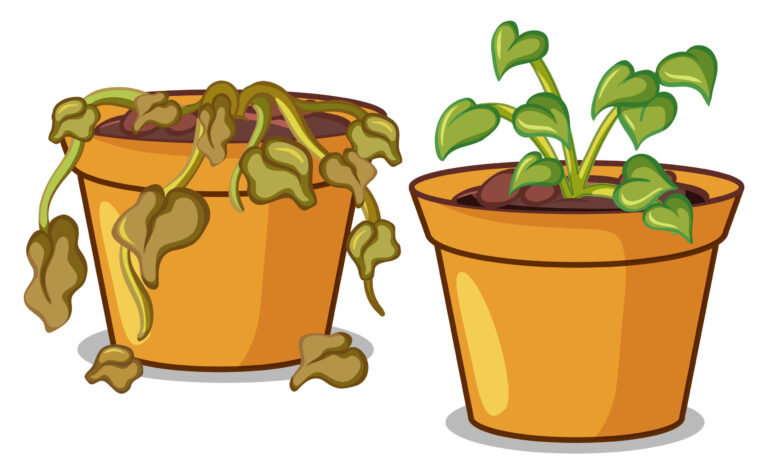
  • Water imbalance – both too much water and too little can cause wilting
  • Light imbalance – too much sun or too little sun creates problems
  • Letting the plant get too hot
  • Over-fertilizing your plants
  • Disease – various fungi, bacteria, and viruses can impact plant health
  • The plant needs a bigger container to grow properly

Tips to Revive Wilted Plants

The most important of all tips to revive wilted plants is to identify the cause of the problem. Check the potential causes above. Then correct accordingly. This could mean moving your plant into more or less sunlight, repotting it, or changing the way you water it.

Here are some additional tips to revive wilted plants:

1. Learn about Overwatering

  • Research the specific water needs of each plant in your garden.
  • If the soil is moist and dark, the plant might not need water.
  • Water at the base of the plant, not from overhead.
  • Make sure that the water is able to drain properly.
  • Water during the day, not at night.

2. Consider Underwatering, Too

If you’re not watering the plant enough, then correct accordingly. The above tips will assist with that as well.

3. Give Plants The Right Amount of Sunlight

Again, research what your specific plants need in terms of sunlight. However, even plants that call for full sun might need shade if they’re wilting. Therefore, try adding shade to see if your plants heal and grow as a result. In particular, give shade to plants that appear to be getting too hot, whether or not they’re getting the right amount of light.

4. Try a Fungicide

You might have to rule out fungi, bacteria, etc. Start by trying a natural fungicide on your plants. You can easily DIY one of these to try at home. From there, you can explore options for treating various bacteria, etc., that are unique to different plants and regions.

5. Re-plant Your Plants

There are a few different reasons to try this option. First of all, the plant might have outgrown its post. If so, the wilting could be due to a need for more space. Second, though, the soil might be problematic. Therefore, replanting in new soil could help resolve the problem. This is true for plants in pots as well as those in the ground.

6. Watch, Try, Watch Again

Ultimately, let your plants tell you what they need. Look at the issue. Try something above to treat the problem. If it doesn’t work, watch some more, then try something new. Gardening includes trial and error. The more you listen to your plants, the better you’ll get at it.

Read More:


5 Reasons to Keep Tabs On The Weather Forecast

5 Reasons to Keep Tabs on the Weather Forecast


I’ve only used my garden hose a handful of times this season. I filled my garden boxes up with perennials and a few plants from a local nursery and knew that I wouldn’t have the energy to keep things up and maintain the garden as I usually do. I was right. But by taking a step back, I realized the importance of keeping tabs on the weather forecast.

I’ve let Mother Nature do most of the work, and despite my very laissez-faire gardening attitude, my garden is still doing surprisingly well. Things are growing, flowers are blooming, and pests aren’t devouring my kale as I expected.

It’s been a sweltering hot summer, so I really thought plants would wilt and die due to the continuous heat waves. But they’ve managed to hold on and grow despite the intense heat. While my gardening activities have been mostly on pause for the season, I have been running outside quite a bit. That means I check the weather forecast just as much as I did before.

I’ve discovered that despite my lack of watering, the garden has done quite well. And the weather forecast has given me clues as to why. We’ve had a pretty rainy July, and even though there were definitely many days between downpours, the garden still held on.

What does that mean? It means that in the past, I’ve probably watered when I really didn’t need to.

Paying attention to the weather forecast is something I’ve always done. But this summer has shown me that maybe sometimes I’m quick to grab the hose. Granted, I’m also not growing too many thirsty plants. Plant choice matters a lot, too. Instead of struggling to keep plants like lettuce and Asian greens well-watered, I picked drought-tolerant ones. The mix of annual and perennial flowering plants has also greatly reduced pest activity. My kale, usually eaten up by cabbage worms by now, is thriving.

This little gardening break has taught me the importance of letting things go. Currently, Mother Nature is in pain. Our gardens are taking a pummelling because of climate change, but there are ways to work with the environment around us. Sure, I could have dropped some pesticides in my garden years ago to try and deal with the cabbage worms and squash bugs. But to see things right themselves naturally has been incredibly rewarding.

By planting a variety of native plants in addition to my favorite edibles, I’ve improved the tiny ecosystem that is my front yard garden. I encourage you to try it. Save some space for some native perennials. Plant more flowers among the leafy greens. If something isn’t working, don’t try to force it. Find an alternative.

Doing this with the garden is an approachable way to get more comfortable with letting nature its course. Eventually, I hope we all do the same with our useless lawns, too. Although I’m not in my garden as often, I’ve been lucky enough to spot many wild lawns on my runs this summer. Here’s hoping we get back to surrounding ourselves with nature instead of tearing it all down.


4 Frugal DIY Drip Irrigation Systems


4 Frugal DIY Drip Irrigation Systems

Buying a fancy drip irrigation system is one way to go. But it’ll cost you. Instead, consider a DIY drip irrigation system. Either way, you’ll need to spend time installing irrigation, so why not save a few bucks, too?

Benefits of drip irrigation

You’ve got a hose or a sprinkler, so why invest time and effort into building a DIY drip irrigation system?

Here are the advantages of this type of watering system:

  • Less water waste. Water doesn’t evaporate as readily with a drip irrigation system.
  • Targeted watering. Because the tubing is close to plant roots, water gets right to where it needs to go—which means less waste and higher efficiency watering.
  • Less disease spread. With drip irrigation, water is unlikely to splash onto plant foliage. That means fewer chances for contaminated soil to spread pathogens.
  • Easy watering. Once installed, an irrigation system makes watering incredibly easy. No more lugging around a heavy hose. You can even install a timer and have the system work completely on its own.
  • Fewer weeds. Because water goes right to plant roots, weeds are less likely to grow between plants.

DIY drip irrigation systems

You’ll need to spend a bit of money on materials to build your DIY drip irrigation system, but the initial cost is worth it, considering how much time you’ll save down the line.

Here are some ideas for creating DIY drip irrigation systems:


  • Soda bottles: This is an easy drip irrigation system for the frugal gardener that costs next to nothing. It’s a great option for small space gardeners. Here’s a video on how to use soda bottles to create a cheap drip irrigation system:


  • Rain barrel system: Here’s a video that shows you how to use a rain barrel in a drip irrigation system to minimize water waste:

  • Bucket: Got a bucket? You’re in luck! You can build a simple DIY drip irrigation system easily. This video shows how you can pair drip tape or tubing with buckets to create a low-tech irrigation system that doesn’t require a hookup to a nearby water source:

This setup is even simpler:


Harvesting Rainwater for the Frugal Gardener

Harvesting Rainwater for the Frugal Gardener


Gardening requires quite a bit of water. For many gardeners that means an increase in their water bill during the hot summer months. Statistics show that lawn and garden watering make up at least 40% of our total household water use. Frugal gardeners, however, can take advantage of rainwater by bringing back an age-old, low-tech system of collecting water from roofs and gutter systems into rain barrels, or cisterns as they have been called. By harvesting rainwater, you can keep your little corner of the world green, decrease stormwater runoff, and cut costs all at the same time.

Harvesting rainwater

One inch of rain on a 1,000 square foot roof will produce 600 gallons of water. Capture just some of that chemical-free rain in a container of any kind and you’ll be able to keep your veggie garden thriving and your flowers blooming all season, with no added expense. Your plants will thrive with the natural rainwater compared to water from municipal systems and the chemicals they typically add. Rainwater is a free source of soft water and also excellent for your houseplants.

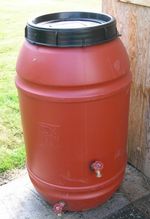
Most rain barrels now come with the fittings for hooking up a hose, so getting harvesting rainwater is as simple as locating a barrel under a gutter and screwing in your hose. If you have a very small garden plot, or only use small containers, you can opt for a simpler system. Locate a barrel under a downspout and just dip your watering can in when you are planning to water your plants and containers. Each time it rains, you can store water up for the dry days or days you can’t water due to summer rationing schedules.

Due to the amount of water coming off a roof, it is important to have a plan for overflow. It’s important to have a valve to switch tanks. You can also go low tech and manually move the downspout away from the already full barrel to keep from having a mini Niagara Falls next to your buildings’ foundation.

As with anything that holds water, be sure your system has a child-proof, secure lid to prevent accidents. You might also want to screen the opening to your container, not only keeping debris out of the water but discouraging mosquitoes from breeding.

Where to get a water barrel?

Here’s a list of a few of the companies that carry water barrels and supplies to help you set up a water storage system. Remember, your system for harvesting rainwater can be as simple or as complex as you have time and money for. Just the savings from setting up one downspout and a barrel will make a difference. What frugal gardener doesn’t want to tap into a free resource?

Check local regulations

Before purchasing anything, be sure to check with the water department where you live to see if they are sponsoring a Rain Water Harvesting project. Many cities encourage the installation of rain barrels as a method of conservation. They may offer the barrels at a reduced price or give rebates if you purchase your barrel elsewhere. Some towns even offer workshops and supplies to build your own systems.

Rain barrels are one of the simplest, cheapest ways to conserve water, allowing you to treat rainwater as a resource and not a waste product. Harvesting rainwater on your property can help make your garden a more environmentally friendly space.

Installing a Rain Barrel

Rain Water Harvesting 


Keep the Garden Well-Watered: 5 Tried & True Tools

well-watered garden

Years ago, when, with the help of my dad, I started my first vegetable garden, I was vaguely aware of the importance of watering plants. I watered whenever I felt like it, and whenever it seemed like my plants yearned for moisture—it turns out many of the symptoms of overwatering and under watering are shockingly similar. I struggled to keep the garden well-watered.

Watering Epiphany

One of the main reasons for my irregular watering schedule was that my garden was tucked away in the depths of the yard, and getting there meant trekking out with shoes and lugging the heavy hose to where it was needed. It was an ordeal. When I moved out of my parent’s home and created a garden plot of my own, I watered here and there but didn’t start really soaking my plants until a year into things. I quickly realized that my haphazard watering wasn’t going to cut it in this new patch of dirt. The spot, blessed with sun, dried out a whole lot quicker than in my very shaded garden of yesteryear. 

Tried and True Watering Tools

I’ve spent a couple of years fiddling with water implements and figuring out the best solution for my little garden. Here’s what I’ve found works for me.

Keep your garden well-watered with these must-have supplies.

Expandable hose

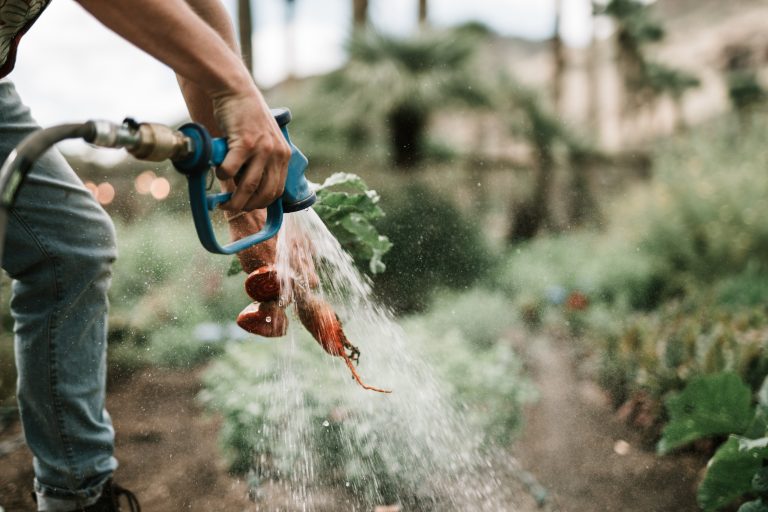
They’re typically cheaper than a traditional chunky, cumbersome hose and are easy to carry around the garden. At the end of the season, it’s super easy to pack up the flexible hose and toss it into the bin of supplies that will head to the basement for the winter. The drawback is that flexible hoses are less durable, but if you’re careful and take good care of your watering implement, it should last a few seasons. There are also plenty of high-quality flexi-hoses with triple-layer protection, though they typically cost more. Buy one with a sprayer attachment that features multiple settings. Use the misting setting on tender seedlings and the soaker setting to water plants deeply from below. 

Watering can

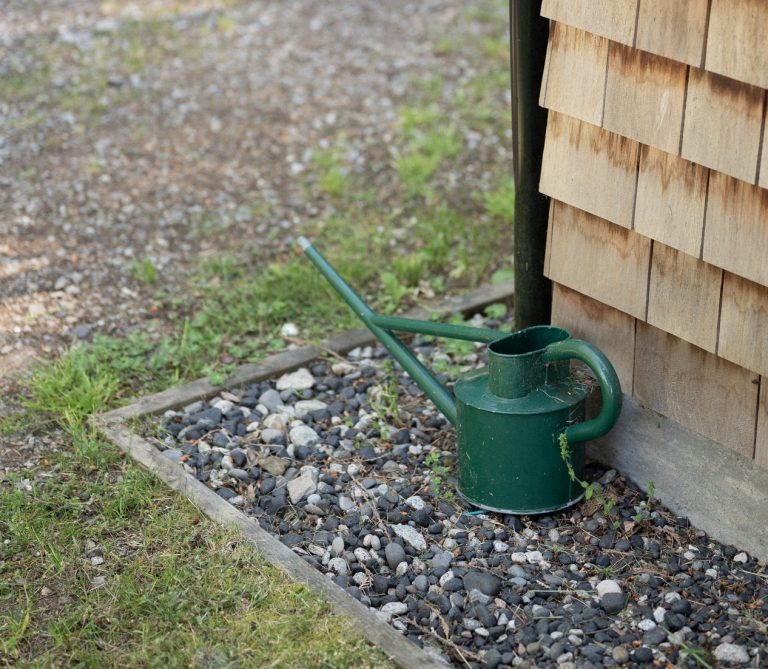
I use a super durable plastic watering can. It’s been around for years and hasn’t failed me yet. It’s helpful for watering areas where the hose doesn’t reach and for watering when the water is shut for the winter.

Mulch

Mulch won’t provide your crops with water, but it conserves moisture exceptionally well. Without mulch, my topsoil dries up super quickly—even if I water at regular intervals. There are plenty of cheap and free mulch options, including grass clipping, leaf mold, and shredded cardboard or newspaper. My preference is straw, but it’s not always readily available. 

Soaker hose

I tried a fancy irrigation set up in my raised beds years ago, and it was an utter failure. The hoses got in the way of my footpaths, and it was more trouble than it was worth. That doesn’t mean I completely gave up on irrigation. I recently installed soaker hoses in some of my ground-level beds, where I plan to plant perennials and other easy-to-maintain plants. Currently, only the hardiest of plants survive there because of the lack of water. The roof overhang blocks the rain and getting the hose there is a pain in the butt, so I use soaker hoses to water the area. 

The weather forecast

Overwatering can be as problematic as under-watering, so while you must give thirsty plants sustenance, it’s also wise to check the weather forecast before dumping a whole gallon of water into your beds. Don’t waste this precious resource if it’s looking like a rainstorm is on the way. Unless your plants are begging for water, it can wait. 

Do you have any favorite watering tools? How do you keep your garden well-watered? Are you fond of any watering tricks that have netted you lush, bushy plants year after year? I’d love to hear your water-wise tips! Share them with me in the comments.