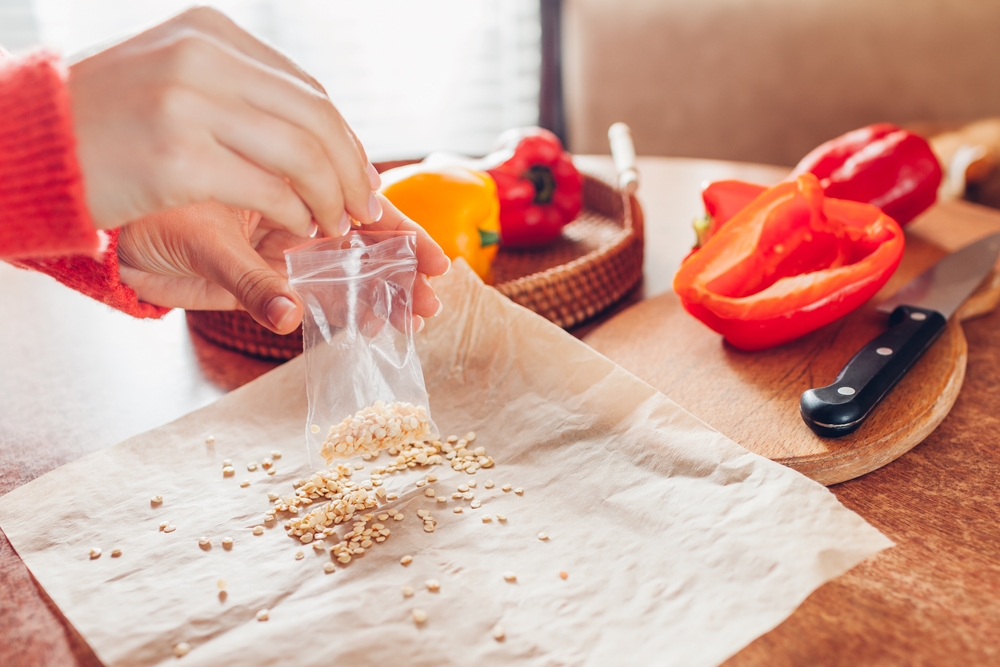
Saving seeds sounds wonderfully simple: let a plant make seeds, scoop them up, put them somewhere safe, and plant them next year. Unfortunately, seeds can act like tiny divas when gardeners give them the wrong treatment, especially when moisture, heat, immature seeds, or poor storage enter the picture. A little care at harvest time can make the difference between a packet full of future seedlings and a sad handful of garden confetti.
Seed saving does not require a laboratory, expensive equipment, or a secret handshake with the gardening gods. It requires timing, cleanliness, patience, and a basic grasp of what different crops need before their seeds can handle storage. These six techniques can help protect seed quality from the moment a gardener chooses a seed-bearing plant until the moment those seeds meet next year’s soil.
1. Let Seeds Mature Fully Before Harvesting
The biggest seed-saving mistake often happens before the seeds even leave the garden. Gardeners need to let seeds reach physiological maturity on the plant, which usually means waiting beyond the point when the vegetable looks ready for the dinner plate. Tomatoes should become fully ripe, beans should mature until the pods dry, and many flowers should finish blooming and produce mature, dry seed heads.
That timing matters because immature seeds may lack the stored food reserves and development they need for strong germination. A dry bean pod that rattles on the plant tells a very different story from a green pod picked while the beans still look plump and tender. When in doubt, sacrifice a little eating quality for seed quality, because the best seed usually comes from a plant that has finished its reproductive job.
2. Separate the Seeds From Their Fruit Properly
Different crops demand different extraction methods, and treating every seed the same way creates unnecessary trouble. Dry seeds from beans, peas, lettuce, dill, and many flowers usually need little more than thorough drying and debris removal. Wet-seeded crops such as tomatoes, cucumbers, and some squash require more attention because pulp can cling to the seeds and encourage mold during storage.
Tomato seeds offer a particularly useful example because gardeners can scoop the seeds and surrounding gel into a container with a little water, then allow the mixture to ferment for several days before rinsing the seeds clean. That fermentation helps break down the gel coating and can reduce some seed-borne pathogens on the seed surface. Afterward, spread the clean seeds in a thin layer on a nonstick surface such as a plate or glass, and give them plenty of air until they feel completely dry.
3. Dry Seeds Like You Mean It
Moisture ranks among the greatest enemies of stored seed, so drying deserves more attention than a quick wipe with a paper towel. Seeds should feel dry before storage, and gardeners should avoid sealing damp seeds inside a container because trapped moisture can encourage mold and shorten seed life. A cool, dry room with good airflow works well for most home gardeners, and a thin layer of seeds allows moisture to escape more easily.
Paper plates, coffee filters, or screens can help during the drying stage because they allow air to circulate around the seeds. Avoid blasting seeds with intense heat from an oven, hair dryer, or other aggressive shortcut because excessive heat can damage their living tissues. Patience wins here, even if watching seeds dry ranks somewhere below watching paint dry on the excitement scale.
4. Store Seeds Somewhere Cool, Dry, and Dark
Once seeds reach the storage stage, the goal changes from drying them to keeping moisture and heat away. Airtight containers can work well when gardeners place only thoroughly dry seeds inside, and small glass jars, sealed envelopes inside containers, or dedicated seed-storage boxes can all serve the purpose. Darkness also helps because light can contribute to deterioration over time, especially when storage conditions fluctuate.
A consistently cool location usually beats a warm kitchen cabinet, garage shelf, or sunny windowsill. Refrigerators can provide suitable seed-storage conditions when gardeners protect seeds from condensation and temperature changes by using moisture-resistant containers, but seeds should return to room temperature before opening the container. That simple step helps prevent humid air from turning into condensation on cold seeds, which defeats all that careful drying.
5. Label Everything Before Memory Betrays You
A seed collection can become a botanical mystery surprisingly fast, especially when several varieties look almost identical once they leave the garden. Every packet or container should include the plant variety, the year of harvest, and any useful notes about where or how the plant grew. Those details help gardeners track which seeds performed well instead of relying on a memory that seemed excellent in October and mysteriously vanished by February.
Labeling also matters when gardeners save seeds from crops that can cross-pollinate. Corn, squash, cucumbers, peppers, and many other crops can exchange pollen between compatible varieties, which means saved seeds may produce plants that differ from the parent. Tomatoes, beans, peas, and lettuce generally make easier choices for beginners because many varieties primarily self-pollinate, although some crossing can still occur.
6. Test a Few Seeds Before Planting the Whole Batch
A germination test can prevent a disappointing spring surprise, particularly when gardeners store older seeds or save seeds under less-than-perfect conditions. Place a small sample of seeds between damp paper towels, keep them warm enough for the crop, and check for germination over the appropriate period for that plant. The test does not need to become a science fair project, but it can reveal whether a packet contains promising seeds or mostly garden nostalgia.
If only a portion of the test seeds germinate, gardeners can adjust their planting approach rather than tossing the entire collection. A thicker planting rate may compensate for lower germination in some situations, although gardeners should still investigate poor results because mold, immature seed, improper storage, or unsuitable testing conditions can all affect the outcome. The test also creates useful information for future seasons, turning seed saving from guesswork into a simple record-keeping habit.
Give Next Year’s Garden a Better Starting Line
Good seed saving begins long before the seed packet reaches the storage shelf. Choose healthy plants, allow the seeds to mature fully, clean them appropriately, dry them completely, and protect them from heat, moisture, and light. Just as importantly, label every batch and test questionable seeds before committing an entire garden bed to them.
The payoff goes beyond saving money on a few packets of seed. Saving seeds creates a connection between this year’s garden and next year’s planting season, while repeated selection can help gardeners preserve varieties that perform particularly well in their own growing conditions. Treat those tiny seeds with a little respect, and next spring’s planting session can begin with something far better than crossed fingers.
What seeds have you saved from your garden, and which ones have given you the best results?
You May Also Like…
Can You Use Old Window Screens to Dry Garden Seeds?
Should You Transplant Volunteer Seedlings During Hot Weather?
The Milk Jug Greenhouse: The Easiest Way to Protect Your Seedlings for Free
5 DIY Bird Deterrents That Protect Seeds and Seedlings
6 Signs Garden Soil Is Too Warm for Newly Sown Seeds

Brandon Marcus is a staff writer for FrugalGardening.com at District Media, Inc., where he delivers practical gardening advice with a relatable, no-nonsense style. An avid amateur gardener, he holds a BA degree and with over ten years of professional writing experience, he is also an award-winning published author whose first book, Questions For Deep Thinkers, was released by Adams Media. His work has appeared in major publications including Fandom.com, CHUD.com, TheColdWire.com, and Fansided.com.
Leave a Reply