Low-Cost Mulching Options for Weed Control and Soil Health

Low-Cost Mulching Options for Weed Control and Soil Health

Mulching is a key part of gardening. Mulching offers soil improvement which makes everything in your garden grow better. It is also one of the most versatile and cost-effective solutions for curbing weed growth in a garden. This guide explores the significance of mulching, its broader benefits, and various low-cost mulching options for reaping the benefits without adding expenses.

Why Mulching Matters for Weed Control and Soil Health

There are many different reasons to utilize low-cost mulching in your garden. The two key benefits are weed control and soil health.

Low-Cost Mulching for Weed Control

Mulching serves as a formidable defense against weeds by creating a physical barrier that suppresses weed growth. Mulch smothers weed seeds. Moreover, it hinders the weeds and their seeds from access to light. Therefore, mulch effectively reduces the emergence and proliferation of weeds. This minimizes the need for constant manual weeding. Additionally, it reduces any need for more costly forms of weed control.

Low-Cost Mulching for Soil Health

Mulch also acts as a protective layer over the soil. It shields the soil from erosion caused by wind or water. It regulates soil temperature, preserving moisture levels by reducing evaporation and preventing soil compaction. Over time, organic mulches break down, enriching the soil with essential nutrients and improving its structure. It is one of the best things that you can do to improve the health of your garden overall. And it doesn’t have to cost much.

Other Benefits of Mulching

These two benefits are key to why you want to consider low-cost mulching. However, there are other benefits of mulching as well.

  • Enhancement of biodiversity by supporting diverse soil microorganisms
  • Reduced need for frequent watering
  • Improvement of nutrient availability as organic mulches decompose
  • Prevention of soil splash, keeping plants clean and disease-free
  • Aesthetic enhancement by providing a neat appearance to garden beds
  • Protection of delicate plant roots from extreme temperature fluctuations
  • Creation of a natural habitat for beneficial insects and organisms
  • Sound insulation by reducing noise levels in urban or noisy environments
  • Prevention of fruit and vegetable spoilage by keeping produce off the ground
  • Prevention of erosion on slopes and hillsides, preserving the landscape
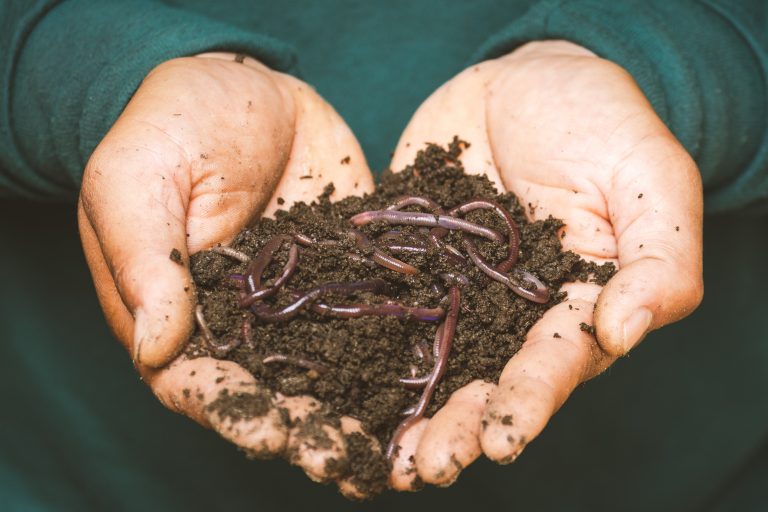
  • Encouragement of earthworm activity
  • Reduction in the spread of certain plant diseases by maintaining soil hygiene

Low-Cost Mulching Options for Weed Control and Soil Health

Generally, the cost of mulch can vary based on factors such as the material used, availability, and the region where it’s purchased. Mulches made from specific hardwood barks or exotic woods can be more expensive due to their limited availability or processing costs. You can spend a lot of money on mulch if you want to go that route. For example, you can buy specialty mulches such as cocoa mulch, rubber mulch, or dyed mulch. However, if you’re looking for low-cost mulching options, you don’t have to look far. There are so many great options.

Organic Mulch Options

Several low-cost organic mulch options are effective for gardens and landscapes. You probably already have them in your yard or garden. Alternatively, you can typically get them at a low cost. Examples include:

Wood Chips / Bark

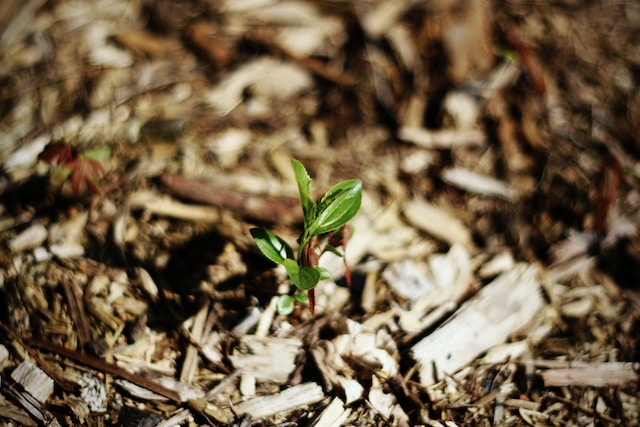
These organic materials slowly decompose, enriching the soil with organic matter. They are very effective for weed suppression as well as for moisture retention. You can often get the material free or at a low cost from tree trimming services.

Leaves

You probably already have plenty of free leaves, especially if you live in a place where the leaves fall during fall. Free. This organic material provides insulation and retains moisture. You can spread out or shred the leaves for faster decomposition.

Pine Needles

Often free for collection in areas with pine trees, this option provides a lightweight and long-lasting mulch. Their acidic nature benefits acid-loving plants like azaleas or blueberries. That’s a point you want to consider; different organic mulches offer different benefits for different plants.

Grass Clippings

This option is high in nitrogen, providing nutrients as it decomposes. Spread thin layers of grass clippings to prevent matting and odor. If you live in a grassy area, this is a free option.

Straw/Hay

Unless you happen to live on a farm, this might not be a free option. However, it’s typically affordable. Straw/ hay are available in bales at garden centers or farm supply stores. It’s an effective mulch for weed suppression and moisture retention. And it adds organic matter to improve the soil as it decomposes.

Livestock Manure

This option adds nutrients and improves soil structure when aged or composted properly. It can be sourced from local farms or stables for free or cheap.

Recycled Materials

In addition to organic materials for mulch, you can use recycled materials. And some of these (like coffee grounds/ compost) fall into both categories.

Newspaper / Cardboard / Shredded Paper

Layer newspapers or cardboard sheets over the soil. You can combine this with any of the organic mulch options above to easily keep them in place. This technique suffocates weeds while breaking down over time.

Cloth / Fabric Scraps

Old fabric pieces or burlap sacks serve as effective weed barriers. Lay them over the soil and cover them with organic mulch for added insulation.

Compost

Homemade compost from kitchen scraps and yard waste can be one of the best low-cost mulching options you’ll find. It is rich in nutrients, promotes soil health, and aids plant growth.

Coffee Grounds

Often available for free from local coffee shops or your own kitchen remnants, coffee grounds are high in nitrogen, which is beneficial for soil and plants. They can be used as mulch alone or incorporated into compost.

Natural Ground Covers

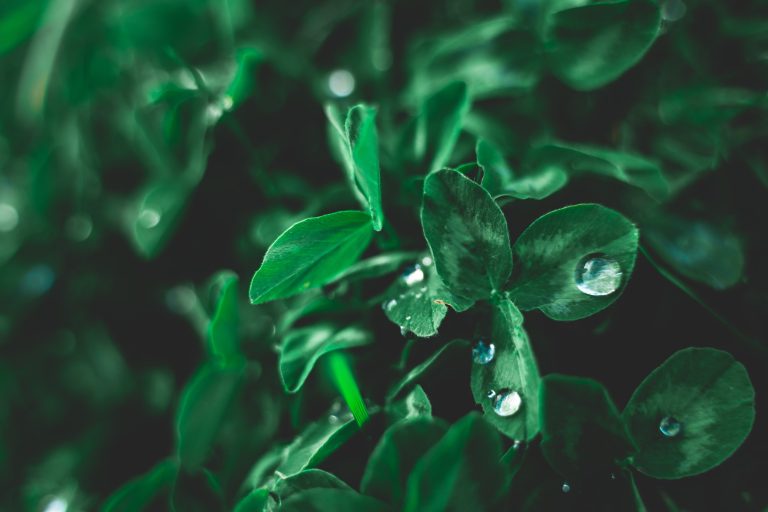
You can also plant natural ground covers in your garden to add beauty while adding mulch. Options like clover, vetch, or even certain types of low-growing herbs serve as living mulches, providing numerous benefits to gardens. These ground covers act as living carpets, suppressing weed growth, retaining moisture, and protecting soil from erosion. Their root systems enhance soil structure, fostering a healthier environment for plant roots while reducing the need for additional mulch. Additionally, these ground covers often require minimal maintenance, making them a cost-effective and sustainable choice for gardeners aiming to improve soil health and curb weed growth without hefty expenses.

Read More:


What Happens to Plants If You Use Enviro Ice on Them?

What Happens to Plants If You Use Enviro Ice on Them?

About one year ago, I wrote an article here about Enviro Ice. Companies use this product to keep items cold for shipping. I receive it in my HungryRoot food deliveries each month. According to the company, you can use it this nitrogen-based product to fertilizer your plants. I considered trying it. However, for reasons explained in the article, I didn’t actually ever end up doing so. Nevertheless, many people have asked me what I think about using it. Therefore, I decided to scour the Internet for information from people who have tried it. Here’s what I found.

Why I Haven’t Tried Enviro Ice on My Plants

I don’t keep too many plants myself. I live in an apartment in San Francisco. Moreover, I’m not great with plants. As a result, I have to be careful to follow directions exactly if I have any chance of keeping plants alive. I’m just not intuitive about it like so many other people are. On more than one occasion, I’ve called my sister, who was a plant sciences major, to ask her what one of my plants might need.

There isn’t a lot of information out there about using Enviro Ice on plants. It’s something that even the company itself seems to be studying. Therefore, there aren’t great specific instructions. In other words, I can’t find anything that says, “use this amount of Enviro Ice this often to get good results for your plants.” There definitely don’t seem to be instructions for using it on specific plants. So, even though I still get Enviro Ice every week, I haven’t tried it on any plants. Instead, I put it down my sink drain as described in my original article.

The Big Questions

I turned to the Internet to find out what people are saying about using Enviro Ice on their plants. Mostly, I scoured Reddit, although there are a few other forum and blog posts about it that you can easily find in a Google search. A few key questions came up:

What Form of Nitrogen Is In Enviro Ice?

I confess that I don’t fully understand the science behind this. However, several people online have asked what form of nitrogen or nitrogen compound this product is or contains. Apparently there are different forms of it. The company says that Enviro Ice is “nitrogen based.” However, that doesn’t give information about the form of nitrogen, which would apparently be important for people seeking to use it on plants.

What Else Is In Enviro Ice?

This is the most frequent question. People who are going to use Enviro Ice on their plants want to know about ALL of the ingredients that might be in this product. Unfortunately, as far as I can find, we don’t have this information. There are two key problems that people bring up:

  • Is there anything else in the product that could harm plants, soil, or other living garden things? Presumably, the answer should be no. After all, they advertise clearly that it’s safe to use in your garden. They state specifically on their website, “When thawed and diluted with water, the Enviro Ice coolant mixture is a safe, suitable fertilizer for both indoor and outdoor plants.” Nevertheless, without specific information about the ingredients in the product, we just have to take their word on its safety.
  • Is there anything in the product that I don’t want to consume? In other words, if I’m growing fruits and vegetables that I plan to eat, is Enviro Ice safe for use? Obviously, people have a diverse range of food sensitivities. Therefore, this isn’t a simple question. Either way, we don’t have a clear answer on the ingredients yet.

Perhaps the Ingredients Are …

I asked ChatGPT if it could tell me what is in Enviro Ice. I’m not sure how accurate it’s information was, since I couldn’t find it elsewhere, but it claims: “The gel in Enviro Ice is made from a blend of natural ingredients, including seaweed extract, plant-based amino acids, and other plant-derived nutrients. ”

In a thread over on Houzz, user toxcruasadr said that they couldn’t find the ingredients. However, they suspect that it’s “probably ammonium nitrate solution, which is just nitrogen fertilizer.” Moreover, they say that the gel is probably “polyethylene glycol (PEG) which is actually a food ingredient.” That’s the best guess I was able to find online.

What Happens When You Use Enviro Ice on Plants?

Okay, so those are the questions that people have. Over on Reddit and around the web, I’ve found a few people who responded to these questions. They have tried the product on their plants and documented their experiences. The experience were varied. However, when looked at as a whole, they indicate that with proper dilution, Enviro Ice does work safely to help plants grow.

Enviro Ice Works on Plants When Diluted

User KimAlex17 shared on Reddit two years ago that it works great on their plants. They actually called the customer service number to ask about how to use it. They followed the recommendation to dilute the gel, using one gallon of water per 16 ounces of gel. They say that they have 77 happy plants.

Similarly, in the same thread, user Optimal_Cheetah3755 reports using it on a moth orchid plant. It sprouted new leaves and new roots. They say they use just 1-2 teaspoons of the gel per plant. They dilute that with water, although they didn’t say how much.

In Fact, It Might Be Great For Trees

In the same thread, user ISK_Reynolds tried the product on two young indoor trees. They used three packs diluted with two gallons of water. They put this on one of the trees, but not on the other one. The one that received the diluted Enviro Ice is thriving better than the one that did not.

Failure to Dilute Can Burn Plants and Soil

Several people reported that Enviro Ice didn’t work for them. They said it burned either the plant or the soil or both. However, in all cases, it seems that they either didn’t dilute the soil or didn’t sufficiently dilute it.

Can You Grow Plants in Just EnviroIce?

In the same thread, user AJ_Effendi talks about trying to grow water plants in just the gel. This is atypical. Most people are using it to fertilize the soil around their plants. This user found that some cuttings have survived well in the gel. Their stems are a bit squishy but above the waterline they do grow. That said, some died. It was a mixed experiment.

Additional Links:


Should I Use Enviro Ice On My Plants?

Should I Use Enviro Ice in My Garden?

Every week, I receive food from Hungryroot. It’s a great service through which you can get meal prep or just general groceries. Much of the food needs to stay cold. Therefore, they put cold packs inside the box. They use an option called Enviro Ice. You can dispose of it in many ways, including apparently by using it as plant food. Should I do that?

What Is Enviro Ice?

Here’s what the Enviro Ice package looks like:

enviro ice

When it arrives, it’s frozen. It works just like any other cold pack for food. Apparently, you can simply reuse it if you want to do that. However, I don’t have a lot of use for cold packs. And I get one of these (which is probably about 9″ x 12″ every week. I certainly don’t need that many. So I need to figure out other ways to use them.

Options for Reusing / Recycling Enviro Ice

Here’s what the back of the package says:

enviroice

All of this time, I’ve been doing the latter option. I leave the bag inside my sink until it’s no longer frozen. Then I cut it open and let it drain into the sink. The first time that I tried it, I was worried that it would clog the sink. But true to what the brand advertises, it does no such thing. It’s designed specifically to go down the drain. So I drain it, rinse the bag, and recycle the bag.

However, as I was doing this habitually last week, I re-read the package. I noticed that the first option is actually to use it as plant food. So, I got curious about that. Should I feed Enviro Ice to plants instead of to the drain?

Enviro Ice For Plants

According to their website, Enviro Ice is the only product of its kind. It’s a nitrogen-based product. This means that it’s good for plants. They say that you can pour the gel directly onto the soil. Alternatively, you can dilute it with water. There’s no particular benefit to the latter other than that it flows more easily.

They report that you get all of the benefits of nitrogen for your plants when you use this gel. It adds nutrients and improves growth. It’s food for your plants. They say that you can use it for both indoor and outdoor plants.

What’s My Hesitation?

All signs indicate that I should go ahead and try this in my own gardening efforts. So why am I hesitating at all? The truth is that I trust the product just fine, but I don’t trust my own instincts when it comes to planting. As I’ve confessed to you in the past, I don’t have a natural green thumb. I never really know what my plants want or need. I over-water and under-sun and all of the things that are bad for them.

So, what I’m worried about is that I won’t use Enviro Ice properly. Will I give the plant too much of it and not realize what’s happening until it’s too late? Will it change the balance of other things I give the plant (water, light, etc.)? If so, will it be able to correct that?

The great thing about gardening, though, is that the stakes are low. I already have the product. I can try it and see what happens. I’ll keep you posted.

Have you used Enviro Ice in gardening? What’s your experience been?

Read More:


5 Reasons To Use Fish Amino Acid on Your Plants

reasons to use fish amino acid

There are so many great reasons to use fish amino acid in your garden. Also known as fish fertilizer, this product provides nutrition to plants in ways that are similar to, but arguably potentially better than, other organic garden fertilizers. There are different types of fish fertilizer and different reasons to use fish amino acid in your garden.

What Is Fish Fertilizer?

There are different types of fish fertilizer, which all rely on the healthy ingredients in fish to feed your garden. These types include fish meal, fish emulsion, and hydrolyzed fish fertilizer. They’re each made a little bit differently. Some smell fishier than others, which people may find deters them from using those products. Some you can make yourself. The point of all of them is to maximize your garden’s health and growth in a natural, organic way.

What Is Fish Amino Acid?

Fish Amino Acid is a product that you can purchase or make yourself. Basically, you use a fermenting process to bring out the amino acid in fish scraps. You then use this product to improve the organic, natural growth in your garden.

5 Reasons To Use Fish Amino Acid on Your Plants

There are a lot of different reasons to use fish amino acid in your garden. Here are the top five:

1. It’s An Age-Old Organic Practice

Indigenous Americans often planted fish in their gardens because they knew that this would help grow their plants. Similarly, fish amino acid has historically been used in Korean natural farming practices. This age-old custom takes us back to the roots of gardening and crop-growing, when people relied on affordable, natural, organic materials. Getting away from commercial, chemical fertilizers is one of the most common reasons to use fish amino acid in your garden.

2. Naturally Provides Nutrients to Plants

Fish fertilizer provides many different nutrients, minerals, and vitamins to your plants. These include calcium, iron, nitrogen, phosphorus, and potassium. Help your plants get everything that they need naturally with just a little bit of fish!

3. Plus, It Feeds The Soil

Fish fertilizer feeds your plants. However, it also feeds all of the soil that your plants are growing in. Your entire garden benefits from adding this product to your gardening process. Pennington explains that unlike fast-acting chemical fertilizer, slow-acting fish fertilizer feeds the whole garden in the best possible way. Bacteria, worms, and fungi in the soil all use what they need, processing it before it gets to the roots of the plant so that the plant can get exactly what it uses best. This aerates the soil allowing the roots of the plant also to have the best soil in which to thrive.

4. Put Fish Scraps to Use

Frugal gardening goes hand-in-hand with avoiding waste, right? If you already eat fish in your home, then avoid wasting the parts that you don’t eat by putting them right into your garden. You can also ask your local butcher for fish scraps. Save them from wasting away in a landfill by turning them into fertilizer.

5. Affordable Fertilizer Option

If you use fish that you or the butcher would throw away anyway to DIY your own fish fertilizer then it’s basically going to cost you almost nothing extra at all. Therefore, you save money. You don’t have to buy fertilizer when you can make it on the cheap.

Read More:


4 Cost-Effective Organic Garden Fertilizers


4 Cost-Effective Organic Garden Fertilizers

Regardless of what you’re growing, your plants need nutrients. Without fertilizer, your plants will fail to thrive and grow big and strong. In the case of edibles, a lack of nutrients can limit your crop and lead to poor production. Unfortunately, many fertilizers on the market are expensive. Thankfully there are cost-effective organic fertilizers you can use to boost your garden’s productivity.

A word of caution

Before I jump into a list of cost-effective organic fertilizer suggestions, I want to talk a bit about fertilizing in general. Piling on fertilizer will NOT automatically make your garden more lush and productive. Fertilizing without testing your soil first can lead to a host of problems down the road. With fertilizer, more is not always better.

Always test your soil first to find out whether your garden is lacking nutrients. Read up about plant nutrient needs to ensure you’re applying the right fertilizer.

While organic fertilizer is a lot less harmful to the environment than synthetic fertilizer, too much of it can still pose problems, so be cautious! If you think your plants are hungry for nutrients, double check first. They may be stressed or ailing for a different reason.

Organic fertilizers are an excellent alternative to synthetic ones because they help build soil quality over time and improve the soil’s ability to retain nutrients and water. They’re a lot less concentrated, which helps prevent overfertilization—though, it’s still possible with certain commercial options.

Cost-Effective Organic Fertilizers

Fertilizers can be expensive. Organic options are even more so! So what are the options available for a frugal gardener? Here are a few cost-effective organic fertilizers to choose from:

Worm castings. Set up a worm farm or attract worms using a bucket system and enjoy the fruits of their labor. Castings is a nice way of saying poop, but this excrement is mighty powerful! Worm poop is high in nitrogen and full of beneficial microbes and bacteria.

Coco coir. Coconut husks are an inexpensive, earth-friendly alternative to peat moss. While coir doesn’t contain nutrients, it helps condition the soil and improves water and nutrient retention.  It’s also a great mulch option.

Homemade compost. It’s easy to make your own compost at home! You’ll need a balanced mix of kitchen scraps and other materials like dead leaves and grass clippings to get some rotting action going. Over time, the materials break down into a powerhouse of nutrients for your garden.

Seaweed. Sea kelp fertilizer is pricey, but if you live near a shoreline, you can collect your own smelly seaweed, let it rot for a bit, and make a seaweed fertilizer tea. It’s not ideal for people who are sensitive to pungent smells, but it’s a great totally free source of nutrients!


Why You Should Test Your Soil


Why You Should Test Your Soil

Along with water and sunlight, soil is the lifeblood of a garden. Without healthy, nutrient-filled soil, plants simply won’t thrive.

It’s tempting to believe that spraying your garden with fertilizer will encourage lush growth. But if you’re spraying without testing your soil, you may be in for trouble down the line.

Why should you test your garden soil? There are several important reasons to test your soil.

Too fertilizer is bad

If you fail to get your soil tested, you have no clue about its nutrient makeup. By adding fertilizer without knowing what nutrients are already there, you risk harming plants and the environment. When you add too much fertilizer, you upset the soil’s delicate ecosystem.

If you toss on tons of fertilizer without checking if it’s really necessary, you also risk wasting a lot of money. Fertilizer is expensive! Don’t bother adding any unless it’s absolutely necessary. Getting a soil test might just save you money!

Too little fertilizer is also bad

If your plants miss out on nutrients, that’s also bad news. But how can you help them out unless you know what they need? A soil test can provide you with essential information about which nutrients are lacking in your garden. If you know exactly what to add, you won’t waste precious dollars buying the wrong kind of fertilizer.

Soil tests are informative

They not only explain the nutrient makeup of your soil, but they also tell you other valuable information. Many extension offices that provide soil testing services provide gardeners with important information regarding the composition of their soil, including the amount of organic matter present. If you’re short on organic matter, you can add more to improve the condition of your soil, which can increase its drainage and water retention properties.

A few soil testing tips

Soil testing is a bit more involved than just taking a vial of dirt and sending it off to a lab. Doing it right ensures you will receive accurate results. The more accurate the results, the less likely you are to waste money and time!

  • Don’t take any soil from areas that have recently been fertilized
  • Take different soils samples from different spots in your garden
  • Label each soil sample appropriately
  • Let the soil samples air dry before mailing them

Here’s a handy video on how to take soil samples for mail-in testing:

https://www.youtube.com/watch?v=3_U9Z3fy0Ig


How to Get Free Worms for Your Garden

Free Worms

Composting is an economical way to recycle household waste like kitchen scraps and yard refuse (dead leaves, grass clippings, etc.). It requires minimal effort, and in return, you get free fertilizer for your garden! 

Using your homemade compost in place of commercial fertilizers is not only cheap, but it’s also better for your garden. Compost delivers nutrients to the soil, conditions it, and increases the overall health of your garden environment. Healthy soil makes for healthy plants! 

Traditional composting is a worthwhile endeavor, but if you’re looking for an extremely efficient and effective strategy for turning your kitchen and garden waste into black gold, why not try your hand at vermicomposting?

With the help of hungry worms, you can convert organic material into a nutrient-filled medium for your garden. 

How To Get Free Garden Worms

If you’re starting your compost pile, worms won’t immediately be present. It’s possible to purchase red wigglers to add to your bin, but if you’re on a tight budget or simply want to save some money, try the following to attract free worms to your compost area:

  • Feed them. Continually add kitchen scraps to your compost pile or bin. As they munch and crunch on the kitchen waste, they leave behind castings (worm poop), which is excellent for your garden.
  • Sprinkle cornmeal. Whether you want to attract worms to your garden or compost, use cornmeal to bring forth the worms. 
  • Add ground-up eggshells. This is a bit of a controversial suggestion, but some swear by it. Shells help worms digest their food. The drawback is that eggshells don’t break down like other types of kitchen waste. Always grind them up, don’t add them in chunks. 

If you’re trying to attract worms to add to your elevated compost bin and want to transfer caught worms, it’s possible to fashion a type of worm trap using a bucket.

Drill some holes into the bottom of a bucket and pop it into a shallow hole you’ve dug in the ground. Fill the bucket with food for hungry worms (fruit and vegetable scraps are a good choice). Add a bit of soil and cover with some type of lid. The lid keeps other critters from getting into the trap. Continue to add food scraps, and over time, you’ll find yourself with a sizeable worm population that can go straight into your compost pile.

What worms don’t like

You can add all the worms you want to your garden or compost, but they won’t stick around very long in an inhospitable environment. Here’s what to avoid when attempting to attract worms to your garden and compost bin:

  • Keep the chemical fertilizers and pesticides to a minimum or banish them altogether. 
  • Try to minimize how often you till the soil to prevent disturbing these little creatures.
  • Use organic mulches in place of synthetic options.
  • Avoid overwatering. Whether you’re moistening your compost pile or watering your thirsty plants, be careful not to flood out resident worms. Underwatering is also a no-no.

An Important Note

The worm you catch this way may not all be red wigglers, however, but it’s doubtful that you’ll introduce any harmful bugs into your compost this way. 

Some things that attract worms also attract pests (rats, flies, etc.). If adding worm bait to your compost or DIY trap, be sure to properly secure the lid to prevent other critters from finding their way inside. 

Note that in most cases, worms will find their way into your garden and compost bin if the conditions are right. If you see worms hanging around, it’s a good sign! 

Want a visual guide to building a DIY worm farm? Watch this video that demonstrates how to create your own worm trap and catch worms for free without having to spend a dime.