Cheap and Economical Humidity Dome Alternatives

Cheap and Economical Humidity Dome Alternatives

If you grow your plants from seeds then you probably know what a humidity dome is. (If not, don’t worry, we’ll go over it briefly below.) Just like with all of your other gardening supplies, you can buy humidity domes from a variety of different sources. However, you can also DIY them. Here are some cheap and economical humidity dome alternatives.

What Is a Humidity Dome?

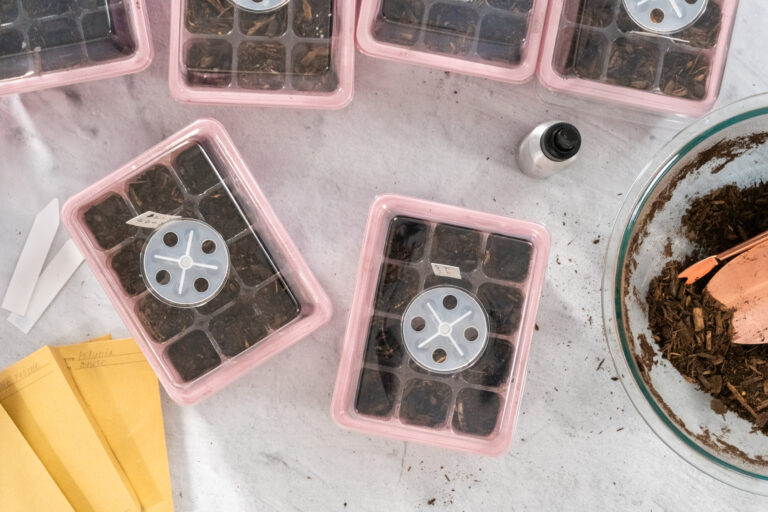
A humidity dome sounds like really fancy device, doesn’t it? Bootstrap Farmer says that they’re an important part of your seed starting tool kit. But what are they? Basically, they’re just plastic lids for your seed trays. Very important, very helpful, but not necessarily fancy at all.

Why Use a Humidity Dome For Seed Starting?

Humidity domes help retain moisture in the soil. Instead of evaporating into the air, the plastic lid catches the moisture and keeps it there with the seeds. Additionally, the lid helps maintain an even temperature for the seeds in the tray. Benefits of using a humidity dome include:

  • Less time spent watering
  • Less time spent checking and maintaining temperature
  • Improved germination rates
  • Faster germination
  • Protection for delicate, expensive, favorite seeds

Are they necessary? Some say yes, some say no. But as long as you can find cheap and economical humidity dome alternatives then there’s really no harm in at least seeing if they improve your seed growing process.

Cheap and Economical Humidity Dome Alternatives

So, you can obviously shop around and purchase a variety of humidity domes for your gardening. And you can purchase seed trays that come with their own domes. But you can also come up with your own cheap and economical humidity dome alternatives. For example, alternatives offered in a National Gardening Association forum and over on the Green Upside website include:

Living Lettuce Containers

Obviously, these are already designed to grow plants – you buy them with lettuce growing inside. When you’re done with the lettuce, use the container. It’s roomy, about the same width as height, and it’s a great option for starting your seeds in at home.

Plastic Wrap

Green Upside explains that you can use plastic wrap around an egg carton seed starting tray or almost any other container to create the humidity dome.

Plastic Bag

Alternatively, you can use a plastic bag the same way. Specifically, Green Upside notes that you can use a wet paper towel inside of a plastic bag to start your seeds … no other containers needed!

Ready-To-Eat Chicken Containers

You know those chickens that you buy whole, ready to eat, from Costco or the supermarket? They usually come on a plastic tray with a plastic dome over it. If you’re a gardener, you might look at that container and think, “that would be perfect for my garden.” If you have plants that need room for leaves to grow, these can be great humidity dome alternatives.

Plastic Bottle

Cut the bottom out of a large plastic bottle, such as a gallon milk bottle. Use that as your humidity dome over your seed tray.

Plastic Containers for Berries

These are an interesting choice. They’re shallow, so you have to choose what you’re growing in there carefully. Moreover, they’re vented with air holes. Sometimes this is a good thing and sometimes it defeats the purpose of your humidity dome. Sometimes too much humidity leads to mold so the venting is good. It depends on varied factors. So, consider this as a potential option but maybe not the best one.

Old Food Containers

Do you have a bunch of food containers that you keep to store your leftovers? Do you have too many of them? Green Upside suggests using any food container with a lid to create your seed tray with its own humidity dome.

In other words, look around for plastic that you can recycle/upcycle to create a humidity home!

Read More:


8 Uses of Baking Soda in Gardening

8 Uses of Baking Soda in Gardening

Baking soda is one of the most amazing, affordable products available to us. Hopefully, you’re already using baking soda for cleaning throughout your home. If not, then you’re spending more money than you should on household cleaners. And today let’s talk about how baking soda’s benefits don’t stop there. There are so many uses of baking soda in gardening. Here are eight big ones:

1. Baking Soda for Soil Testing

Everything that you grow needs to grow in suitable soil. The soil’s pH level is one of the most critical factors. Therefore, you should do soil testing before you plant. Baking soda provides an easy, cheap way to do that. Here’s what to do:

  • Take a tablespoon of soil and place it in a container.
  • Add a little bit of distilled water until the soil is mud.
  • Add a little bit of baking soda.
  • Watch.
  • Does the soil fizz? If so, then your soil has an acidic pH level.

Bonus tip: If the soil doesn’t fizz with baking soda, then you should do a second test. Take a fresh tablespoon of the soil. Add distilled vinegar to it. If it fizzes now, then your soil has an alkaline pH level. However, if neither the baking soda nor the vinegar cause fizzing, then you have soil with neutral pH.

2. Boost Your Plant Fertilization

Balcony Garden Web has several great suggestions for using baking soda in gardening. For example, they suggest adding baking soda to fertilize slow-growing, dull-appearing plants. They say that you should mix one teaspoon of baking soda and Epsom set with 1/2 teaspoon ammonia in one gall of water. Then add approximately one quart of that solution to each plant you want to fertilize. You should see them grow faster and brighter in no time.

3. Make Your Tomatoes Taste Better

This is one of my favorite tips from Balcony Garden Web. They explain that if you simply sprinkle a little bit of baking soda around the base of your tomato plants, you’ll be able to grow sweeter tomatoes. How is this possible? The soil absorbs the baking soda, lowering the natural acidity levels of the plant itself. Baking soda costs so little and yet it can work so much magic!

4. Get Rid of Garden Pests

It’s always so difficult to decide how to handle garden pests like worms and slugs. Some of them don’t do that much damage and you might decide to leave them alone. Others, however, can wreak havoc in your garden. If you don’t want to lose your plants, then you have to find some way to deal with them.

Baking soda can provide a solution. It’s eco-friendly and generally kind to your plants. However, it works as a pesticide. You can put it directly on slugs and gnats to kill them. Alternatively, you can make a solution that you spray on your plants to keep pests away.

5. Uses of Baking Soda on Plant Leaves

Did you know that if you have indoor household plants, you’re supposed to clean them? That’s right, household dust can settle on them and ruin them. A baking soda solution is a simple way to clean those leaves.

Even outdoors, though, you might find that baking soda helps the leaves of your plants. For example, a baking soda solution can help prevent fungus growth on plant leaves.

6. Add Baking Soda to Cut Flowers

Do you grow flowers in your backyard garden? If so, then perhaps you sometimes cut them and put them in a vase for yourself or to gift to others. Make those flowers last as long as possible by adding just a little bit of baking soda to the water inside that vase.

7. Deodorize Compost

Hopefully, you have compost for your garden. It’s such a waste if you don’t. However, the smell of a compost pile might have deterred you. If that’s the case, then baking soda can come to the rescue. Just sprinkle a little bit on top of the compost regularly. The smell will go away. You can then reap all the benefits of composting in your garden.

8. Cleaning Around the Garden

The plants are the most important part of your garden. However, they’re not the only part. You have gardening tools, statues, chairs, etc. Make sure that you keep all of these things clean for the best garden experience. Baking soda makes a great natural cleaner for all of these.

Read More: