Seed Starting on a Budget Series: Avoid These 5 Mistakes

You’re bound to mess up at some point or another in your gardening life. That’s fine. I’ve made plenty of errors in the ten or so years that I’ve been a gardener. Much that I’ve learned is the result of messing up. I love that I’m able to experiment in my garden, and if I were afraid to bungle things, I’d be reluctant to try new techniques and methods.

That doesn’t mean, though, that you should always make mistakes. With a little bit of knowledge in your pocket, there are some messes you can altogether avoid. Don’t make these five mistakes.

5 Mistakes to Avoid When Starting Seeds

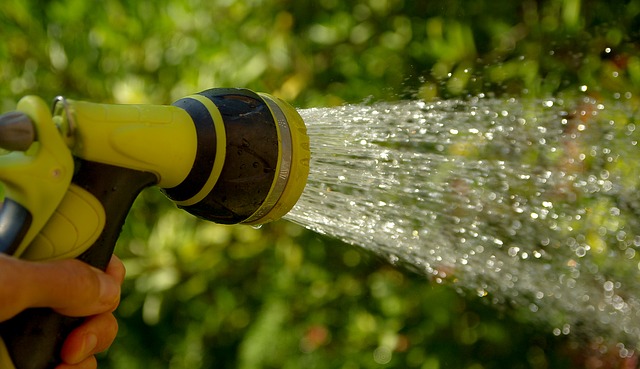
  • Overwatering: I think watering is one of the most critical tasks that gardeners seem to screw up so often. We’re terrible at hydrating ourselves, so it’s not that surprising that we have trouble figuring out when and how much to water our plants. We forget that different plants have different needs, too. Seedlings require moisture but add too much water, and you’ll encourage mold growth and potentially end up drowning your baby plants. Stick your finger in the soil to feel whether it’s too dry.
  • Leaving seedlings in small containers: Potting up seedlings is an annoying task, but waiting to transfer seedlings to larger containers may spell disaster. Leaving vigorous plants in pots that are too small will render them root bound. You’ll stress your plants and stifle their growth. With the right timing, some plants don’t need to be transplanted while they’re still indoors. My lettuce seedlings, for instance, will be ready to go out before their too big for their original containers. Tomatoes, eggplants, and peppers, however, won’t be happy relegated to mini pots once they’ve grown several inches tall.
  • Forgetting to harden off seedlings: I think every gardener has made this mistake, and it’s a costly one. You start your seedlings indoors, you do everything right, and then it’s time to set them outside. You transplant your healthy starts on a gorgeous, sunny day and admire your hard work. The next morning, you head to your garden to check on your plants, and you find that nearly all of them have toppled over, dead or almost dead. What happened? Those plants weren’t adequately hardened off. Plants need to adjust to the change in conditions before being thrown into the wild. I’ll be covering the process of hardening off in detail in the coming weeks, so check back for more info soon! 
  • Using too many seeds: This is especially important for frugal gardeners. Stop tossing all your seeds into plant trays! There’s no reason to waste an entire packet to start seedlings. All that’s needed is for one single seed to sprout and flourish. Of course, not all seeds sprout, but using a whole packet is wasteful and unnecessary. Instead, plant two or three seeds per cell or pot. Using fewer seeds means you’ll have leftovers for next season and thinning will be a much easier process.
  • Ignoring the forecast: Don’t become obsessed with your last frost date. It’s just a guideline. And stop comparing your gardening progress to others. That gardener on Instagram who’s just transplanted her tomatoes? They’re in a completely different zone! Instead of waiting impatiently for the last frost date to come and go, keep a close eye on the weather forecast. Look carefully at the predicted highs and lows for the daytime and overnight. Becoming an expert in weather watching is an incredibly useful skill for the eager gardener. It’s not enough to look outside and see whether it’s sunny or raining. Knowing what’s coming allows you to be prepared. If a sudden frost arrives after the last frost day, you can take measures to protect your tender transplants.

These aren’t, by any means, the only mistakes you don’t want to make as a gardener. But I think they’re important and relatively easy to avoid.

I sincerely hope everyone is enjoying the warmer days as springtime advances. I’ve already planted a variety of greens and look forward to beginning the transplanting process for my cabbage starts.

Don’t forget to leave a comment below to let me know what you’d like to see me write about. I’m happy to answer questions about anything! Even if it’s something, I don’t know anything about. I always love to research and learn more about the plant world.

Happy Monday and happy gardening!


Seed Starting Series: Air Circulation

Frugal gardeners can’t afford to leave a lot to chance during the seed starting process. Failed starts means wasted time, effort, and money. While failure happens more often than I’d like sometimes, I always find a way to learn from my mistakes. Otherwise, what’s the point? Sometimes, it’s out of our hands. But, if my seedlings don’t thrive and I have the power to change the situation for next time, I’ll do my best to make necessary changes.

This past weekend, I had to toss out nearly a full tray of tomato seedlings because they were not growing well at all. I can’t be one-hundred percent certain but I think the issue may have been the seeds themselves since the rest of the tray was filled with tomatillos and those were looking lovely.

I’ve also noticed a lot more surface mold than usual on the seed starting mix and wondered if that might be the issue. Again, I don’t think so, since the tomatillos are thriving and my eggplants are looking healthy, too. Still, it made me realize that I needed to rectify the mold growth issue.

Signs of mold on your soil isn’t always a big deal. Often, excess mold growth is a sign of overwatering, but the fungus or mold is unlikely to cause any harm. In my case, I think the issue is poor air circulation and being too slow to remove the clear plastic domes on my trays. Always remove the domes at the first sign of germination. This requires regular inspections of your trays, though, which is tough if you’re having a busy week. I suggest making it a habit to check on your trays at least once a day.

I’m a somewhat laissez-faire gardener, but I wanted to find a way to encourage better air circulation in my growing space and prevent excess humidity, without needing to shell out lots of money. So yesterday, I did two things:

Turned up the heat: The basement is colder than other parts of my home. That’s true for most basement spaces. A basement is often a popular place for seed starting since it’s out of the way and not typically as highly trafficked as other parts of a home. The problem is that basements are often cooler and more humid than upstairs spaces. Thankfully, we have a baseboard heater close to the grow shelves. It’s not usually on, but I decided to crank up the heat. Humidity isn’t inherently bad for your seedlings. In fact, most plants enjoy humidity, but excess levels may lead to mold and fungal growth.

Plugged in a cheap oscillating fan: I’ve actually been meaning to do this for a while now, but the fan was hidden away in our crawl space, and I couldn’t be bothered to go hunting for it. I knew I would be in for a situation where something would definitely fall on my head. So I asked my husband to do it. He managed to get it out in a snap, and it’s been blowing air around my grow space for a few days now.

Why is a fan useful?

There are a few reasons to consider adding a fan to your indoor grow space. Even if you’re just starting some seedlings along a windowsill. Oscillating fans are also inexpensive, so frugal gardeners don’t have to worry about making a huge dent in their budget. Once the seed starting season is over, you can use the fan to circulate air elsewhere in your house and to keep you cool on very hot days. For your seedlings, adding a fan can:

  • Reduce fungal growth
  • Strengthen your seedlings
  • Keeps leaves dry
  • Helps prevent disease

Tip: Set your fan to the lowest setting and not too close to seedlings. Too strong an air current may stress your seedlings. Give them a break at night and save power, by shutting off the fan before you head to bed.


Troubleshooting the Seed Starting Process: Using Old Seeds

I’m typing this up on a gloomy day here in Zone 5, Canada. In the past week, I’ve experienced an impromptu snowstorm, a city-wide power outage, and then a bright sunny Saturday where the temps went up to 16 degrees Celcius. It’s been a wacky week. I had been excited to sow quick-growing cool-season crops outdoors on Sunday, but the weather decided it had other plans. It’s been rainy for a whole two days, and I’m not sure when it’s going to stop. I had to throw away my cracked and broken 10-year-old rainboots last year. I think it’s time to invest in another pair!

I received another great question that I’d like to tackle this week.

Can I use last years seeds?  I bought a bunch of seeds at my hardware store for half off.  Will there be any problems germinating? 

The short and sweet answer is yes! You can’t most definitely use last year’s seeds. Most seed packets feature a sell-by date that should give you an indication of how fresh (or not fresh) they are. The key to keeping seeds fresh and viable for years down the road is proper storage. An airtight container is the best home for leftover or saved seeds.

I used to keep my seeds in mini petri dishes I purchased for cheap on eBay, but they were hard to open, and I often lost track of their original seed packets. I then started storing packets in an airtight container, but I didn’t like that there was no way to keep different varieties of seed separate. Then, I spotted a genius storage idea on a fellow gardener’s Instagram stories. Deanna from Homestead and Chill had the brilliant idea of using a craft storage case to categorize and organize her seed packets. It keeps everything tidy, and I no longer have to worry about losing seed packets.

You may have some trouble germinating old seeds if they haven’t been stored correctly and some seeds stay fresher longer than others. If you’re not sure if any of the seeds are viable? Germinate them before planting, so you can be sure you’re not planting duds. Place seeds on a damp paper towel and place inside a ziplock bag. Depending on the seeds in question, in a few days or so, you’ll have an idea as to whether the seeds are still good to go.

I did this recently with a seed packet full of pepper seeds. I had no clue how old the packet was and didn’t want to waste tray space trying to germinate pepper seeds that would never grow, so I laid them out on a slightly wet paper towel to see what came up. Very few ended up germinating, likely from a combo of being very old and poor storage.

What are your favorite ways to store seeds? Have you ever tried to pre-germinate seeds and did it help with your seed starting efforts? 


Seed Starting on a Budget Series: Watering your Seedlings

Plants need water to survive. There’s no doubt about it. Moisture is a requirement throughout a plant’s lifecycle. Some are better at handling drought conditions than others, but seedlings are especially sensitive to significant fluctuations in moisture levels. Too much variation will stress your baby plants.

Proper watering will produce sturdy seedlings and prevent loss. If you don’t water enough, drown your seedlings or wait too long between waterings, you may just watch all your effort go down the drain.

Tips for keeping your thirsty seedlings happy

Everyone has a different way of approaching the seed starting process, but here are some tried and true tips for watering your seedlings.

  • Water from below. My seed starting setup includes sturdy, deep trays where I set flats or coco coir pellets. Once seedlings have popped through the soil, I shallow-fill the tray with water. Watering from below helps prevent disease development, and I’ve found it encourages strong root growth. I’m also less likely to drown the tiny plants this way.
  • Watch the temperature. Don’t water with scalding hot or ice cold water as it can stress your seedlings. Opt for lukewarm or room temp water for watering.
  • Soak the soil. Before planting seeds in soil mix, make sure the soil is wet. Watering once you’ve popped in seeds is tougher and may cause small seeds to migrate to other cells in a flat.

Check on seedlings often

Keep to a schedule and make it part of your routine to take a peek at your seedlings at least once a day. You’ll notice right away if there’s anything wrong and you’re more likely to remember to water consistently.

Thankfully, proper watering doesn’t require any additional spending. Consistency and diligence will get your plants where they need to be!


Seed Starting on a Budget Series: Choosing What to Grow

Browsing a seed catalog or shopping at a local plant nursery can be overwhelming. Especially for a new gardener! I still have a tough time making selections. With so many choices, it’s hard not to go overboard. When I’m purchasing seeds, I try to consider my space and needs so I can maximize returns. I also often fill up my basket and walk away from my computer before finalizing my order. It’s easy to get caught up in the moment and overestimate both my garden’s capacity and the amount of room I have for seed starting. Have you found yourself stressing about what to plant? Today I want to try to make the planning process easier for you. 

Make a plan

Before buying your seeds or starter plants. Make a rough garden plan. You’ll have an estimate of the amount of space available for planting. I use the Square Foot Gardening method, so I always have an idea of how many square feet are available. I sketch out my beds, divide them into square feet, and decided what to plant in each square. With proper planning, I know what I need to start indoors. For example this year, I’m dedicating one square foot to leeks. Using the SFG method, leeks should be planted 9 per square foot, so I’ve got at least nine leek seedlings growing. I also always start a few extra, just in case. 

If I hadn’t done any planning, I might have started too many seedlings and found myself scrambling to make room for leftover plants. Luckily, this year I’m donating any extras to our local community garden.

If you’re working within a limited space, like a balcony, count up the number of pots you have or plan to use before you start growing or purchasing seedlings. 

How do I narrow down my planting choices? 

Sunlight

Now that you know how much space you’re working with, consider the amount of sunlight that shines upon your growing space. How many hours of sunlight does your garden receive? 6-8 hours is ideal. Less than 6 hours of sun typically means the area is partially shaded. You can still grow plants in low sunlight, but growth will be slower, and not all plants will thrive without full sun (e.g., tomatoes). 

Working with a super sunny area? 

In the summer, you may want to use shade cloth to protect greens like lettuce because heat will cause certain plants to bolt and go to seed. In the very hot sun, greens may also experience leaf burn. Mulching to conserve moisture is crucial. You may also plant heat-sensitive crops close to larger, leafy vegetables for shade. In full sun, you’ll have success with eggplant, tomatoes, peppers, and squash.

Shade tolerant veggies

Note that the use of the word tolerant. Temper your expectations when working in a shaded or partially shaded area. Don’t expect to grow big juicy tomatoes if your garden gets less than 4 hours of sunlight. I have experience gardening in a well-shaded area. The biggest issue is that growth is extremely slow. The advantage? In the thick of the hot summer, it’s easier to grow lettuce, spinach, and Asian greens. Here are a few examples of vegetables you can grow in partial shade:

  • Carrots
  • Radishes
  • Chard
  • Parsley
  • Lettuce
  • Kale 
  • Mustards
  • Mizuna
  • Pac Choi
  • Broccoli

Your dinner plate

I’m a big proponent of choosing vegetables and plants that will make their way onto your dinner plate. Don’t grow stuff you don’t like to eat unless you plan to trade it with other gardeners. I don’t love cucumbers. I find them boring, and plants always produce way more than I can eat, so I don’t typically grow them. What’s the point? I’d rather use the space to grow something I love to eat! My favorite veggies include bok choi, kale, eggplant, and carrots. I eat these veggies the most, so I make sure I have plenty of growing space for them.  

Which plants are the easiest to grow and which are the toughest?

I hear this question a lot, and I’d say it depends. A lot of people find it easy to grow tomatoes. I find they’re a lot of work and often produce way more than I can eat in a season. It’s possible to preserve them, but that involves extra labor. 

Radishes grow super quickly, and some varieties are ready to harvest in less than a month. But your success with radishes may depend on your soil composition.

Lettuce is easy to grow, but in climates with sweltering summers can bolt quickly and turn bitter before you even have a chance to harvest the leaves.

Spinach is another low-maintenance quick growing green, but in my climate, if I don’t sow seeds early, plants go to seed before I even realize they’re ready to eat. 

I’ve had great luck with eggplants, but it’s true that they’re finicky. 

Difficulty level depends on many factors, and you may find that the easiest vegetables to grow are the ones you enjoy eating because the harvest is so rewarding. Plan your garden according to your palette, and it’ll be that much more fun to nurture the plants within. 


Seed Starting on a Budget Series: Germination

Germination is the process by which a plant sprouts from its seed. Because it mostly happens underground, it’s such a mysterious and almost magical occurrence. One day you’re popping seeds into moist soil mix and the next you’ve got bright green seedlings popping up. It’s a simple yet incredible feat of Mother Nature that such a miniature-sized organism is capable of making its way above ground to seek sunlight. Seed starting is all about this process, so I wanted to talk a bit about it, requirements for germination, and germination times.

Germination Requirements

Germination requirements differ depending on the plant in question, but all plants require the following: 

  • Moisture 
  • Suitable temperature range
  • Oxygen availability

Contrary to popular belief, most seeds don’t need light to sprout. But it’s handy to have lights on and ready since your seedlings will require light as soon as they emerge from the soil.

Germination Times

Not all seeds sprout at the same rate. While environmental conditions may alter germination time (e.g., if the soil is too cold, tomato seeds may take longer to germinate) some seeds naturally take a lot longer to pop up out of the ground. Knowing how long a seed should take to germinate is an integral part of the seed starting process. If quick-to-sprout seeds like mizuna and lettuce are taking longer than seven days, you can be sure there’s a problem with your setup or your seeds. Here are a few examples of germination times for favorite garden vegetables:

  • Tomatoes: About a week
  • Eggplant: About a week 
  • Beans: About a week
  • Kale: 4-5 days
  • Chard: 4-5 days
  • Lettuce: 3 days
  • Parsnip: Up to two weeks 

*note these times are based on optimal conditions, slightly colder or warmer soil may delay germination

Having Problems?

If you’ve waited patiently and seedlings aren’t showing up, you may have a bad batch of seeds on your hands. You may also not be meeting the optimal conditions for germination. 

Different varieties of the same plant may germinate at different rates. As always, I suggest taking notes for next year. Knowledge is power, after all! 


Seed Starting on a Budget Series: The Importance of Biding Your Time

My first serious foray into indoor seed starting began with a bang. My husband helped me set up a makeshift grow shelf, and I purchased soil mix, trays, and pots. I was so ready to get started that I assumed it would be better to get things going sooner rather than later.

I quickly realized, that when starting seeds, getting things done faster isn’t necessarily better especially if you’re on a budget!

Problems with Starting Seeds Too Early

It seems entirely logical to start plants earlier. They’ll be bigger by the time they get planted out, and you’ll harvest vegetables sooner. If you don’t have money to spare, however, early indoor sowing can leave you scrambling. Here are some ways starting early may be a detriment for the frugal gardener.

  • Higher supply cost. You’ll likely need to repot plants into bigger containers to prevent them from becoming root bound. This will involve purchasing larger pots and more soil mix.
  • Bigger time investment. The earlier you start, the more time you’ll spend babysitting your plants.
  • More space required. Bigger pots and plants mean that you’ll need to carve out more space for your seed starting activities and that can translate to extra money spent. You may need to purchase more lights for a second shelf, for instance.
  • Pressure and potential loss of seedlings. As your plants get bigger, you may feel pressure to transplant too early, especially if you simply don’t have the budget to purchase additional supplies. This may lead to loss of seedlings if they are transplanted out before the last frost date or without proper hardening off.

The Right Timing

I addressed this in a previous post, but I’ll repeat it. Proper timing is key. Don’t overestimate the time you’ll need. Instead, I recommend that frugal gardeners under-estimate. For instance, the typical recommendation for starting tomato seedlings is 6-8 weeks before the last frost date. Go with the 6-week figure to be safe and take notes on timing, so next year you can master your schedule.

Exceptions

Of course, there are exceptions to the rule. If you have plenty of space, a bigger budget, and patience, starting slightly earlier isn’t a big deal. And some plants, like leeks and onions, can be started early without too much trouble. They grow slowly and aren’t susceptible to becoming root bound. You may also want to begin cool-season veggies such as spinach and mizuna early so you can transplant them outdoors as soon as the soil warms in the spring to maximize their exposure to cooler temperatures.

Overall, the lesson I’m trying to impart is that there’s no need to rush!


Seed Starting on a Budget Series: The Importance of Labeling

It’s almost time for me to start my very first seedlings of the season. I’ve been busy gathering supplies, cleaning out my grow room, and sanitizing trays that I plan to re-use. I’ve been organizing my seed packets, and I’m thoroughly excited to try a few new varieties this year. I’m also shifting my start dates a bit later because I always find myself stuck with seedlings outgrowing their pots, despite my best efforts to make conservative estimates based on the last frost date in my region.

The weather is so unpredictable, so this year I’m delaying my foray into seed starting. It’s hard to resist. Those in warmer regions are already sharing photos of cute little transplants on social media. I know, though, that the wait will be a smart move. 

My System

In addition to getting pots and trays ready, I’ve also done some thinking about how I’ll keep track of my seedlings this year. Because I’m growing starts just for myself, I tend to have multiple varieties and sometimes different vegetables in the same tray.

If I didn’t label starts, I’d be mighty confused. Over the years, I’ve tried multiple labeling strategies, each with pros and cons. While I can definitely tell which vegetable is growing even at the seedling stage, I like to know a bit more information than just the veg type. 

For now, I’ve settled on a system that combines plain plastic labels and a Google spreadsheet. I use a thin sharpie to write down the vegetable and variety (e.g., Old German Tomato).

Then, in a digital spreadsheet, I mark the date the seedlings were started and any other notable information including anything meaningful from the seed packet (e.g., date to maturity, whether the variety is determinate or indeterminate, etc.). If I start two sets of ‘Old German Tomato’ at different times, I simply label the groups ‘A’ or ‘B’ to differentiate them. 

Why is Labeling Important?

Without labels for your starts, you’ll quickly lose track of what’s growing where. You’ll second guess yourself, too. Why are these seeds not germinating yet? Has it been a week? There’s no need to guess at this information if you have it available at your fingertips. My system also involves keeping notes, which allows me to look back at my seed starting dates and practices and see where I might improve or make changes.

Other Labeling Options

My system won’t work for everyone, and I think it’s important for gardeners to develop their own. I tried a lot of different things before I found what worked for me. 

  • Masking tape – Write on bits of masking tape and affix the pieces to trays or pots. Masking tape is cheap but doesn’t adhere to all types of materials. Ink, if wet, will bleed and leave information unreadable. 
  • Label maker – Pricier alternative, but if you already have one lying around the house, why not use it to label seedlings?
  • Paper – When I first started, my operation was very unsophisticated, but even then I knew the importance of keeping track. I tore up pieces of paper and arranged them near my windowsill growing op. It wasn’t an ideal system, but it worked in a pinch.
  • Color / Shape coding – Use different colored or different types of containers to organize your seedlings. 

Don’t forget to re-use

If you use plastic or wooden markers, don’t throw them away. They’re incredibly easy to reuse. Write on the other side next year or affix a piece of tape to cover up last year’s markings. Or use the same label if you’re re-planting the same seedling varieties. 

And, don’t forget that your seedling labels are perfectly usable for outdoor organization purposes, too! 


Seed Starting on a Budget Series: Indoors vs. Outdoors

I recently polled my social media followers to find out what kinds of questions they had about seed starting and a common source of confusion is figuring out which seeds need to be started indoors. You don’t need to dig out all your seeds and start everything indoors before the last frost date.

Why Not Start Them All?

The biggest reason is that it’s just not necessary. We start some seeds indoors because they require a long growing season. Eggplants, for instance, need plenty of time exposed to summer heat to grow, mature, and bear fruit. In many climates, it’s just not possible to direct sow seeds after the last frost date for these types of plants. They wouldn’t have enough time to mature in ideal conditions.

Some seeds can be direct sown even when the weather is cool. They actually prefer the cooler soil. So you don’t need to bother to start them indoors. The exception being if you want to succession sow your plants. You can start seeds indoors to enjoy a steady supply of seedlings.

Other plants don’t like to be transplanted. Often these are plants with shallow root systems. Transplanting stresses the plant and may leave you with dead seedlings.

Examples

Here are a few examples for each case mentioned above.

Heat-loving / Long growing season

  • Eggplants
  • Tomatoes
  • Peppers
  • Onions
  • Leeks

Easy to direct sow

  • Radishes
  • Asian greens (mustard, Pac Choi, mizuna, etc.)
  • Lettuce
  • Kale

Don’t like to be transplanted

  • Carrots
  • Beans
  • Peas
  • Beets

Tip for Direct Sowing

For plants like radishes and greens that mature reasonably quickly, direct sowing is easy. Pop seeds right into the ground, spacing things out accordingly, and it won’t be long before you notice seedlings sprouting from the earth.

A few problems may arise, however: birds and small mammals might munch on your seeds, and there may be seeds that don’t sprout at all (they may be old, or you may have received a bad batch).

An easy solution is to pre-germinate seeds. Sprout seeds on a damp paper towel, and you’ll quickly be able to pick out viable sprouts to plant in your garden. There’s no need to go back a week later to re-sow in spots where seeds didn’t sprout. You still may have to protect your garden from birds or other hungry creatures, but at least you’ll know that animals are the culprits!

Are you still confused? Need more clarification? Have another burning seed starting question? Leave a comment below!


Seed Starting on a Budget Series: Get Your Timing Right

When January rolls around, the seed catalogs start to arrive in the mailbox. Then, as soon as February hits, I get a constant flood of seed starting photos popping up on my Instagram feed. It gets me excited for the gardening year ahead, but I’ve also learned to slow my roll. Just because someone else is starting seeds doesn’t mean it’s time for me to do so. The Internet is full of excellent seed starting calendars for different zones and regions making it easy to know when it’s time to get going. 

Most of the calendars are based on last frost dates. It’s important to note that the dates are ballpark figures. There have been years when I’ve followed a chart I found online and ended up having to transplant my tomatoes, peppers, and eggplants into larger pots because it was still way too cold to set them out into the garden, but they were beginning to show signs of stress from the small-sized starting containers. Timing is everything, but it takes a bit of practice to get into a groove.

Tricks of the Trade

Here are a few tips to help you get the timing right.

Use a notebook. The best way to figure out optimal timing is to take copious notes during the seed starting and transplanting process. Next year, you’ll have data to help you make decisions. Last year, for example, I started my tomatoes too early, without my notes, I’d probably forget what I did, and I’d risk starting my seeds too soon all over again.

Follow other gardeners. Follow them on Instagram or read blogs to get a sense of what other gardeners do in terms of timing. Be sure to follow folks who garden in the same zone as you, but always remember that there are fluctuations and minor differences in temperature even in the same zone depending on where a person lives, where their garden is situated, etc.

Read seed packets. Don’t ignore the information on all those seed packets. Sometimes you’ll find useful info that will help you get your timing right. 

Mistakes to Avoid

I’ve made a lot of errors during the seed starting process, but thankfully they’ve helped me learn and adjust. 

Being too eager. Don’t start seeds too early. You’ll be left with plants that outgrow their pots, and you’ll be tempted to transplant them way too early. 

Sticking to frost dates. Last and first frost dates are not set in stone. They’re simply guidelines. Just because the LFD in your area is usually May 15th, doesn’t mean you should set out transplants no matter what. Check the weather forecast and use your judgment. 

Not hardening off seedlings. Your little baby seedlings are coddled indoors and require a bit of help getting used to the outdoor environment. It’s important to expose them little by little to the outdoors. This ties into being too eager, too. Don’t rush to get your plants outside. Be patient and acclimate them accordingly.

Resources to Help You Get Your Timing Right