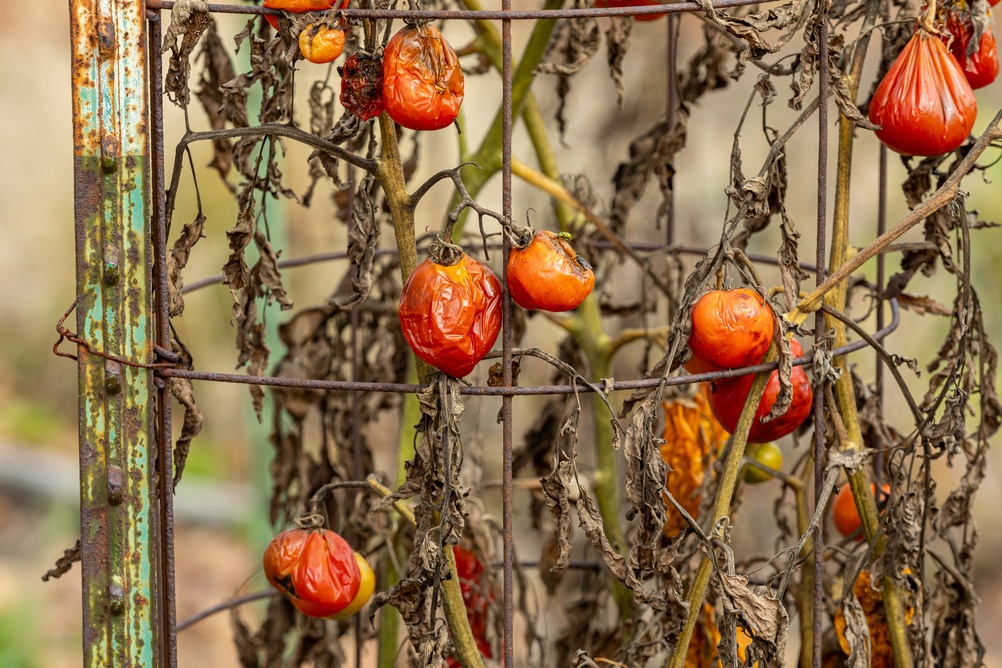
That last tomato may be off the vine, but your tomato season isn’t quite finished. What you do with those tired, brown plants now can affect disease pressure, garden cleanup, and even where you should plant next year’s crop. Simply leaving old vines sprawled across the bed until spring may allow infected plant debris to remain exactly where you don’t want it. A few smart steps for tomato plant cleanup can also turn healthy material into compost and save reusable cages and stakes for another season. Before you yank everything out and walk away, take a closer look at what you’re actually removing.
Harvest Every Usable Tomato Before a Killing Freeze
Start by checking the vines carefully for tomatoes hidden under leaves, including green fruit that hasn’t ripened yet. The University of Illinois recommends harvesting mature green tomatoes you want to save before a killing freeze arrives, because they can continue ripening indoors afterward. One option is to wrap individual tomatoes in paper and store them at roughly 60 to 65 degrees Fahrenheit, where they can ripen gradually over the following weeks. You can even uproot an entire healthy plant and hang it in a sheltered location to allow remaining fruit to continue ripening. That means the end of outdoor tomato season doesn’t necessarily mean sacrificing every green tomato still hanging from the vine.
Pull the Entire Plant Instead of Cutting It Off
Once you’ve finished harvesting, remove the tomato plant rather than leaving the roots and stem sitting in the bed indefinitely. This gives you an opportunity to inspect the roots, lower stem, and foliage for unusual discoloration, rot, or other symptoms that could indicate disease. End-of-season tomato plant cleanup matters because some pathogens can survive in plant debris and contribute to problems in future crops. The University of Minnesota, for example, recommends removing or burying infected plants in fall to reduce the likelihood of early blight surviving into the following year. Pulling plants now also leaves you with a much cleaner bed to amend, mulch or cover before winter.
Decide Whether Those Vines Belong in the Compost
Healthy tomato vines can contribute useful organic matter to a properly managed compost pile, but diseased plants deserve more caution. Home compost piles don’t always reach and maintain temperatures capable of reliably destroying every troublesome plant pathogen. Recommendations can also differ by disease: early-blight material may be composted in a properly maintained pile. Penn State advises disposing of early-blight-infected tomato material rather than composting it. If you suspect a serious disease and don’t know what caused it, the conservative choice is to keep that material out of a typical backyard compost pile until you’ve identified the problem. Don’t turn this year’s diseased tomato plant into next year’s avoidable garden headache just to gain a little extra compost.
Don’t Forget the Stakes, Cages and Ties
Removing the plant while leaving dirty tomato supports untouched is only half of tomato plant cleanup. Soil and infected plant residue can remain on cages, stakes, clips, pruning tools, and other equipment, potentially carrying pathogens from one growing season into another. University of Minnesota recommends cleaning and sanitizing gardening tools and trellises as part of disease prevention. Scrape away soil and plant material first, then clean and disinfect reusable equipment appropriately before storing it. If you had a confirmed disease, check disease-specific guidance because porous wooden stakes or disposable ties may be better replaced than reused in certain situations.
Remove Fallen Tomatoes and Plant Debris
Those shriveled tomatoes lying underneath the plants shouldn’t automatically stay there all winter. Fallen fruit can produce volunteer tomato seedlings the following season, and leftover leaves and stems can harbor pathogens or complicate spring cleanup. The University of Minnesota’s bacterial spot guidance specifically recommends burying or removing crop debris at the end of the season and controlling volunteer tomatoes during rotations. Take a few extra minutes to rake up diseased leaves, dropped fruit and broken stems instead of focusing only on the main plant. It’s much easier to start spring with a reasonably clean bed than to sort through half-decomposed tomato vines when you’re ready to plant.
Think About Where Next Year’s Tomatoes Will Go
One of the most useful things you can do after removing tomatoes has nothing to do with the plants themselves: make a note of where they grew. Tomatoes belong to the Solanaceae family along with peppers, potatoes and eggplants, so rotating tomatoes means more than simply replacing them with peppers next year. The University of Minnesota recommends moving crop families so members of the same family haven’t occupied a location for roughly two to four years when managing garden diseases. Early blight guidance specifically recommends allowing at least two years before tomatoes or peppers return to the same location. Gardeners with limited space may not achieve a perfect rotation, but keeping a simple planting map can help you avoid putting tomatoes in precisely the same spot year after year.
Give the Empty Bed Some Protection
Once tomato plant cleanup is complete, don’t assume bare soil needs to sit exposed until planting time. Organic mulch can protect the soil surface, while gardeners with enough time before winter may choose an appropriate cover crop for their climate and planting schedule. Even dried leaves can become useful garden mulch rather than something that automatically goes into a trash bag. If you’re adding finished compost, make sure it is actually finished before spreading it, since the University of Minnesota cautions against applying incompletely composted material to growing areas. Think of the empty tomato bed as soil you’re preparing for its next job rather than dead space until spring.
Write Down What Worked While You Still Remember
October is a much better time to evaluate your tomato season than next May, when you’ve forgotten which variety split constantly or resisted disease beautifully. Record which tomatoes produced well, when problems appeared, whether plants became overcrowded, and which varieties you’d actually grow again. If disease was severe, identifying it now can help you choose resistant varieties and better cultural practices for next year. For example, the University of Minnesota notes that staking, mulching, improving airflow, keeping foliage dry, and rotating crops can help manage common tomato leaf-spot diseases. Five minutes of notes after tomato plant cleanup can save you from repeating an entire season’s worth of mistakes.
The Last Harvest Is Really the Start of Next Year’s Crop
Pulling tomato plants may feel like closing the garden for the year, but experienced gardeners know that fall cleanup is part of next season’s preparation. Harvest the remaining fruit, remove old vines and debris, clean reusable supports and pay attention to any evidence of disease before everything disappears into the compost or trash. Then protect the soil and record where tomatoes grew so you can make a smarter rotation plan next spring. Thorough tomato plant cleanup costs almost nothing, yet it can reduce unnecessary disease pressure and make your first spring gardening weekend considerably easier.
What do you normally do with your tomato plants after the final harvest—compost them, throw them away, or leave them in the garden until spring?
What to Read Next
7 Vegetables You Can Still Plant in Fall for One More Cheap Harvest
Garlic Goes in the Ground This Fall, But Timing It Wrong Can Ruin Next Year’s Harvest
Leave a Reply