A worn garden tool does not deserve a trip to the trash. Most tools fail because of small problems: a loose bolt, a rusty edge, or a handle that lost its grip. A few minutes of attention can turn a tired shovel or stubborn pair of pruners back into a reliable workhorse. Repairing tools saves money, keeps quality gear in service for years, and builds a stronger connection with the work happening in the soil.
Anyone who spends time in the garden eventually faces dull blades, stiff hinges, and splintered handles. Instead of replacing those tools, a little care and a few smart techniques can restore them to full strength.
Rust Never Wins When You Fight Back
Rust attacks steel tools quickly, especially after rainy days or damp storage. Orange patches on a shovel or hoe may look dramatic, but rust rarely ruins a tool beyond recovery. A gardener can scrub away surface rust with steel wool, a wire brush, or coarse sandpaper. Firm pressure combined with steady motion strips corrosion and reveals clean metal underneath.
After removing rust, apply a thin layer of mineral oil or vegetable oil across the metal surface. Oil seals the metal and blocks moisture from starting the rust cycle again. Some gardeners also rub tools with an oily rag after every use, which keeps metal bright and ready for the next job. A simple bucket filled with sand and a little oil works wonders for this routine; plunging a trowel or cultivator into the mixture cleans dirt and coats the metal in one quick motion.
Severe rust sometimes forms rough pits across the surface of the metal. Even then, a tool usually keeps plenty of life. Sand the rough areas smooth, wipe away debris, and protect the metal with oil. Consistent maintenance stops rust from spreading and keeps tools strong for years.
Sharpening Blades Changes Everything
Dull edges turn basic garden work into a frustrating battle. A sharp tool slices through soil, roots, and branches with surprising ease. Many gardeners overlook sharpening, yet this single habit extends the life of almost every cutting tool in the shed. Pruning shears, loppers, hoes, and shovels all benefit from a fresh edge. A flat mill file or sharpening stone handles most garden blades. Hold the file at the same angle as the original edge and push it along the blade in smooth strokes. Consistent motion restores the cutting surface without removing too much metal.
Pruning shears demand extra care because sharp blades protect plant health. Clean the blades first with warm water and soap to remove sap and dirt. After sharpening, wipe the blade with rubbing alcohol or vinegar to discourage plant diseases. Sharp pruners glide through stems instead of crushing them, which allows plants to heal faster and grow stronger.
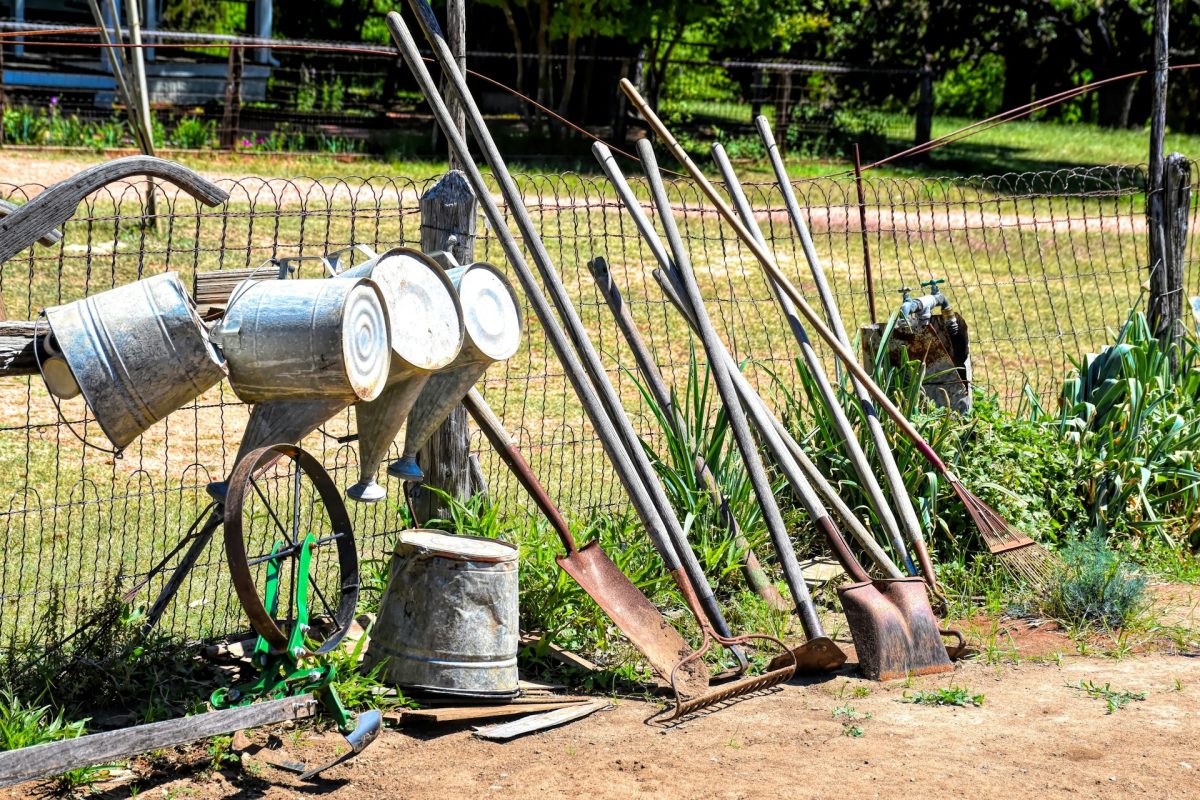
Loose Handles Ruin Good Tools
A sturdy metal blade means nothing when the handle wobbles like a loose tooth. Many long-handled tools rely on a simple bolt, screw, or rivet to hold everything together. That connection loosens over time as repeated motion shakes the parts apart. A quick inspection solves most of these issues. Tighten bolts with a wrench or screwdriver until the blade and handle lock firmly together. If the original hardware stripped or disappeared, a new bolt and locking nut from a hardware store usually solves the problem.
Wooden handles sometimes shrink slightly during dry weather. That small change allows the metal head to slip or twist. A wooden wedge driven into the top of the handle expands the wood and secures the connection again. Hardware stores sell these wedges for exactly this purpose, though a carefully shaped piece of scrap wood can perform the same job.
When a Handle Splinters, Don’t Panic
Wooden handles eventually crack or splinter after years of hard work. That damage may look like the end of the road for a beloved rake or shovel, yet replacing a handle often costs far less than replacing the entire tool. Replacement handles hang in the tool section of many hardware stores. Most of them follow standard sizes designed for common garden tools. Remove the old handle by loosening the bolt or knocking out the remaining rivets. After that step, slide the new handle into the metal socket and secure it with fresh hardware.
Some gardeners prefer fiberglass replacement handles because they resist moisture and cracking. Others stick with hardwood because it absorbs shock and feels natural during long work sessions. Both options restore a tool to working order. A light sanding session after installation smooths rough spots and prevents blisters. Rubbing a little linseed oil into the wood also protects the handle and deepens its color. With a solid handle in place, an old tool suddenly feels brand new again.
Pruners That Stick Need a Little Attention
Pruning shears endure constant pressure, sap buildup, and exposure to moisture. Over time, the hinge stiffens, the blades stick together, and the tool loses its smooth cutting motion. Fortunately, most of these problems disappear after a careful cleaning.
Start by removing the center bolt that holds the pruners together. Separate the blades and scrub away sticky sap with warm water and dish soap. Stubborn residue often dissolves with rubbing alcohol or a dab of vinegar.
After cleaning, dry the pieces completely and apply a small amount of lubricating oil to the hinge and spring. Reassemble the pruners and tighten the bolt until the blades move smoothly without wobbling. That small adjustment restores the crisp, precise motion that good pruning requires. Regular cleaning keeps pruners dependable throughout the growing season. Healthy plants depend on clean cuts, and well-maintained tools deliver exactly that.
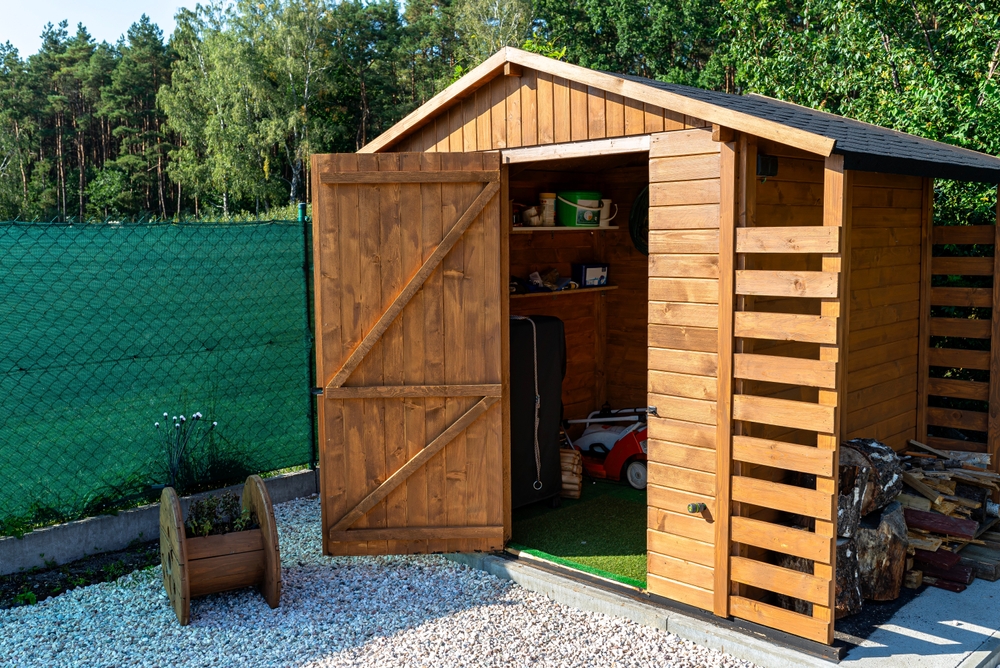
Smart Storage Prevents Future Repairs
A repaired tool deserves better treatment going forward. Proper storage prevents many of the issues that force repairs in the first place. Tools left outside collect moisture, which leads straight to rust and weakened wood. A shed wall with a few sturdy hooks creates a perfect home for long-handled tools. Hanging them off the ground protects edges and keeps handles dry. Smaller tools benefit from a toolbox or wall rack that prevents blades from knocking into each other.
Before storage, knock off soil and wipe the metal parts with a rag. That quick habit removes moisture and slows rust formation. A gardener who spends a minute on cleanup after each session rarely faces major repair work later.
The Real Reward of Fixing What Already Works
Repairing garden tools offers more than simple savings. Each repaired shovel, rake, or pair of pruners keeps useful materials out of landfills and extends the life of well-made equipment. Gardeners who maintain their tools also work more efficiently, because sharp blades and tight handles respond exactly the way they should.
Many older tools contain stronger steel and sturdier construction than cheaper modern replacements. A little maintenance unlocks years of additional service from those dependable pieces. Instead of discarding tools after the first sign of wear, a gardener builds a small repair routine that keeps everything ready for action.
Which garden tool in your shed deserves a second chance instead of replacement? Give us your thoughts and gardening plans in the comments.
You May Also Like…
10 Everyday Household Items Gardeners Are Using Instead of Expensive Tools
7 Tools That Help Seniors Stay In Their Gardens Longer
9 Garden Tools You Should Oil Now or Replace by Spring
7 Garden Tools Worth Buying Used Instead of New
How To Keep Your Garden Tools Organized When Snow Hits
Brandon Marcus is a staff writer for FrugalGardening.com at District Media, Inc., where he delivers practical gardening advice with a relatable, no-nonsense style. An avid amateur gardener, he holds a BA degree and with over ten years of professional writing experience, he is also an award-winning published author whose first book, Questions For Deep Thinkers, was released by Adams Media. His work has appeared in major publications including Fandom.com, CHUD.com, TheColdWire.com, and Fansided.com.
Leave a Reply