Your herb garden has been producing all summer, but the growing season is coming to an end. The oregano is overflowing its container, your thyme needs trimming, and the rosemary has more fragrant stems than you could possibly use before winter. Rather than letting those herbs go to waste, you can preserve much of your harvest for cooking during the colder months.
Learning how to dry garden herbs is one of the simplest ways to stretch your gardening budget. You don’t need expensive equipment, fancy storage containers, or even a food dehydrator to get started.
The key is choosing the right herbs, harvesting them at the proper time, and removing enough moisture to prevent spoilage. With a few practical techniques, you can turn the final harvest into homemade seasonings that last well beyond the first frost.
Choose Herbs That Hold Their Flavor When Dried
Not every herb responds equally well to drying, so selecting the right varieties can make a significant difference. According to the National Center for Home Food Preservation, herbs such as oregano, thyme, rosemary, sage, and marjoram are suitable candidates for drying. These herbs have relatively sturdy leaves and flavors that remain useful after much of their natural moisture has been removed. Basil, parsley, chives, and cilantro can also be dried, although freezing may preserve their fresh flavor better for certain recipes. If you’re learning how to dry garden herbs for the first time, start with oregano or thyme because their small leaves are relatively easy to handle and preserve.
Harvest Before Cold Weather Damages the Leaves
Timing matters because herbs generally produce the best dried seasonings when harvested while their foliage is still healthy. The University of Minnesota Extension recommends harvesting herbs before their flowers open, when flavor and aromatic oils are often at their peak. Choose a dry morning after the dew has evaporated but before the strongest afternoon heat arrives. Use clean scissors or pruning shears to cut healthy stems, avoiding leaves that are yellowing, moldy, or heavily damaged by insects. If freezing temperatures are expected soon, prioritize harvesting tender herbs rather than waiting for perfect conditions and risking the loss of your crop.
Clean Your Harvest Without Adding Excess Moisture
Freshly harvested herbs may contain dust, soil particles, insects, or other debris that shouldn’t end up in your spice jars. You should wash herbs in cool water when needed and remove excess moisture before drying. Gently shake the stems, use a salad spinner if appropriate, or spread them on clean towels until surface water has evaporated. Avoid leaving wet herbs piled together because trapped moisture can encourage deterioration before the drying process begins. Taking a few extra minutes to inspect and prepare your harvest can help produce cleaner, better-quality homemade seasonings.
Air-Dry Small Bundles in a Well-Ventilated Room
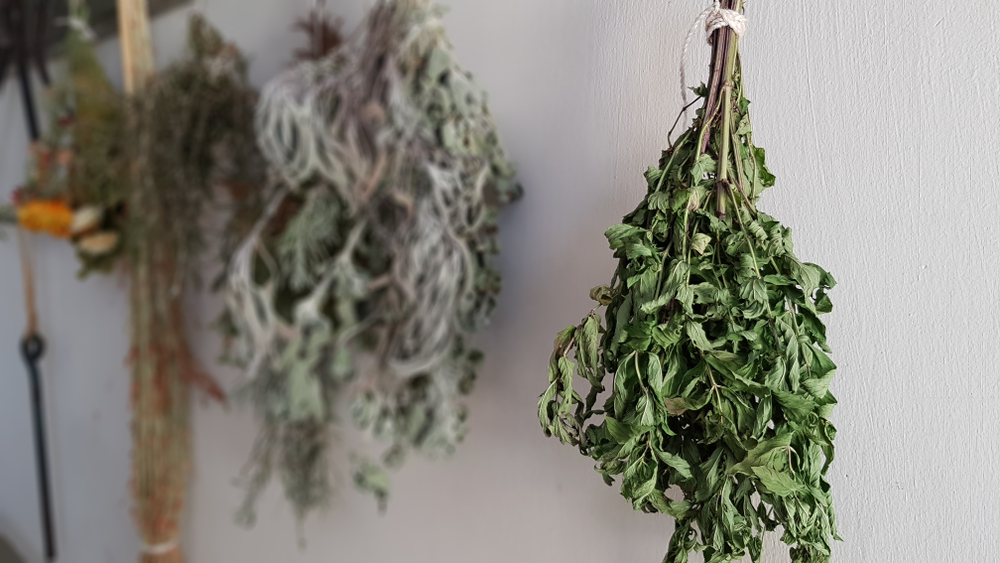
One of the most affordable methods for anyone researching how to dry garden herbs is traditional air-drying. Sturdy herbs can be gathered into small bundles and hung upside down in a warm, dry, well-ventilated location. Tie approximately four to six stems together, keeping the bundles loose enough for air to circulate around the leaves. Avoid humid basements, damp garages, and direct sunlight because excess moisture can encourage mold while strong light may reduce flavor and color. Depending on the herb and drying conditions, the process may take several days to a few weeks, so check the bundles regularly rather than relying on a fixed schedule.
Use Paper Bags to Keep Drying Herbs Clean
Hanging herbs uncovered may work in a clean indoor space, but dust and falling leaves can become annoying. Try placing small herb bundles inside paper bags with ventilation holes to help protect them during drying. Gather the stems near the bag opening, secure them loosely, and hang the bag where air can circulate freely. Paper allows moisture to escape more readily than sealed plastic, which can trap humidity and encourage mold growth. Check the contents periodically, especially during damp weather, and discard any herbs that develop visible mold or an unpleasant musty odor.
Try a Food Dehydrator for Faster, More Consistent Results
If you have a large harvest or live in a humid climate, a food dehydrator may offer more reliable results than air-drying. It is recommended to dry herbs at relatively low temperatures, generally around 95 to 115 degrees Fahrenheit, with somewhat higher temperatures sometimes needed in humid conditions. Spread leaves or small stems in a single layer so heated air can move freely around them. Check frequently because thin leaves may dry much faster than thicker rosemary or sage leaves. Although a dehydrator requires an initial investment, it can be useful for gardeners who regularly preserve herbs, fruits, and vegetables.
Be Careful With Oven and Microwave Drying
You might be tempted to speed up the process by placing herbs in a hot oven, but excessive heat can damage their delicate flavor compounds. Microwave drying can work for small quantities of certain herbs, although results vary depending on the herb and equipment. Oven drying is less desirable when the appliance cannot maintain sufficiently low temperatures, since leaves may scorch before drying evenly. Never leave herbs unattended in a microwave, and follow tested instructions rather than experimenting with long heating times. For beginners, a dehydrator or properly ventilated air-drying setup is generally easier to control than high-heat shortcuts.
Check That Herbs Are Completely Dry Before Storing
Knowing how to dry garden herbs also means recognizing when the process is actually finished. Properly dried herb leaves should crumble easily while stems become brittle enough to snap. If leaves still feel flexible, damp, or leathery, they may contain too much moisture for safe long-term storage. Allow dehydrated herbs to cool completely before transferring them into containers so condensation doesn’t form inside the jars. Any herbs showing mold or unusual odors should be discarded rather than mixed with a healthy batch.
Store Whole Leaves to Preserve Flavor Longer
Once your herbs are completely dry, proper storage can help protect the time and effort you invested in growing them. Pros recommend storing dried herbs in airtight containers away from heat, moisture, and direct sunlight. Keeping leaves whole until you’re ready to cook can help retain more of their aroma compared with crushing everything immediately. Label each container with the herb name and drying date so you can use older supplies before newer harvests. For the best flavor, plan to use dried herbs within approximately six months to a year, checking their aroma and condition before adding them to recipes.
Turn the Final Harvest Into Months of Savings
Learning how to dry garden herbs is an inexpensive way to make your garden productive even after the growing season ends. Proper drying and storage can preserve herbs for later use, although their flavor gradually weakens over time. Instead of buying another small container of oregano, thyme, or rosemary at the grocery store, you can reach for seasonings you grew and preserved yourself. Start with a small batch, pay attention to moisture and ventilation, and experiment with different herbs to discover which methods work best in your home.
Do you prefer air-drying herbs, using a dehydrator, or freezing your garden harvest, and which herbs have given you the best results? Share your favorite preservation tips in the comments.
What to Read Next
6 Reasons Gardeners Are Mixing Herbs Into Flower Borders
How to Protect Tender Herbs From Sudden Frost
7 Herbs That Keep Producing After Summer Vegetables Slow Down
Leave a Reply