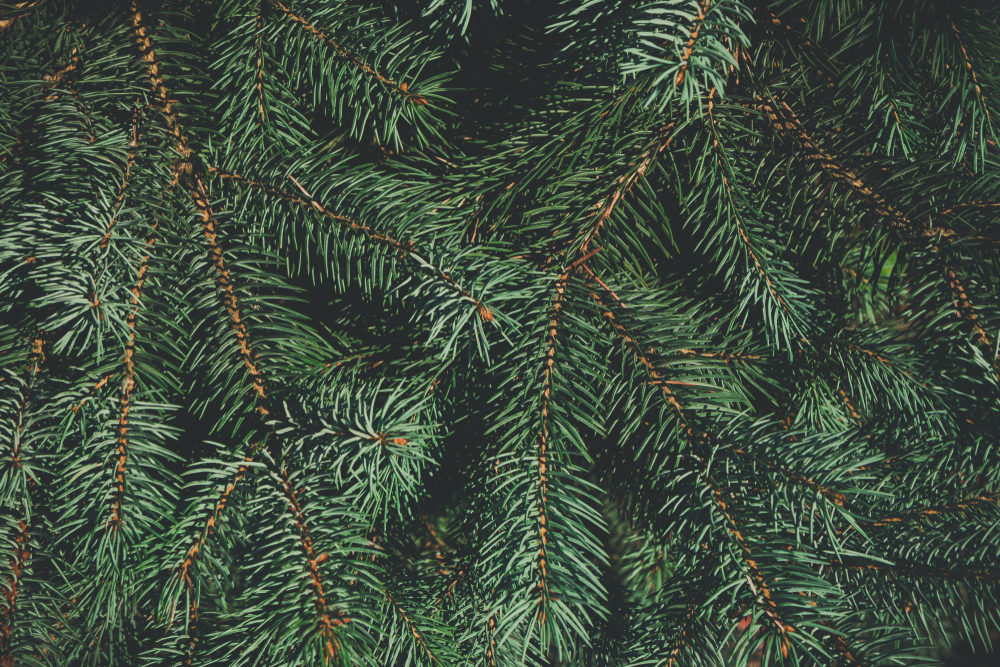
If you’ve ever raked up a pile of fallen pine needles, you’ve probably wondered: “Can I just… use these?” Spoiler alert: you absolutely can—but with a few smart precautions. Pine needles, or “pine straw” as some gardeners call them, are one of nature’s most underrated mulching materials. They’re plentiful, lightweight, and give your garden that effortlessly tidy, woodland vibe.
But before you go tossing them around your flower beds like confetti, it’s worth knowing how to use them properly so you don’t accidentally harm your soil or suffocate your plants.
Pine Needles Aren’t the Villain You Think They Are
Let’s clear up the biggest myth right away: pine needles don’t actually make your soil permanently acidic. Yes, freshly fallen needles are a bit acidic, but as they break down, their pH levels neutralize. That means they won’t turn your entire garden into an acid swamp unless you’re dumping them in by the truckload. In fact, many plants—especially evergreens, azaleas, and blueberries—absolutely thrive under pine needle mulch. The secret lies in balance: use them wisely, and they’ll protect your soil instead of sabotaging it.
Choose the Right Pine Needles for the Job
Not all pine needles are created equal. Longleaf pine needles, for instance, are prized by landscapers for their durability and slow decomposition, while shorter varieties break down more quickly. Aim for clean, freshly fallen needles instead of those already halfway to compost. Avoid ones that are overly brittle, moldy, or mixed with other debris—they can introduce pests or unwanted seeds into your garden beds. A quick hand-sort before spreading will ensure your mulch looks neat and does its job effectively.
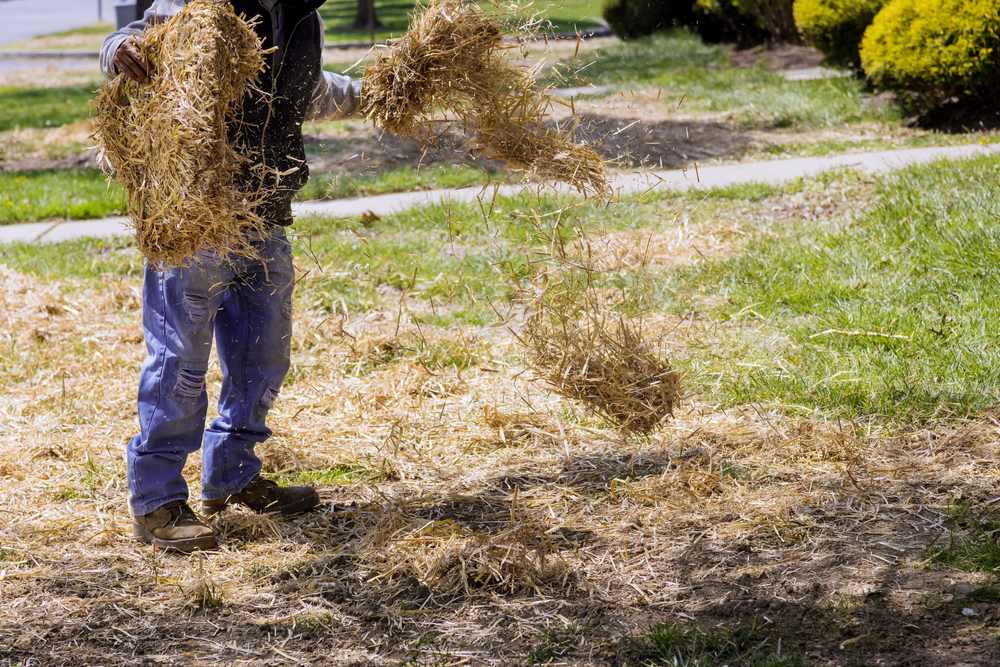
Prep Your Garden Before the Mulching Magic
Before you start spreading, make sure your garden bed is ready to receive its new blanket. Remove any weeds, loosen the top inch of soil, and water it lightly if it’s dry. This helps the pine needles settle evenly and start protecting the soil right away. If you’re working around delicate stems or shallow-rooted plants, leave a small gap between the mulch and the base of the plant to prevent rot. Think of it like tucking your garden in—cozy, but not smothered.
The Perfect Layer: Not Too Thin, Not Too Thick
One of the biggest mistakes gardeners make with pine needle mulch is piling it on too thick. A layer that’s about two to three inches deep is ideal—it’s enough to block weeds and retain moisture without suffocating the soil. If you go thicker, you risk trapping too much moisture underneath, which can lead to fungal growth or root rot. Too thin, and weeds will gleefully poke right through. Like most good things in life, the key is moderation—just enough to keep things comfortable and controlled.
How Pine Needles Help Your Soil Stay Healthy
Pine needles aren’t just a pretty ground cover—they’re hardworking soil protectors. Their airy structure allows water to seep through easily while preventing evaporation, keeping roots cool in summer and insulated in winter. As they decompose, they add organic matter that improves soil texture and promotes beneficial microbial activity. Over time, this creates a softer, richer growing environment without the need for constant fertilizing. Plus, they’re slow to break down, meaning you won’t be reapplying mulch every few months.
The Bonus: Natural Weed Control Without Chemicals
If you’re tired of waging war on weeds, pine needles are your new best friend. Their interlocking structure forms a dense mat that blocks sunlight, discouraging unwanted plants from sprouting. Even the few weeds that do manage to push through are easier to pull because the soil beneath stays loose and moist. Unlike bark mulch, pine needles don’t compact into a solid crust, which means your plants can still breathe. It’s like giving your garden a breathable armor—strong, but flexible.
What to Avoid When Using Pine Needle Mulch
Even natural materials can backfire if used carelessly. Don’t use pine needles in areas that flood or hold water, as they can trap moisture and cause mildew. Avoid using them directly around vegetable stems or in compost piles that you plan to turn frequently—they break down slowly and can tangle up tools. And skip using them near pathways where they might blow away or become slippery when wet. When used thoughtfully, they’re a gardener’s dream, but thrown down randomly, they can cause small headaches.
Mixing and Matching with Other Mulches
You don’t have to go all-in on pine needles to get their benefits. In fact, mixing them with other organic mulches can create the best of both worlds. Pair them with shredded leaves for faster decomposition, or with bark chips for extra insulation and a richer look. The combination also helps balance the soil environment—keeping things airy and nutrient-diverse. Think of it as a “mulch cocktail” for your garden—customized to your plants’ exact needs.
When and How Often to Refresh Your Pine Mulch
Pine needles break down slower than most mulches, but they’ll still thin out over time. Plan to add a fresh layer once a year, preferably in spring or fall, depending on your climate. You’ll know it’s time when you can start seeing patches of bare soil peeking through. Lightly rake the existing layer to loosen it before adding new needles; this keeps the surface breathable and encourages healthy decomposition underneath. A quick seasonal refresh keeps your garden looking sharp and your soil thriving year-round.
The Eco-Friendly Factor You’ll Feel Good About
Using pine needles as mulch is one of those rare gardening moves that’s both practical and planet-friendly. Instead of buying packaged mulch that’s been processed and shipped across the country, you’re repurposing something nature already provides in abundance. Pine straw is fully biodegradable, and harvesting it doesn’t harm trees—it’s literally a byproduct of nature’s own recycling system. Plus, it looks naturally elegant, blending beautifully with both rustic and modern landscapes. Every layer you spread is a little act of sustainability that pays off in both beauty and balance.
Pine Needles, the Unsung Heroes of the Garden
So there you have it—pine needles aren’t just forest litter waiting to be bagged up; they’re one of the most efficient, sustainable, and good-looking mulches you can use. With the right preparation, layering, and a bit of annual upkeep, they’ll protect your soil, block weeds, and make your plants happier than ever. Forget the old myths about acidity—these golden-brown needles are natural allies for gardeners who crave both function and flair.
Now it’s your turn: have you tried using pine needles in your garden? Share your thoughts, stories, or mulch success tips in the comments below.
You May Also Like…
5 Natural Mulches That Protect Roots From Frost
Why Raised Beds Hold Warmth Longer Than Ground Soil
12 Plants That Benefit From Extra Compost in Autumn
Why Soil Testing in Fall Saves Money in Spring
Why Covering Beds Helps Soil Microbes Thrive
Brandon Marcus is a staff writer for FrugalGardening.com at District Media, Inc., where he delivers practical gardening advice with a relatable, no-nonsense style. An avid amateur gardener, he holds a BA degree and with over ten years of professional writing experience, he is also an award-winning published author whose first book, Questions For Deep Thinkers, was released by Adams Media. His work has appeared in major publications including Fandom.com, CHUD.com, TheColdWire.com, and Fansided.com.
Leave a Reply