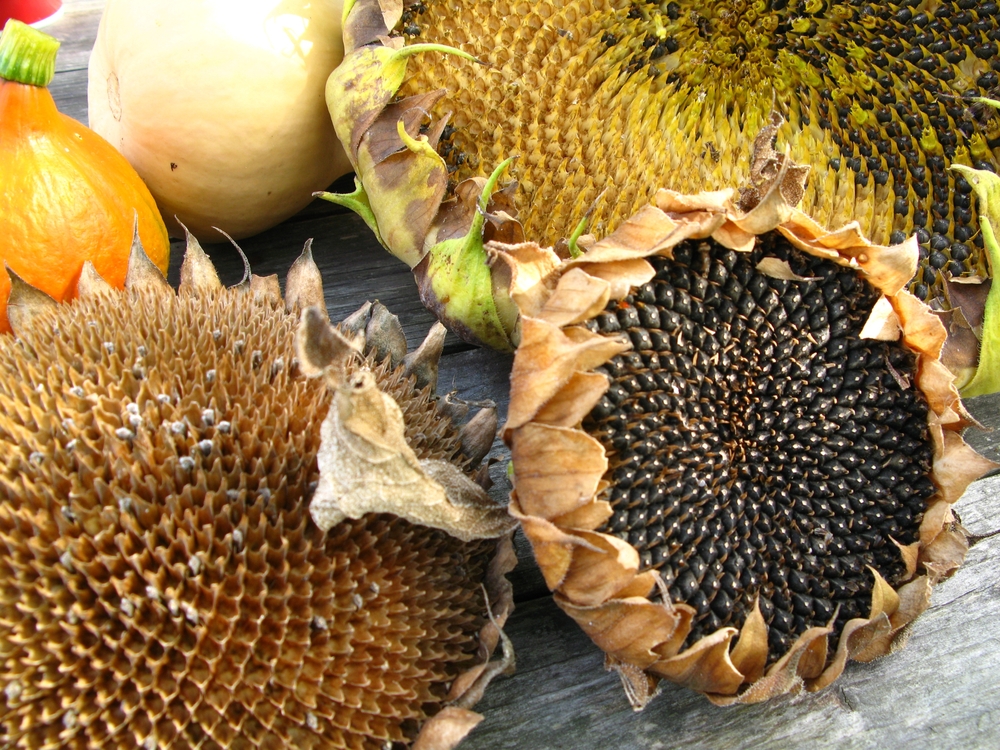
Before you toss those drooping sunflower heads into the compost pile this fall, consider what you’re throwing away. Those faded blooms could provide free seeds for next year’s garden, nutritious food for backyard birds, or even a natural alternative to expensive store-bought bird feeders.
Sunflowers are one of the few garden plants that continue providing benefits long after their colorful petals disappear. Their large seed heads can hold hundreds of seeds, making them valuable for gardeners who want to save money while supporting local wildlife.
According to Iowa State University Extension, sunflower heads can be harvested and dried for seed collection or left available for birds to enjoy.
However, learning how to dry sunflower heads correctly is important because harvesting too early, trapping moisture, or storing them improperly can cause seeds to spoil before they’re useful.
The good news is that you don’t need expensive equipment or specialized gardening supplies to preserve your sunflower harvest.
Know When Sunflower Heads Are Ready to Harvest
The first step in learning how to dry sunflower heads is recognizing when the seeds have reached maturity. According to Kansas State University Extension, mature sunflower heads typically begin drooping downward while the backs of the flowers change from green to a lemon-yellow color. The small florets covering the developing seeds should also appear shriveled, and the outer petals will usually have faded or fallen away. Gently remove a few seeds to check whether they’re plump and have developed the coloring typical of your sunflower variety, which may include black or striped shells. Harvesting before seeds are mature can result in poorly developed kernels, while waiting too long may allow birds, squirrels, or wet weather to claim much of your harvest.
Decide Whether to Harvest or Leave Them Standing
Not every sunflower head needs to be cut down when the growing season ends, especially if your goal is supporting backyard wildlife. The North Carolina State University Extension notes that leaving sunflower seed heads standing provides food for birds and squirrels during fall and winter. Goldfinches, chickadees, and other seed-eating birds may visit mature sunflowers and pull seeds directly from the flower heads without needing a traditional feeder. However, if your garden receives heavy autumn rainfall or strong winds, harvesting some mature heads and drying them indoors can help preserve seeds for later use. A practical compromise is to leave several sturdy sunflower stalks standing for wildlife while collecting the remaining heads for storage or next year’s planting.
Cut Sunflower Heads With Enough Stem for Hanging
Once you’ve identified mature seed heads, use clean pruning shears or sturdy garden scissors to cut them from the plant. According to Oregon State University Extension, gardeners should leave approximately one foot of stem attached when harvesting sunflower heads for drying. This extra stem provides enough length to tie the flowers securely and hang them upside down without damaging the seed-bearing portion. Place harvested heads in a basket or shallow container rather than piling them into a tightly packed plastic bag, which can trap moisture and encourage mold. If you’re collecting particularly large sunflower heads, handle them carefully because mature flowers can become surprisingly heavy and may break apart if dropped.
Hang Sunflower Heads Somewhere Dry and Ventilated
One of the most reliable methods for how to dry sunflower heads is hanging them upside down in a sheltered location with good airflow. The University of Georgia Cooperative Extension recommends hanging harvested seed heads in a warm, dry, well-ventilated area protected from rodents and insects. A dry garage, covered shed, or utility room may work, provided humidity remains low and the flowers aren’t exposed to rain or condensation. Tie the stems individually or in small, loosely spaced groups, leaving enough room between flower heads for air to circulate around them. Depending on the weather and moisture remaining in the heads, drying may take several weeks, so check them regularly rather than relying on a fixed number of days.
Protect the Seeds While They’re Drying
Even after you’ve brought sunflower heads indoors, seeds can fall out or attract unwanted visitors during the drying process. Covering drying heads with paper bags or cheesecloth is recommended to catch seeds as they loosen and fall. If using paper bags, make sure the heads have adequate ventilation and avoid sealing damp flowers inside tightly closed containers. Lightweight cheesecloth or breathable mesh can be especially useful because it allows air to circulate while keeping most loose seeds contained. Check the heads periodically for damp spots, unpleasant odors, or visible mold, and discard moldy material rather than attempting to save contaminated seeds for people or wildlife.
Remove Seeds Once the Heads Are Completely Dry
After the sunflower heads have dried thoroughly, the seeds should loosen more easily from the flower’s central disk. Gardeners can remove dried seeds by rubbing two flower heads together or brushing them loose with their fingers or a stiff brush. Work over a large tray, clean bucket, or newspaper-covered table so the seeds don’t scatter across the floor. Separate the seeds from dried petals, broken flower pieces, and other debris before deciding which ones to store for planting or other purposes. Learning how to dry sunflower heads properly makes this process considerably easier because thoroughly dried seeds generally release with less effort than those still attached to moist plant material.
Save Some Seeds for Next Year’s Garden
If you’d like to grow sunflowers again next spring, set aside some of the healthiest, fully developed seeds before offering the rest to wildlife. The University of California Agriculture and Natural Resources explains that sunflower varieties can cross-pollinate, meaning saved seeds may produce plants with different characteristics from their parents. Choose seeds from healthy plants that produced strong stems and desirable flowers, especially if you’re hoping to grow similarly vigorous sunflowers next season. Allow the cleaned seeds to dry completely, then store them in labeled paper envelopes in a cool, dry location away from pests and excessive humidity. Remember that hybrid varieties may not grow true to type, but saved sunflower seeds can still provide an inexpensive opportunity to experiment with different flower sizes and colors.
Turn Dried Sunflower Heads Into Natural Bird Feeders
If supporting backyard birds is your priority, you don’t necessarily need to remove the seeds from every dried sunflower head. In guidance provided through Michigan State University Extension’s Ask Extension service, experts explain that dried sunflower heads can be hung outdoors on fences or tree branches for birds to feed directly from them. Once a head is thoroughly dry, attach it securely using suitable wire or sturdy natural twine, making sure it won’t fall in strong winds. Choose a location where birds have a clear view of their surroundings and where neighborhood cats or other predators cannot easily ambush them. This approach lets you repurpose something your garden already produced instead of purchasing additional birdseed or decorative feeders for the colder months.
Avoid the Storage Mistakes That Cause Mold
A sunflower head that looks dry on the outside may still contain moisture deep inside its thick central disk. Many gardeners warn against storing harvested sunflower heads in high-humidity conditions because moisture encourages mold and spoilage. Avoid stacking freshly harvested heads inside sealed plastic containers, particularly if you plan to keep them for several months before offering them to birds. If you notice fuzzy growth, musty odors, or soft, discolored areas, discard the affected heads rather than assuming drying will make them safe again. Proper airflow, regular inspections, and thoroughly drying seeds before storage are the simplest ways to protect your harvest without spending money on specialized equipment.
One Sunflower Harvest Can Serve Several Purposes
Learning how to dry sunflower heads gives gardeners several inexpensive ways to make the most of their flowers after summer ends. A few carefully preserved heads can provide seeds for next year’s planting, while others can become natural feeding stations for backyard birds. Leaving additional stalks standing can also provide wildlife benefits, including food and potential habitat for beneficial insects during the colder months. Best of all, these projects require little more than pruning shears, breathable storage materials, and a dry place to finish curing the seeds.
Do you leave your sunflower heads standing for birds, or do you collect and save the seeds for next year’s garden? Share your favorite sunflower harvesting tips in the comments.
What to Read Next
Your Neighbors May Hate the Mess — But Pollinators Need Some of It
6 Pollinator Plants to Start Now for a Stronger Spring Garden
Are Keystone Plants More Valuable Than a Long Pollinator List?
Leave a Reply