5 Frugal Gardening Traits

If you’re creating a garden on the cheap or going for the frugal to downright FREE garden, here’s my list of must haves:

1) The frugal gardener needs to be flexible, as in no master landscape plan set in concrete. The frugal gardener lets the plants be the guide and the garden sort of “happens by happy accident.” For example, if you respond to a “free plants” ad on CraigsList, you will have no idea what you’re really getting. Being flexible lets you look at the new plants and say “Wow, they’re just what I needed!” no matter what they are.

2) Physical flexibility helps too. Keep this in mind when the ad on CraigsList says “You dig!”

3) Patience by the wheelbarrow load is also necessary if you’re keeping your gardening budget down. Small plants, cuttings or starting your garden from seeds is not the instant way to garden. Gardeners need to learn to wait — and then wait some more, especially if you’re aiming for frugal. It can take years to create a garden this way.

4) Terms such as “meek” and “mild” don’t usually describe the frugal gardener. Toss the shy, quiet and unassuming traits out the window and practice being outgoing and assertive. The more you ask for free or reduced prices on items, the easier it gets and getting told “no” just pushes you on to the next possibility.

5) Creativity and an open mind will help the frugal gardener use what IS available rather than having a set shopping list of items that “need” to be purchased.

The good news is that if you love to garden and don’t have a lot of money, these traits can be learned and when they are, you’ll have a fantastic garden on the cheap.


Build An Organic Waste System

Want to take your kitchen to a new level of “green”? Tried a compost pile in your backyard and had to hide from your neighbors due to the smell? Tired of finding your compost items brought out to your front yard by the neighborhood animals?

Well, there is an alternative. Make a backyard food waste system and you can green up your kitchen by not throwing your food scraps into the trash and you won’t be stinking up the neighborhood either. This is the supply list you will need:

  • 20 gallon galvanized trash can, with lid. Be sure to look for a can with handles on 2 sides as well as a handle on the lid.
  • Bungee cord
  • Power drill with approx  drill bit, suitable for metal
  • Safety equipment – goggles & gloves
  • Shovel

After assembling your equipment, all you need to do is start drilling holes into the bottom of the can. You’ll want to make at least 10-15 holes spaced around the bottom. Next , lay the can on its side and start drilling holes in the bottom third all the way around. What you are aiming for is a drainage for your new waste system.

Once you have the holes drilled, you’re ready for the hardest part of the project. You need to dig a hole in your garden area that is big enough to place the bottom third of your can into it. You want the can to be easily accessible so you will use it, but not right outside your back door. Try to locate it where you won’t be digging through established root systems from trees or shrubs. You also want to take into consideration your view from the house or any outdoor rooms you may have; hidden behind shrubbery would be better than out in plain sight.

When you have the can buried in the ground so all the holes are covered with earth, you’re ready to put your system to use. You want to limit the items you put in the system to those without animal proteins. Any plant based items are fine. A good idea is to find a plastic container with a tight fitting lid that fits into your refrigerator – this can be your temporary holding area for your kitchen scraps. Storing the scraps inside the plastic container and inside your refrigerator will keep the scraps from smelling up your kitchen and you’ll only need to empty them into the waste system when it is full.

When you place the plant scraps into the waste system can outside, be sure to securely attach the lid to the can with the bungee cord. This will ensure that no wandering animals get into it and ensure you don’t find the contents strewn about all over your yard the next morning.

A 20 gallon can should hold the kitchen waste from a typical family of 4 for up to 9 months to a year before it gets full. Once full, simply leave the lid on and forget it for another 9 months to a year. At that point, you will have Black Gold, or rich, nutrient filled organic compost, ready to add to your garden beds.

Since you will need to let the one can rest for a year while the contents decompose, be sure to keep your eyes open for your 2nd can. This will allow you to continue with your food waste “System” Once you have 2 cans, they will just keep cycling through: one in use while the other one is decomposing.


Free Garden Party Plants

There are a lot of different ways to acquire free plants and even unusual ways depending on how adventurous you are. Another sneaky way to acquire free plants is to throw a Garden Party.

No, not the big hat, posh refreshment type of Garden Party, but a party to increase the size of your garden. Grab your list of friends & acquaintances, be it on your PC, your palm pilot or an old fashioned address book and let’s get started. Here’s a list to-do list to start you thinking, but feel free to skip some or add others to tailor the party to your group of friends.

First you need to pick a date. It’s best to hold this between late spring and harvest season so people have plenty of plants to share. Along with the date, you need to pick a place. The party would work in a public garden or at a home, inside or outside, depending on the weather. To round out the three first steps, you need to pick a time. Make it convenient when the most number of people can attend – not too early in the morning or too late in the evening. Luncheons usually work best.

Once you have the date, time and place, it’s time to get the invites out. Do this very early, at least a “Hold the Date” announcement, so guests can plan for the event. At this point, you will need to explain the event & let the guests know what they need to bring.

An easy way to visualize this is to think of a Cookie Exchange and just substitute plants. Let’s say you’re inviting 6 people (plus yourself) – each person attending will need to bring 6 plants to share with others. You should give some examples of what types of plants they could bring; Potted plants they have divided, herbs they have started, cuttings they rooted or houseplants they took cuttings from. It is also a good idea for you to pot up extra items, in case one of your guests cancels at the last minute.

In addition, you may want to ask the guests to bring an ingredient from their garden to add to a large salad so the cost of a luncheon will be minimal. The host/hostess will then only need to provide salad dressings, beverages and perhaps a dessert to round out the menu.

Another option or addition is to see if guests would like to bring a garden tool to swap. Most gardeners have an extra implement that they’d like to switch for something else. All the trades can be set up outside the entry area on a table for convenience.

A way to draw more interest from the participants is to contact your local garden club or nursery to see if anyone would be willing to speak or show a demo for your event.

Check out an assortment of gardening magazines and books to add to the décor. Anything garden related could be used for centerpieces: flower arrangements, garden implements, flower petals scattered around the tables. Use your imagination here to get everyone in the spirit.

If you hold your party during harvest season, you could also ask everyone to bring extra produce from their gardens to be taken to your local food bank. If you do this, be sure you coordinate with the food banks hours so you’re sure the items will be delivered when they are fresh.

After spending an afternoon with friends, enjoying a garden fresh salad and learning some valuable garden tips, it will be time for the actual Plant Exchange. Have each guest describe what they are sharing, along with what type of care it needs and how they used the particular plant in their gardens. Once done, everyone who attends should have some great new plants to add to their garden.

So what are you waiting for? Start planning and planting for your own Garden Party this season.


Reusing Stuff In Your Garden

Earth Day isn’t just a day in April to frugal gardeners. No matter what month it is, we’re always on the look out for ways to tread lightly in our little corner of the world.

Here is a short list of some of the items which many people throw away that I reuse in some way while I am gardening. By no means is this a complete listing, but it is a good starting point to get your creative juices flowing:

Plastic knives: I love these. I’ve always been a terribly lazy gardener and in the past I never marked the plants and seeds when I’ve stuck them in the ground. I have this problem no more. With my permanent marker and a handful of plastic knives, I’ve got plant markers for everything this season.

Old panty hose: I like cutting the legs off these and using them to tie up plants like tomatoes. These are ideal because they stretch a bit so the plants aren’t held rigidly to the trellis.

Clear plastic clam shell type containers: I use the clamshell packaging for muffins and such by poking a drainage hole in the bottom, filling with potting soil and planting seeds in these. Once done, close the top down and you have an instant mini greenhouse. If it gets too warm, simply open the lid. When the plants get large enough, you can transplant them to the garden, rinse out the makeshift greenhouse and store it away for next year.

Shower curtains: I use a couple of old shower curtains that have been around for years. They are extremely handy for transplanting mature plants. I hate to get garden soil on my lawn since that usually means small rocks meeting the lawn mower, so I spread the shower curtain out next to the plant that is going to be moved or get divided. All the dirt that gets dug up is piled onto the shower curtain. If I’m going to move the plant, or perform a bit of surgery on it, a second shower curtain is handy too. I’ll use it like a skid to move the plant from place to place, eliminating the need to pick it up at all. Then when I’m done with projects like this, I can pick up the edges and send the dirt directly where I want back into the garden. No dirt on the lawn and the project is finished without having to shovel all the dirt back again.

Old pop cans: I’ve used these for years in the bottoms of all of my planters and containers. If you fill the bottom third of a container with slightly bent / crushed pop cans, you can use less potting soil when planting. This will give you a lighter pot when finished and costs less per pot. The cans allow space at the bottom of the pot for drainage, so there is need to keep a supply of gravel for this purpose either.

Empty plastic pop bottles: These are wonderful to make a drip water system for hard to water plants. I have a couple areas with plants where the water runs right off if I use the hose or a sprinkler. By leaving the cap on the bottle, and cutting off the bottom, you can create a drip system. It\’s your choice whether you want to put in the garden on watering day or just leave it behind the plant and out of sight.

I poke a couple holes in the shoulder of the bottle, then bury the top of the bottle along side the plant that needs watering. Fill the bottle and let the water slowly seep out at root level and the water run off problem is solved. Depending on the area in my garden, I’ve used both the green colored plastic and the clear ones. Chose whichever shows less in relation to the plant and the location.

Broken flower pots: If a pot still has one side that is good, these make cute additions to the garden. Bury the broken part and plant inside the “cave” that is created. These broken pots are a good way to highlight particular plants or to tuck in little bits of tiny ground cover.

Broken garden tools: You can stick the handle end in the ground, leaving the shovel or rake head visible. You can then train a vine up the handle or use the new “stake” to tie up a plant.

As you can see, there are a lot of ways to use various objects that would normally end up in the landfill as part of your garden. We all should make a conscious effort to celebrate Earth Day every month by reusing some of these familiar items in our garden. Reduce, Reuse, Recycle should all be familiar words to a gardener. Other helpful hints can be for the garden can be found at Homeclick.


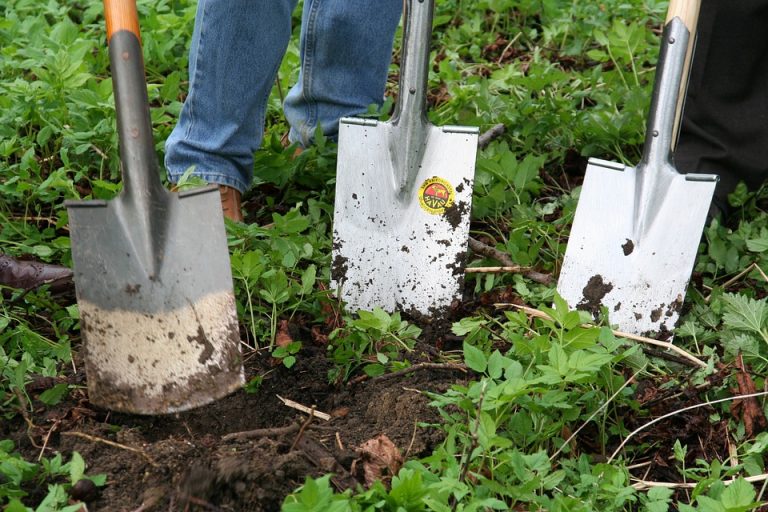
Free Organic Fertilizer

All set for another article telling you the jobs you should be tackling from your “to do” list this winter?

Well, think again! I’m not going to tell you to clean and sharpen your shovels (although we should all be doing that!), nor am I going to give you a schedule to get your fruit trees pruned and your roses cut back (although those activities need to be done too).

This idea will give you more flowers and produce more veggies while saving you water (which saves you time and money) and save even more time since it should cut down on the weeding too. The best part is it can all be yours for free. No money. Just some time and energy this winter to have a better garden come spring and summer.

A novel or brand new tip? Nope. This tip is as old as the hills. Enrich your soil this winter & you will reap the benefits later.

Animal Waste: I’m lucky enough to have horses and chickens on my property, so I regularly add the bedding materials to my garden areas. If you’re not out in farm country, there will still be places to search for this Garden Gold. Drag out the yellow pages, or keep your eyes open as you drive through your community. Watch for businesses that need to dispose of animal waste & then make a contact. Stop in when you see a riding stable & ask if you can pick up a container full of fertilizer. Locate the feed store closest to you and ask if you can post a Wanted notice on a bulletin board. Put an ad on Craigslist and you’ll probably be blessed with several contacts.

Wood Chips / Sawdust: Besides animal wastes, you could also be searching out businesses that work with wood for sawdust and wood chips. Both of these make great mulch and will cut down on the need to water as often. Winter is a great time to spend digging up contacts since we can’t be out digging in the dirt.

Coffee Grinds: Coffee stands regularly need to dispose of used coffee grounds, and while there is no real proof they provide nutrients to your soil, they do seem to add a non clumping sort of texture to my gardens. Living in Starbucks land as I do (the Pacific NW), coffee grounds are prolific and again – free.

Yard Waste: If you didn’t get all your fall leaves picked up, do it now and stick them in black trash bags. Poke some air holes in the bags, close them up and store someplace where they won’t freeze. They will start decomposing and be ready to dig into your garden space come spring!

The winter will barely be long enough if you start on this list now. There are so many sources of free items to add to your soil, you might not even have time to sharpen that shovel!


Frugal Pest Control

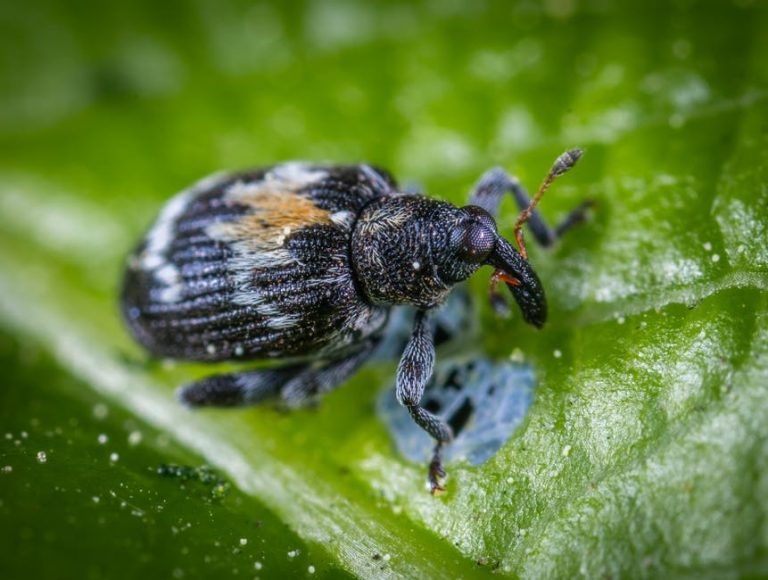
If you have a garden, the you have garden pests. It seems that bugs of all kinds love our plants just as much as we do. There are a couple things you can do before heading off to your local garden center to purchase products to tackle the problem.

First, you don’t necessarily want to kill it. That’s right. The pest you kill may be just the one that is keeping other pests from your plants. Be sure you identify what you’ve found before you decide its’ life is over. Either Google your little find or head to your local Extension office to meet with a Master Gardener to find out just what you’ve got. If it is a beneficial insect, let it alone & it will continue to rid your garden of other little pests, thereby earning its’ keep.

If you decide you have pests that need to go, an inexpensive removal technique is to give them strong blasts from the hose periodically. Alternatively, you can find pest control services on a site like Pest Control Experts if you need professional help. If the hose technique isn’t working but you don’t need professionals, but you need something else to make your plants seem less like breakfast to the little creepy crawlies, try either of these “recipes” for a natural pest control:

Mix 1 T. dishwashing soap with 1 cup cooking oil. Use 3 T of this to 1 quart of water & spray directly on the plants.

Steep several cloves of garlic (bruised or chopped) with up to a tablespoon of red chili flakes in a quart of water for several days. Spray directly on plants.

Your last resort may be pest control, but try the other tips first.


Growing Native

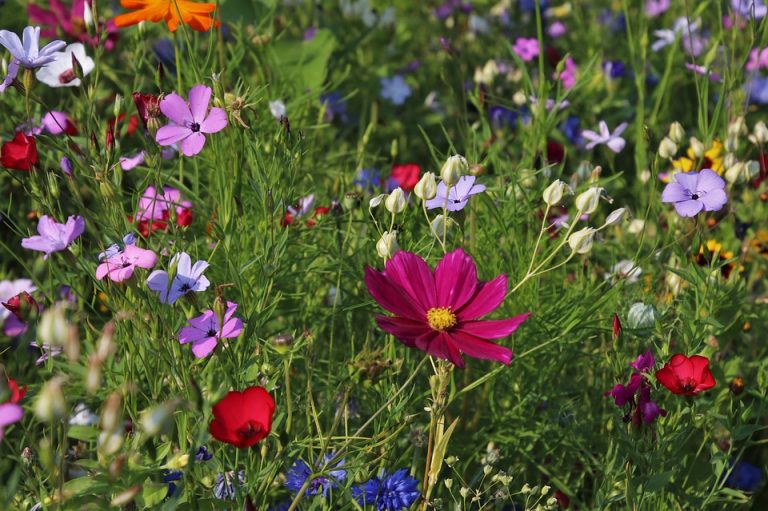
Frugal gardeners are always looking for ways to make their yards attractive, while holding costs down. Re-introducing native plantings to your property will do just that.

Native plants are those that were growing in any area before humans introduced plants from distant lands. In my Zone 7 garden located in the Pacific Northwest, they include things like Evergreen trees, salal, maples, columbine, ferns, bleeding heart, Oregon grape, honeysuckle, rhododendrons & huckleberries.

There are many advantages to going native:

  • Native plants, once established, can survive the winter’s cold and the summer’s heat while requiring no watering or fertilizing. This saves on your energy bill as well as cuts the time you need to spend maintaining the garden (thinking on a global scale, if we all did this, the need to produce chemical fertilizers would be curtailed too).
  • Native plants tend to stay where you put them. Simple but oh, what a nice trait. They rarely become invasive, unlike some plants we use from other areas. Just think of the time & energy this could be saving?
  • Typically, native plants are pest & disease resistant. Starting to see a trend here? There will be no need to purchase products to aim at the crawly things!
  • Landscaping with native plants improves the environment by returning the area to a healthy ecosystem. Growing native will do the best job of providing food & shelter for a wider variety of native wild animals and birds, plus you’ll get free entertainment in your own back yard.

To find information on Native Plants for your region or zone, check with local garden clubs, county extension services or the New England Wildflower Society (US & Canada). They provide extensive lists of resources including each states Native Plant Society contact information, specific plants for all the regions, as well as planting information and activities.


Harvest Your Own Seeds

Since my garden is located in Zone 7, now is the time to start planning ahead for the hundreds of free plants I want to get next spring. If you’re just starting out at gardening as a hobby, you may be wondering how does one get free plants? You are also probably wondering that if there are ways to get free plants, is it possible for me do this?


The frugal gardener should be outside searching the plants in our gardens that are going to seed. These are the very same seeds most people buy at the garden stores in the spring. That’s right, the seeds are sitting right in front of us, waiting to be harvested!

If left alone, the seeds will dry and drop around the original plant(s). If you gather the seed & save them over winter, you can start them indoors, in a greenhouse or plant them directly in the garden after the last frost (there is also nothing wrong with letting them seed on their own. It may get a bit crowded, but you can dig up the ‘babies’ and replant them).

All you need to harvest your own seeds are a few basic supplies and you’ll be ready to become a Seed Saver!

  • Marker
  • Envelopes
  • Small paper bags (occasionally a BIG bag, depending on the size of your plants)
  • Clippers

Pick a dry day to gather seeds as they will be less likely to mold over winter. Search out the plants that are at the end of their growing season. If you look closely where the flowers were, you should be able to spot some in the next stage – where the plant starts to set its seed for the next season. Pick the best specimen to save the seed from. The more carefully you select the plant, the better quality seedlings you will have come next season.

The best seed savers are both patient and observant – making frequent tours of the garden, looking for plants that are in the process of going to seed (be sure you stop dead heading or you’ll never have any blossoms setting seeds). You want them as mature as possible, but you want to catch them before they disperse on their own or before it rains.

To actually gather the seeds, I find I get some of the seeds from a flower or plant, but rarely all of them. Since the plants are dry, that makes the seeds hard to capture. I’ve tried different methods for different flowers. This includes cutting small seed pods & just putting them whole into an envelope or cutting larger pieces and putting them in paper bags. Often I’ve slipped the bag over the stem, then bent the stem off and tipped the bag over. The biggest difficulty comes because the stems are dry so as soon as something touches any part of the plant the seeds will scatter. You’ll probably have to try a plant a few times before you come up with a good way to get some of the seeds captured from that particular plant.

Allow your seeds to air dry indoors at room temperature as they are laid out on a flat surface. Once dry, you can choose to clean them up or not. I’ve done it both ways. If I have time, I clean up my collections and put all the like seeds together in an envelope and seal(being sure to label). If the pieces won’t fit easily into the envelope, I clean up my collection, tossing stems and old blossoms, and just use the smallest size paper bag by folding over the top, taping shut and labeling.

Keep the packets of seeds in a cool, dark and dry space over the winter*** The best spot would be a moisture proof container inside your freezer or refrigerator, but I’ve successfully grown plants from seed that just got stuck in a desk drawer.

Start looking at your plants that look a bit worse for wear and see if you can harvest a few seeds. You can then start dreaming of where you’re going to expand your garden next spring or how many people on your gift giving list would enjoy a gift from your yard.


*** Use of Desiccants: To keep seeds dry, you could use the little packets of silica gel that come with new electronics and other items or being frugal, you could make your own. Just take a teaspoon of powdered milk and make a small pouch or envelope out of paper towel. It works just as well to absorb any moisture and keeping your seeds dry.


Know Your Plant Zones


If you’re interested in gardening to any extent at all, you should really know what zone your garden is in. Having this number in mind will help you pick plants for your area that are going to survive over winter. Step number one for a frugal gardener is to stick to plants that will handle the weather where you’re live.

Please understand that there are some difficulties with this Zone idea, especially towards the west coast of the U.S. Due to the air coming in off the Pacific, and the multiple mountain ranges it has to cross, some areas of the west coast states are in the same zone, but experience totally different climates. So, the Zone map is a place to start, not the end all of your own gardens identity.

Once you have the Zone your gardens are classified as, you are better prepared to go to your local nurseries as well as participate in gardening forums on line Often when we as gardeners ask anyone for help, the first thing we hear is “What Zone are you in?”

Zones can tell a gardener all sorts of things including the amount of rainfall, average temperatures and the earliest and latest frost one can expect for your area. All this info adds up to which plants you can grow year round in your gardens if – and this is a big IF – all the other variables for that plant are met.

Plant Hardiness Northwest


Annuals vs. Perennials

You’ve decided to add some color to your garden and every store has dozens of the 4 or 6 packs of annuals lined up just like candy bars at grocery check out lines. It is tempting to choose a few petunias, some trailing lobelia and other “color spots” as garden departments like to call them. Your mind sees them filling pots, jazzing up your empty garden beds and perking up your entry area.

Now, stop and think. How many times have you done the same thing? Year after year, planting these temporary flowers, giving a brief display to your yard and making a negative impact on your wallet? Annuals are short lived and most of us are drawn to them every spring and summer.

The frugal alternative is to search out the perennial offerings, those plants often not looking like the stars of the garden department. Most come in gallon containers or larger and sport price tags many times the amount of the annuals.

Wait a minute. Why would these be the frugal gardener’s choice? The basic difference is annuals are going to provide that burst of color once – and a perennial plant comes back each year, or is hardy year round.

If you consider gardening with perennials like putting money into an investment account, you start to get the vision. Besides continuing to add to the beauty and value of your garden, you can divide perennials every couple of years; making them a gardener’s equivalent of a compound interest bearing account!

Now, there is something a frugal gardener can embrace! Think of how many pots you can fill on a permanent basis? Which gardeners on your gift list would love a plant or a pot full of plants? The price of that one perennial keeps going down as you see it multiplying over the years.

Once you understand the differences between annuals and perennials your decision to fill your garden with things like hardy geraniums, ornamental grasses and flowering shrubs will be clear. And, if you’re still needing the color burst from a pack of petunias, you can get one and splice them in between the work horses of your garden…the perennials!


Read more: