Edible Plants You Can Grow Inside

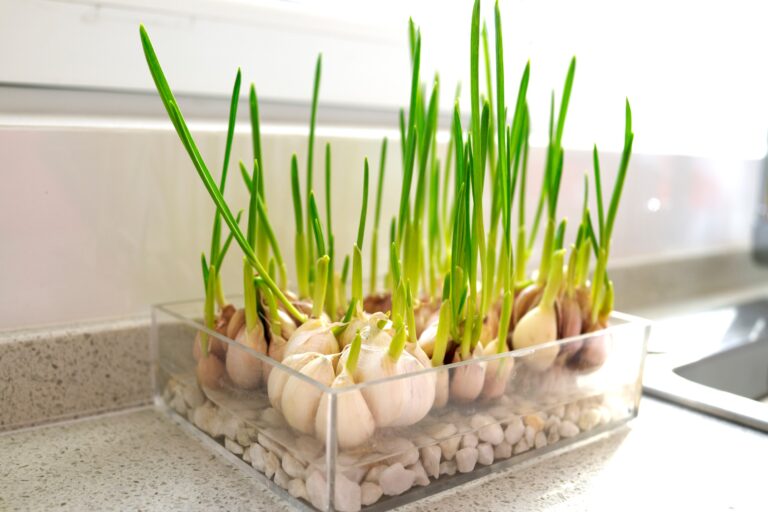
onions growing in a container on a kitchen counter, edible plants you can grow insideGrowing edible plants inside isn’t tricky.

All you need is an appropriate container, enough light, and to pick varieties that grow well in containers.

Picking the Right Container

Whenever you want to grow edible plants inside, you need to pick a container that meets the needs of your plants.

When picking a container, you must consider several things, like drainage and size.

Drainage

Sitting water encourages root rot, and this problem can persist in the winter because lower temperatures do not cause evaporation like in the summer.

Make sure any pot you use has drainage holes. You can obviously buy pots with holes, but when I grew herbs in containers, it was much cheaper to buy other containers and add holes with a drill.

Size

Some plants grow more extensive root systems or have root systems that spread out and stay relatively shallow in the soil.

So it is crucial to understand the plant’s needs for the size and shape of your plants. For example, you don’t need a deep container if you want to grow strawberries. However, a tomato plant produces a more extensive root ball, so its container must be much deeper than the strawberry.

Light

When growing plants inside, you must ensure they get enough light.

You may be lucky for things like small herbs and have a south-facing window without obstructions blocking the light. This means they may get enough light just sitting on the window sill.

But if you want to grow things like fruits or veggies, you must get a grow light that will provide 8 hours of sunlight daily.

You can choose grow lights to fit your needs, too. For example, you can get them with automatic timers, so you don’t have to remember to turn them off once the plants have met their daily light needs.

Edible Plants that Grow Well in Containers

Many plants grow well in containers. Below is a list of the most common edible plants you can grow inside.

Herbs

Herbs are a popular choice for growing edible plants inside. They do well in containers and only take up a little space.

The best herbs for growing inside are basil, oregano, rosemary, chives, thyme, sage, and mint. And these herbs come in various varieties, so you can produce many different versions simultaneously.

Peppers and Tomatoes

Peppers and tomatoes need bigger pots, but they can thrive indoors, given enough light. Wouldn’t it be awesome to have fresh garden salsa all year long?

Microgreens

Microgreens are different from the above plants. They can quickly grow inside because they don’t need light. Microgreens are the early growth of things like beans. To grow them, lay beans on damp (but not wet) paper towels, cover them with another damp paper towel, put them in a plastic bag or tray, and put them in a dark place. In as little as 5 days, they will have grown into leggy little, delicious things.

Conclusion

Do you grow any edible plants inside? Tell me about it!


5 Reasons To Use Fabric Over Plastic Grow Bags


5 Reasons To Use Fabric Over Plastic Grow Bags

I love grow bags. They’re a great choice for gardeners with limited space, and you can bring them with you if you have to move. But should you use fabric over plastic grow bags? Which type of grow bag is the best option?

Plastic will work in a pinch, but the fabric is my favorite grow bag material.

I’m here to tell you that fabric is your best option when using grow bags. And here’s why:

They promote healthy root growth.

Unlike plastic ones, fabric grow bags are breathable. You can buy fabric grow bags here. The permeable fabric allows roots to breathe and encourages something called air pruning. Have you ever picked up a plastic plant container only to notice the roots are all mangled and twirled up? This is unlikely to occur with a fabric bag because exposure to air in effect prunes the roots.

And this pruning isn’t just good for preventing root-bound plants. It also makes roots healthier and better able to soak up water and nutrients.


They’re easy to transport.

Even when filled with dirt, fabric bags are easy to drag from one place to another. When empty, they’re easy to store, too. You can fold them up and store them in a tiny nook.

They prevent root rot.

Because the fabric is permeable, water easily drains out the bottom, which is not the case with plastic grow bags. Plants that sit in water for days on end can end up dying due to root rot. Over watering is a common mistake, especially with newbie gardeners. You spot an unhealthy-looking plant and assume it needs water, right? Except, often it’s too much water that’s the problem. With fabric grow bags, you’ll never overwater again.

They don’t overheat.

Plastic is a great material of choice for keeping heat-loving plants happy because it tends to soak up heat. But in the middle of the summer, when the weather gets too hot, plastic can help plants on their way to overheating. Fabric is less likely to cook your plants to death. It can even help keep the soil cool.

You can reuse them.

You probably think fabric pots aren’t reusable. Well, you’d be wrong! You can reuse most fabric pots for at least a few years. And they aren’t prone to cracking or UV damage like plastic.

What to plant in fabric bags

You can plant just about anything in fabric grow bags, but my absolutely favorite plant to grow in these containers is potato. Potatoes can take up a lot of room, and it can be tough to dig them out in a regular garden bed—raised or not. But when you grow them in a fabric bag, just dump out the soil at the end of the season and gently sift through the dirt to find those starchy treasures.

Ultimately, anything you can grow in your regular garden will grow in a fabric grow bag. Grow bags are great for patios and balconies. They’re also great when you’ve run out of room in your main garden beds and need a place to plant on short notice.


5 Compact Plants For Small Gardens

5 Compact Plants For Small Gardens

You’re probably interested in frugal gardening tips because you’re on a budget. But I’ll bet that many frugal gardeners also have to carefully budget gardening space. Most people don’t have a lot of room to work with. And even if you have a large property, it’s likely that not all areas are conducive to growing plants.

Growing within a constrained space is also a fun challenge. It’s a great way to try out new plant varieties and come up with ways to grow upward.

I’m a big fan of compact plants because even though I’m lucky enough to have plenty of space to work with, I love the neat and tidy look of compact varieties.

Here are some of my favorite compact plants for growing in small spaces or containers. Their miniature sizing also makes them great for growing indoors.

Orange Hat Tomato

This teeny-tiny tomato plant is one of the smallest I’ve ever grown. It doesn’t get taller than 9 inches and takes up minimal space. If you’re a fan of cherry tomatoes, it’s a great variety to grow on a balcony or patio. Because the plants are mighty small, consider planting a few for a bigger yield.

Seeds available from Baker Creek Heirloom Seeds

Orchard Baby Sweet Corn

I don’t grow corn often because squirrels usually make off with the ears before I can enjoy them, but this variety is an excellent pick for tiny, squirrel-free gardens. The small ears of corn are ultra-cute, and the stalks don’t get taller than 5 feet. Don’t plan a corn roast after planting these mini corn plants, though. Each stalk produces just a couple of ears. That said, it’s a fun way to try out this crop that usually takes up a lot of room. And it’s a great plant to grow with kids.

Seeds available from Baker Creek Heirloom Seeds

Baby Milk Bok Choy

Bok choy is one of my favorite crops to grow, and this variety is perfect for compact gardens. I love the unified look of the plants after harvest and the bright white stems. Their miniature size makes them great for steaming or stir-frying whole.

Seeds available from Baker Creek Heirloom Seeds

Little Gem Lettuce

This is actually the first variety of lettuce I ever grew. And it remains a staple crop to this day. I have some growing in my indoor hydroponic garden right now! Head lettuce can sometimes take up quite a bit of room, but this plant produces crispy, shrunken heads of lettuce that are perfect for one or two people. And the leaves are super tender and tasty.

Seeds available from Baker Creek Heirloom Seeds

Parisian Carrot

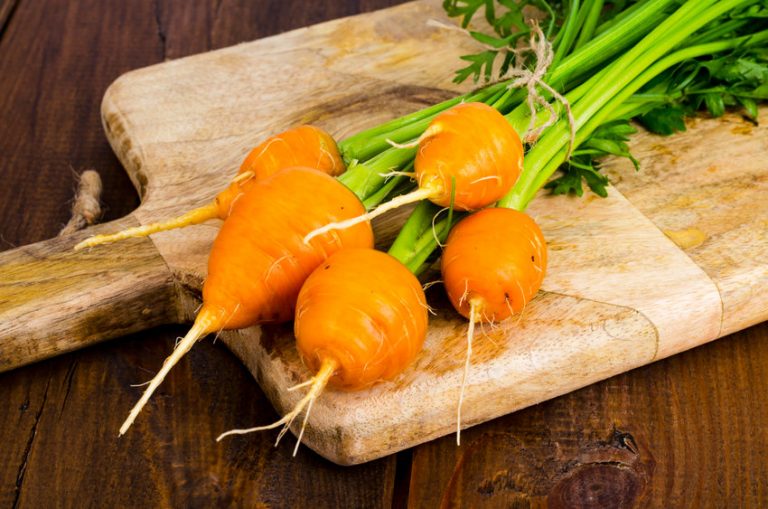
Here’s another variety that was a first for me back in my newbie gardener days. These small orange globes pack so much carroty goodness but don’t require as much soil depth as regular-sized carrots, making them an excellent choice for containers. They also look fancy when cooked and plated. Like little gem lettuce, Parisian carrots are a variety I still grow.

Seeds available from Hudson Valley Seed Co


5 Things To Consider When Recycling Soil


5 Things To Consider When Recycling Soil

It’s the end of the growing season, and you’ve tossed your spent container tomato plants in the compost. Can you reuse the soil next year? Here’s a soil recycling checklist to go through before repotting plants in old soil or using last year’s soil leftovers in the spring.

Pitfalls of Recycling Soil

Reusing soil is the perfect way for a frugal gardener to save money, but there are some risks involved in potting up new plants with old soil. Here are a few things to keep in mind:

  • Diseases may be lurking. Soil may contain diseases like viruses or fungi that can infect newly planted plants. Don’t reuse soil from a pot with a plant that died of or showed signs of disease.
  • Food may be scarce. Recycled soil may be deficient in nutrients. Old soil will be depleted of nutrients. You’ll need to cut the soil with fertilizer or compost for the best results.

Soil Recycling Checklist

Here are a few things to keep in mind for your soil recycling checklist:

  • Check for diseases or pests. Was the previous plant showing signs of disease such as yellowed leaves, stunted growth, or general poor health? If the last plant that grew in that soil was diseased. Toss out the soil rather than recycle it or try to sterilize it.
  • Eliminate weeds. Are there weeds actively growing in the pot or container? Are there weed seeds hidden inside? Pull the weeds, sterilize the soil, or use it for something other than potting soil.
  • Fertilize. Old nutrient-depleted soils need to be revived with a fertilizer like compost. Mix some in to boost fertility before recycling the potting soil.
  • Do some testing. Get the soil tested to check for pH or nutrient imbalances that can affect nutrient uptake and plant health.

You can also use old soil for things other than potting up or planting new plants. Use soil to patch up holes in your lawn or add bulk to very large containers. You can also mix old soil into your compost.

How to Sterilize Soil

Let it sit in the sun to kill insects, weed seeds, and pathogens. Alternately, you can also use your oven to zap all the nasty things hiding in old soil.

https://www.youtube.com/watch?v=-RNNQPxnUYE

Source:

https://www.bhg.com/gardening/yard/soil/how-to-reuse-potting-soil/


5 Houseplants That Won’t Waste Your Money


5 Houseplants That Won't Waste Your Money

Ever since the pandemic began, I slowly started buying houseplants. I’d scour my favorite online nurseries and pounce when they had a sale or coupon code up for grabs. Of course, I already had some plants before the COVID situation, but adding more made my home feel cozier, livelier.

When buying plants, I always opt for the smallest size because smaller plants are cheaper. I don’t mind starting with tiny nursery plants. I feel accomplished when they start to outgrow their small pots. Still, it’s a huge bummer when houseplants you’ve spent money on wilt and die.

I’ve been caring for a host of new plants this past year, and I can tell you which are worth your time and money. Here are 5 houseplants that won’t waste your money.

Snake Plant

When buying houseplants, I always look for ones that will fit my interior environment and my lifestyle. I have three types of lighting situations: two very sunny rooms, one partially shaded room, and another with very little light. When it comes to watering, I’m forgetful (but I have a handy app that reminds me when to care for my plants!) and prefer to fill my home with low-maintenance plants. Snake plants are the ultimate low-maintenance plants. They’re also supremely attractive and give off a tropical vibe without needing specialized care.

Prayer Plant

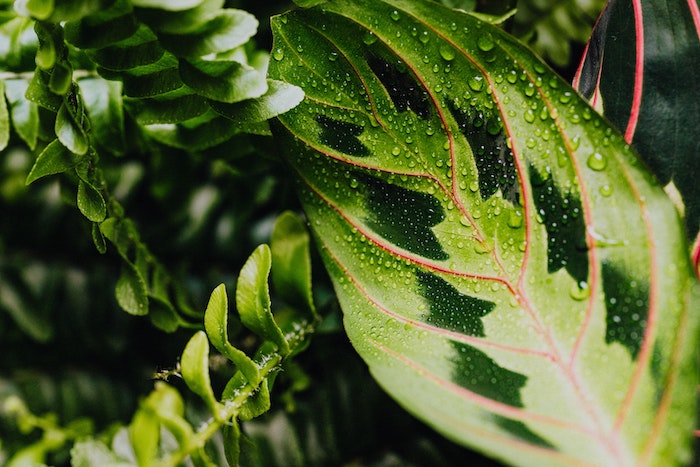
Prayer plants provide a huge visual impact. Their showy leaves come in a variety of colors. The plants are also pretty easy to maintain. They like a lot of moisture, so they need frequent watering. If you tend to overwater your plants, prayer plants are a great option because it’s tough to overwater them. They also don’t mind partial shade conditions.

Zebra Plant

Buying manageable houseplants doesn’t mean you’re stuck with visually boring specimens. I love the attractive stripey leaves on this plant. Zebra plants also require a lot of moisture, but the great thing about them is that they’ll tell you when they’re thirsty. The leaves immediately droop when it’s time for watering—a handy signal for the forgetful gardener.

Calathea

These come in a slew of varieties, and they’re all gorgeous. Calatheas can handle low light and have moderate watering needs. In my experience, they’re pretty tough to kill!

Sword fern

A lot of people have trouble with ferns. I’ve heard past wisdom that they’re fairly difficult to care for. I’ve had the opposite experience. As long as you provide them with plenty of water and keep the soil moist, they’re happy. They also don’t mind shade and actually prefer to be out of direct sunlight.

Quick plant care tips

I use an app that reminds me when it’s time to water each of my plants. Previously, I’d water them all on the same schedule, which is a no-no. It’s tough to remember each plant’s individual needs, though. I suggest creating a spreadsheet with a watering schedule to help you get used to each plant’s needs. Add reminders to your calendar, planner, or phone, so you don’t forget.

Always have a watering can—any cheap one will do!—on hand, so you can water at a moment’s notice.

I have two watering cans at the ready at all times. One is for watering, and the other contains liquid fertilizer. Having them both prepped and ready to go means I never skip out on plant care tasks.


4 Advantages of Pruning Plant Roots


4 Advantages of Pruning Plant Roots

You’ve heard of pruning branches, but what about pruning plant roots? Roots aren’t something we think about very often. Mainly because they’re buried under the earth. Out of sight. Out of mind. However, paying attention to your plant’s roots can be an essential part of raising healthy houseplants. 

Here’s why you might consider pruning plant roots. Below, you’ll also find a helpful video for guidance on how to prune plant roots.

Improve root growth

Young plants can sometimes fail to produce healthy, abundant root systems. When this happens, pruning the roots before transplanting may help encourage more vigorous growth.

Prevent or reverse root binding

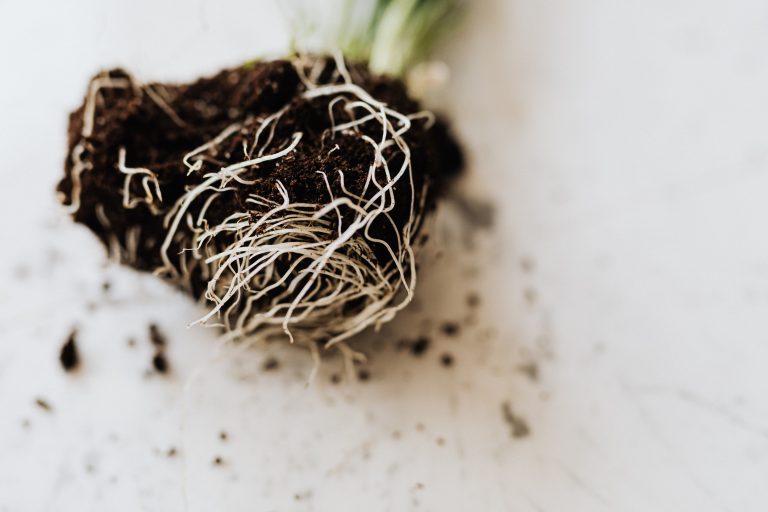
If you’ve ever repotted a plant or left a seedling too long in its pot, you may have noticed that its root system begins to circle the bottom of the container. If this happens, it means the plant has become root-bound. Without anywhere else to expand, the roots become a ragged, dense mess. Trimming the roots can help encourage new root growth and improve the overall health of your plant.

An alternative to trimming is to use breathable fabric pots. Obviously, this isn’t a great option for indoor plants. For outdoor plants, thought, fabric pots allow for air pruning. Because the fabric is breathable, it will enable the roots to breathe, preventing plants from becoming root-bound altogether.

Increases nutrient absorption

By pruning plant roots, you encourage nutrient absorption. The new root fibers help increase a plant’s nutrient uptake from the soil. If you have a root-bound plant, it can’t take up nutrients efficiently because it’s incapable of growing a lot of new, healthy roots.

Slows down growth

Abundant growth is great, but a plant that grows too rapidly will quickly need to be repotted again and again. By pruning roots, you slow down overall growth keeping the plant the right size for its current pot for a little while longer.

Get more plants

You’ll also need to prune roots if you want to divide plants. To divide plants, you’ll need to separate the roots, clip them, and trim them to encourage new growth.

How to prune

The ideal way to prune a plant is to lightly trim part of its root system. Taking off too much can have the opposite effect and potentially damage the plant.


Container Gardening: Fabric Pots vs. Plastic Pots


I love to plant crops in containers, especially finicky plants like eggplant and peppers. I use a variety of containers in my garden, including fabric pots. If it gets too cold, it’s simple enough to haul them inside. Containers are also great for those living in rental properties or those with limited space. It’s easy to shuffle them around a deck or balcony and you can manage to plant quite a bit in multiple containers. I’ve collected many plastic pots from the garden center over the years. I reuse them to plant herbs, tomatoes, and whatever doesn’t fit in the rest of my garden. But plastic pots have their pros and cons, and they aren’t the only option for your gardening needs.

The Trouble With Plastic

Black plastic pots are great for heat-loving plants because the dark material is a heat magnet. What’s not so great about plastic? Unless you’ve purchased self-watering containers, plastic pots require careful monitoring so that plants are evenly watered. Without proper drainage, plants may become root-bound or drown if over-watered (always make sure there are drainage holes underneath). Plastic doesn’t breathe very well, either. Imagine wrapping yourself in a sheet of plastic instead of breathable clothing. You’d end up a sweaty, suffocated mess.

That doesn’t mean plastic pots aren’t useful. They’re typically very inexpensive, easy to find, and they’re available in all shapes and sizes. But there’s already SO much plastic in the world. If there’s a worthy alternative, why not try it? By choosing a different type of plant pot, you can reduce your ecological footprint and stop creating unnecessary plastic waste.

An Alternative: Fabric Pots

You could use any pot for planting, but fabric pots offer a few distinct advantages:

  • They’re relatively cheap. Often sold in packs, fabric containers are a suitable option for frugal gardeners.
  • They last a long time. Cracked plastic and broken ceramic pots begone! Fabric pots are made of sturdy materials that won’t rip, even when filled with wet soil. Re-use them year after year.
  • They’re breathable. The fabric allows for optimal airflow.
  • No water-logging. You won’t have to contend with rotted roots using fabric pots, the material allows for proper drainage.
  • Easy to handle. Handles make it easy to drag fabric pots around the garden.
  • Foldable sides. Fabric pots are ideal for growing potatoes since the edges can be rolled down.

If you’re looking for a good beginner’s guide to growing in pots, I highly recommend the Vegetable Gardener’s Container Garden. It’s a book that I still refer back to!

I also recommend checking out this handy YouTube video on how to grow potatoes in containers:

What’s your favorite vegetable to grow in fabric pots? Leave us a comment to let us know!


How to Reuse Grow Bags


How to Reuse Grow Bags

Grow bags are an excellent container option for the frugal gardener. They’re extremely versatile and work for a variety of plants. Did you know that you can reuse them from year to year, too? Here’s how to reuse grow bags and save money down the line.

What is a grow bag?

A grow bag is a flexible container for growing plants. It’s usually made out of a breathable fabric. The breathable material lets air and water through but keeps all your earth neatly contained.

Benefits of using grow bags

Grow bags have a ton of wonderful advantages and are especially useful for frugal gardeners. They are great for:

People on a budget. If you don’t have a lot of money to spend on fancy containers, grow bags are an excellent choice. They’re fairly durable, so you can reuse them for several years.

People without a lot of room. If you have a small space or are gardening on a patio or balcony, grow bags are an excellent option. They’re available in multiple sizes, and when they’re empty, they fold down flat. You can also drag them around in spaces where the light moves around quite a bit, which can help you keep your plants happy.

Temporary gardening spaces. Not sure if you’ll be gardening in the same location next year? Use grow bags! When you’re done, they can come with you. They’re easy to store and transport when empty.

Certain plants. Grow bags are great for growing certain kinds of plants. I’m particularly fond of growing potatoes inside large grow bags. It keeps the potato plants contained, and at the end of the season, I just dump out the earth making it easier to spot ready-to-eat tubers.

Beginner gardeners. If you’re new to gardening, building raised beds or creating an in-ground plot can seem like daunting tasks. Grow bags are easy and convenient growing vessels that require not an ounce of physical labor.

How to reuse grow bags

You’ll get more life out of your grow bags if you empty them and store them in a dry place over the winter. Dump out the earth in your compost bin (or in a raised garden bed, if available) and then rinse, dry, and store your bags for the season.

You can also leave them full of dirt and reuse them next year. You’ll need to mix in fresh compost next season.

However, if any of your plants were diseased or experienced severe pest infestations, you’re better off safe than sorry. Toss out all the dirt and start fresh.

Some grow bags are also safe to toss in the washing machine, which is great if you need to sterilize them once the growing season is done. Never put grow bags in the dryer, though. The heat can cause shrinkage or weaken the fabric.

By reusing your grow bags, you can save money and avoid waste.

If your grow bags rip, don’t throw them away! You can use the pieces as a weed barrier in pots or raised beds.


5 Best Plants for a Privacy Wall


5 Best Plants for a Privacy Wall

A little bit of privacy can turn a plain outdoor space into a cozy oasis. Climbing, vining, and towering plants are perfect natural plant privacy wall options. With a plant privacy wall, there’s no need to fuss with the extra cost of lumber, fencing, or ready-made privacy accessories. Plants are a free, simple way to keep your yard, patio, or porch hidden from prying eyes. No need to worry about heading out to water your flowers in your pajamas!

A Word of Caution

Do your homework before settling on a plant for your DIY plant privacy wall. It may seem cheap now, but if you pick an invasive species, you’ll end up spending a chunk of money on getting rid of the spreading beast.

Consider also how a plant-ish privacy wall will affect other plant life nearby. Will there be enough shade to grow your favorite tomatoes next year? Will you still be able to enjoy the sunshine on your patio?

Don’t forget to find out how long it takes for the plant to mature. Will it take a decade for the vine to engulf your deck’s trellis? A plant that grows too quickly may turn invasive. If it takes forever to spread, it’ll be useless for immediate privacy purposes.

Lastly, does the plant provide privacy throughout the year? Evergreen cedars don’t shed their leaves in the winter, so they act as a permanent living fence. Flowering vines, however, may wither away in the winter and fail to provide enough of a screen during the colder months. If you’re not outside much in the winter, then this consideration matters little.

Best Plants for a Privacy Wall

Climbing Roses

What better way to gain privacy than with the help of beautiful blooms? Climbing roses pair well with a variety of support structures, so they’re an excellent pick for an elevated patio or deck.

Bamboo

While some types of bamboo are invasive, others aren’t as high maintenance. Bamboo is a tall plant that’s super easy to grow. Avoid aggressive bamboo species that send out runners. Don’t take chances, though. Install an underground barrier to prevent unwanted spread. Bamboo is an excellent choice for adding privacy around a pool area. It looks tropical, but it’s a lot less work to maintain than other tropical plants.

Boxwood

While boxwood won’t grow super tall, it’s an excellent choice for adding privacy if you don’t have a standard trellis or wall. I’m wary of vining plants because of a past (very awful) experience with an invasive vine, so I love the idea of placing attractive boxwood plants in tall pots for a chic, modern, privacy wall. Since nothing in containers is permanent, you can also move around the containers should you want to open up the previously hidden area.


Fake Plants

Hey, why not? Not everyone has a green thumb, but artificial plants are gaining momentum, and more people are adding them to their indoor and outdoor living spaces. Why? They require no water, no weeding—and they last forever. If you’re prone to killing plants, faux greenery might be a worthy alternative to a living plant privacy wall.

Jasmine vine

This fragrant vining plant is a gorgeous summer bloomer. It takes a while for it to spread, so it’s not for those who want instant-privacy. It’s also better suited for warm climates and doesn’t tolerate cold weather. You’ll need to start training the vines early on to ensure that the plant grows onto its support structure. Pruning is also necessary to encourage a bushy growth habit.


Can You Grow Potatoes in Containers?


Growing potatoes is so incredibly fun. With a little bit of patience, you’ll be digging up spuds towards the end of the season. The taste of freshly dug potatoes is unparalleled. People say the same about tomatoes, but I genuinely think potatoes win the contest for best-tasting garden edible. Compared to a storebought potato, one from the earth has a creamy, potato-y quality that’s impossible to match. There’s also so much more variety available when choosing seed potatoes compared to shopping the root vegetable aisle at your local grocer: fingerling potatoes, red-skinned varieties, and even blue spuds. But how do you grow potatoes if you don’t have tons of in-ground space?

Can You Grow Potatoes in Containers?

Yes! Absolutely! I wholly recommend growing them in containers instead of using in-ground real estate or large raised beds. A single 5-gallon container yields about 1.5 pounds of potatoes.

Benefits of Growing Potatoes in Containers

What’s the advantage of growing potatoes in containers? Here are the benefits of growing in containers:

  • Inexpensive. There’s no need to build a garden bed, there are plenty of cheap container options available from fabric pots to upcycled vessels like empty recycling bins.
  • Easy to relocate. Did you plop the containers somewhere where you’ve realized there’s not enough sun? Simply drag the containers to a sunnier spot.
  • Easy harvest. No need to dig around for hours to find spuds. Dump out the container and sift through the dirt. Since you’re less likely to leave behind diseased potatoes, there’s also a decreased chance of pest and disease in the following year.
  • Great for small spaces. Don’t have a large garden? You might think it’s time to give up on planting potatoes. Not so fast! Containers are great for gardeners with limited room. Grow taters or your porch or balcony.

How to Grow Potatoes in Containers

Plant 1-2 seed potatoes in a single 5-gallon bucket and double that amount for large containers. Fill your container up with enough soil (mixed with plenty of compost) to cover those newly planted seed potatoes.

As days go by, you’ll notice foliage start to appear. Continue to add enough soil mix to cover the stems and tubers, but don’t bury the leaves.

Potatoes need plenty of sun and regular watering. However, it’s best to avoid high-nitrogen fertilizers as they will increase foliage production but reduce tuber formation.

When Do I Harvest Potatoes?

Potatoes are ready to harvest when the tops have completely died back. Attempting to dig them up too soon may hinder tuber development and leave you with a smaller crop. Still not sure when the time is right? Read more about harvesting potatoes.