How To Transplant Pepper Seedlings: A Step-By-Step Guide

How To Transplant Pepper Seedlings

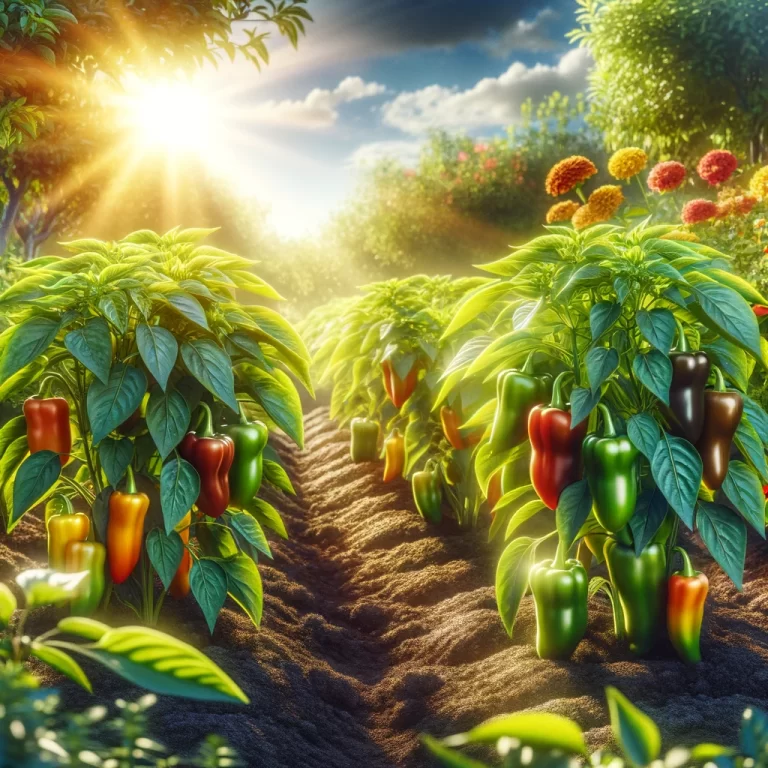
Transplanting pepper seedlings is a critical step in the journey of growing peppers, whether you’re a hobbyist gardener or a commercial grower. The process can significantly impact the health, growth, and yield of your pepper plants. With the rising interest in home gardening and sustainable living, understanding when to transplant seedlings and the right way to transplant pepper seedlings has never been more relevant. This guide will walk you through the process step by step, ensuring your pepper plants thrive in their new environment.

When to Transplant Pepper Seedlings

When to Transplant Pepper Seedlings

Timing is everything when it comes to transplanting pepper seedlings. The ideal time is after the last frost when the soil has warmed up to at least 60°F (15°C), typically in late spring or early summer. Pepper plants are warm-season crops that thrive in warm temperatures, and transplanting them too early can stunt their growth or even be fatal.

Wait until your seedlings produce their third set of true leaves, which indicates they are strong enough to handle the transition. Usually, that occurs about 3 to 4 weeks after sprouting, though the exact timeline can vary. This timing also aligns with the growing interest in seasonal gardening, making it especially relevant for those looking to optimize their gardening efforts.

Preparing the New Home

Preparing the New Home

Before you transplant, it’s essential to prepare the new location, whether it’s in your garden bed or a larger container. Ensure the soil is rich in organic matter and well-draining to promote healthy root growth. Amend the soil with compost or a balanced, slow-release fertilizer to provide essential nutrients. The pH of the soil should ideally be between 6.0 and 6.8.

If you’re planting in containers, choose ones that are at least 12 inches deep to accommodate the pepper plants’ root system. This preparation is crucial for the plants’ success and aligns with the trend towards organic and sustainable gardening practices.

Acclimatizing Your Seedlings

Acclimatizing Your Seedlings

Acclimatization, or “hardening off,” is a process that gradually introduces indoor-grown seedlings to outdoor conditions. Over 7 to 10 days, start by placing your seedlings outside in a shaded, sheltered area for a few hours each day, gradually increasing their exposure to sunlight and outdoor temperatures. This step is vital for reducing transplant shock, a common issue that can stunt growth and affect the overall health of the plants. With the increasing popularity of starting seeds indoors, this step has become more relevant for gardeners looking to transition their plants outdoors successfully.

The Transplanting Process

The Transplanting Process

When it’s time to transplant, water your seedlings thoroughly a few hours before moving them; this makes the soil cling to the roots and reduces stress on the plant. Dig a hole in the prepared soil slightly larger than the seedling’s root ball. Gently remove the seedling from its current container, being careful not to damage the roots. Then, roll the root ball gently to loosen it up and ensure the pepper plant isn’t rootbound. After that, carefully place it in the hole.

The base of the stem should be level with the soil surface. Backfill the hole with soil and press lightly to remove air pockets, then water the seedling gently but thoroughly to help settle the soil around the roots. This process is crucial for ensuring a smooth transition and promoting strong root development.

Post-Transplant Care

Post-Transplant Care

After transplanting, it’s essential to provide your pepper plants with consistent care to ensure they thrive. Keep the soil evenly moist, but avoid overwatering, which can lead to root rot. Mulching around the base of the plants can help retain soil moisture and regulate temperature. Provide support with stakes or cages as the plants grow, especially for larger varieties that can become top-heavy with peppers.

Regular feeding with a balanced fertilizer can also promote healthy growth and fruit production. This ongoing care is essential for maximizing the yield and health of your pepper plants, reflecting the broader trend toward meticulous and informed gardening practices.

Congratulations! You’ve Transplant Pepper Seedlings Successfully!

Transplant Pepper Seedlings Successfully

Transplanting pepper seedlings successfully is a key step in growing healthy and productive plants. By following this step-by-step guide, gardeners can ensure their pepper plants are well-prepared to thrive in their new environment. The process, from choosing the right time to post-transplant care, reflects current trends in gardening towards sustainability, organic practices, and the joy of growing your food. With patience and attention to detail, you can enjoy a bountiful harvest of peppers from your garden.


Hardening Off Plants Headache-Free

Hardening off plants

Hardening off plants is one of my least favorite gardening tasks. It requires a lot of care and attention, and it’s really easy to mess it up. I’ve yet to perfect the shuffle that involves bringing trays of seedling outside then back in. There’s always something that goes wrong. So let me help you avoid mistakes of your own by sharing all of mine, past, and present. 

What is hardening off?

Hardening off plants involves acclimating your indoor-grown seedlings to the outdoor climate and conditions. Inside your house, your baby plants are given plenty of tender, love, and care. If you don’t take the time to harden off your seedlings here’s what can happen:

  • Seedlings die because it’s too cold. 
  • Seedlings experience leaf burn because the sun is a whole lot stronger than any indoor lights your plant has previously been exposed to.
  • Seedlings die or become sickly because of transplant shock.
  • Seedlings topple over and stems break because it’s windy. 

How do I harden off my seedlings?

First, you should have an idea of when it’s appropriate to transplant your seedlings. Peppers and eggplants won’t be heading outside anytime soon in my climate because it’s still way too cold at night. 

Hardening off plants involves exposing them, little by little to outdoor temperatures, and, of course, the strong rays of the sun. In my experience, it takes a little over a week to complete the process because not every day looks the same weather-wise. Today, for instance, I didn’t bother putting my transplants outside for their second day of hardening off because the weather is stormy. I didn’t want to risk harming my tender starts.

Here’s a handy guide for hardening off seedlings

  • Day 1: Set out in the shade for 1-2 hours. Make sure the plants aren’t exposed to direct sunlight on their first day out in the wild.
  • Day 2: Increase outdoor plant time slightly, keeping them in shade.
  • Day 3: Increase time outdoors again with a little bit of time in the sun—make sure they’re not exposed to the sun at the hottest part of the day. They’re still not ready for that.
  • Day 4 and 5: Increase time outside in shade and sun incrementally. 
  • Day 6 to 7: Keep plants outside almost all day but bring them in at night.

Once that week of hardening off is complete, it’s time to transplant your starts in the garden. 

Errors to Avoid

There’s a lot of juggling around when hardening off plants. Set yourself a timer, so you don’t forget to bring plants inside, especially in the first few days. It’s easy to accidentally leave a tray of seedlings out in the hot afternoon sun and oops! You have a tray of burned plants on your hands. 

Don’t forget to water your plants! And if it rains, watch that your plants don’t stay sitting in a puddle of water all day. Drain the trays accordingly. 

Check the forecast, too. You don’t need to stick to a strict hardening off schedule. Adjust if you need to. Will it be unexpectedly chilly tomorrow? Don’t set out heat-loving starts until a day later when the warmth has returned.