How To Get Plant Spacing Right

How To Get Plant Spacing Right

When I started gardening over a decade ago, I was so excited to grow things that I would cram many seedlings into tiny spaces. My first garden was my pride and joy, but looking back on it, I made so many mistakes. Mistakes are good! They help you learn. But some of them are entirely avoidable. Spacing plants properly is one of those preventable mistakes.

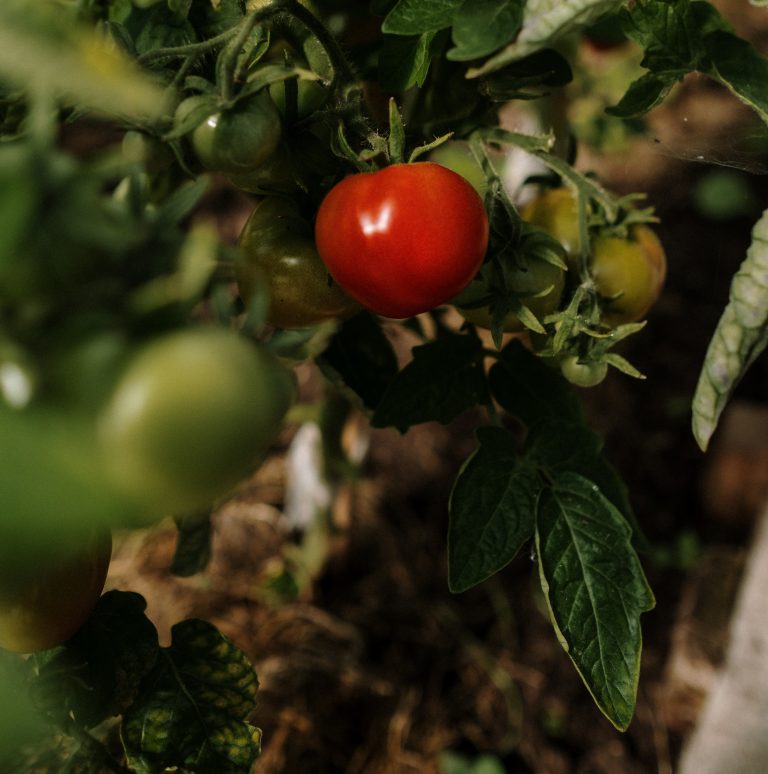
Cramming lots of seedlings into a tiny planter or jamming in 10 tomato plants into a raised bed with enough room for maybe 9 at most seems like a bright idea. It’s all about maximizing space, after all, right? Except, improper plant spacing can easily leave you with a disappointing yield. It seems like filling in every bare spot in your garden is a brilliant way to maximize the harvest, but, in reality, it can actually harm your efforts. Frugal gardeners should pay close attention to plant spacing because ignoring those guidelines can cause you to waste a lot of time, effort, and money.

What’s the big deal?

Okay, so why is plant spacing so important? Who cares?

For one, your plants do.

Putting plants too close together means they may not have access to enough nutrients. You may end up with spindly, weak plants if you don’t space them far enough apart.

Suffocatingly close plants may also experience higher instances of pest and disease activity. That’s because there’s usually limited airflow between squished-together plants. The foliage can’t dry quickly after it gets wet and becomes a hot spot for nasty bugs.

What’s the correct spacing?

Close quarters aren’t always a bad thing. You don’t need miles of space between plants to be a successful gardener. In fact, too much room between plants makes it easier for weeds to settle in your garden.

Most seed packets will give you exact spacing requirements for particular plant varieties. When in doubt, check Madame Google or ask a fellow gardener.

Sometimes, close spacing is ideal for harvesting things like baby greens. If you plant the seeds or seedlings too far apart, you’ll leave more room for weeds. Moisture loss is also likely to occur with spacing that’s too far apart.

I like using the Square Foot Gardening method for help with spacing. I hated geometry as a kid, so as an adult, spacing requirements on the backs of seed packets give me vertigo. 2 inches? 2 centimeters!? As someone with poor spatial abilities, I’m not about to take out the ruler to make precise measurements. Instead, I go by SFG measurements which specify plant spacing per square foot. A stamping tool helps me get spacing precisely correct.

Here are a few SFG spacing guidelines for common edibles:

  • Tomatoes: 1 per square foot
  • Peppers: 1 per square foot
  • Kale: 1 or 2 per square foot
  • Lettuce: 1 or 4 per square foot, depending on size and whether you want to harvest baby leaves or not
  • Carrots: 16 per square foot
  • Beets: 9 per square foot
  • Beans: 9 per square foot

Here’s the thing, though. Sometimes, different varieties have varying spacing needs. While I follow these guidelines, for the most part, I sometimes stray from the set rules regarding spacing to experiment. Sometimes it’s a win, and other times it’s a big disappointing failure.

If you want to experiment with spacing, I recommend taking notes so you can remember what works down the line. There’s no use making the same mistake twice!


Seeding Square Review: An Essential Tool for the Square Foot Gardener

seeding square

In this review, I’ll explain how the seeding square makes organized planting a cinch! 

The Square Foot Gardening method has been my go-to since I began gardening. I love it for many reasons. It allows me to maximize my planting space and close spacing keeps weed growth to a minimum. My favorite aspect, though, is how organized everything looks. I love that each square foot has a purpose. The spacing requirements make it easy to spot weeds and thinning seedlings is a piece of cake.

However, even with a grid it can be tough to accurately eyeball spacing—especially for crops like carrots and radishes, whose spacing is 16 per square foot. My self-made holes aren’t always perfectly aligned, and I often get the planting depth wrong. And when I opt to use the SFG method in beds without grids,  I often forget where I’ve started sowing.

How Does it Work?

seeding square

The Seeding Square is an attempt to make the Square Foot Gardening method even easier. Sure, a stick works wonders in a pinch, but having perfectly spaced holes really makes a difference.

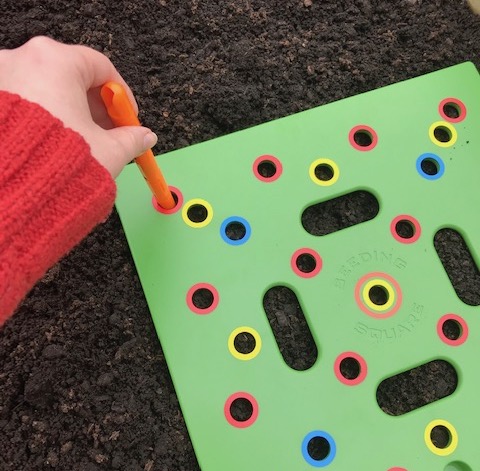
The gardening tool ships in a square-shaped box. The square itself is slightly raised with a hollow back end to allow for indentations in the soil. As you stamp the square into the earth, it creates a makeshift grid.

The Seeding Square includes a small plastic dibbler with seed depth indicators. On the other side of the wand is a spoon-shaped end for scooping up seeds. The third funnel piece, which clicks to the unit for storage, helps direct seeds into their respective holes.

The Seeding Square itself is full of color-coded holes to help guide your planting. If you’re planting carrot seeds, for instance, you can use the wand to poke 16 holes through the red-colored circles. The color-coding concept is a fantastic teaching tool for introducing newcomers to the SFG method. It’s also a great way to involve kids in gardening. If you’re totally new to gardening, don’t worry because the package includes planting guides to help gardeners get started.  You can also download them online.

My Thoughts on the Seeding Square

seeding squareLast week, the soil finally warmed, and I was ready to start sowing cool-weather plants like spinach and bok choy. It was the perfect time to put the Seeding Square to the test.

First off, I’ll say that I was incredibly impressed with the construction of the gardening accessory. It’s super sturdy, and I wasn’t afraid to press it firmly into the soil. I imagine it’ll hold up for a long while. (update: 1 year later and it’s still going strong!)

Part of my garden features semi-permanent wooden grids, which is where I first began my planting with the Seeding Square. It’s a bit tough to use the square atop a grid, but if my beds were completely filled, I suspect it would be easier. I still was able to poke the holes I needed and finished with planting in no time at all.

The Seeding Square really made my life easier in the no-grid portion of my garden. A quick press into the soil and my faux-grid was complete. I expect perfect squares of seedlings to pop up any day now! using the seeding square

I didn’t end up using the spoon end of the wand nor did I find myself choosing to use the funnel, but they’re helpful add-ons that others may find useful. There’s also little chance of losing the wand because it magnetizes to the square.

The square itself is super easy to clean, too. A quick rinse under the tap and it looked good as new.

An Inexpensive Tool for Frugal Gardeners

I look forward to using the Seeding Square throughout the season and beyond. It’s a well thought out tool that’s built-to-last, and it works exactly as intended. I even left my first planting day of the season without dirt under my fingernails!

What I’m about to type is a bit of blasphemy in the world of SFG, but the Seeding Square has me thinking that I may not replace my grids once they eventually rot away.Dirt Grid

Why do I recommend this product to frugal gardeners? It’s a small investment that will last you a long time. It’s also a great entry tool for those interested in Square Foot Gardening. I’m a big believer that organization in the garden leads to pennies saved.

Check out the Seeding Square website for more info. The product may also be purchased on Amazon.

Disclaimer: I was graciously gifted a seeding square in exchange for an honest review.