5 Compelling Reasons to Purchase Seeds Over Harvesting from Fruits

Compelling Reasons to Purchase Seeds Over Harvesting from Fruits

In the world of gardening, the choice between purchasing seeds and harvesting seeds from fruit can significantly impact the success of your planting season. While harvesting seeds from fruit may seem economical and sustainable, there are several compelling reasons to purchase seeds instead. This approach offers advantages ranging from genetic quality to ease of use, especially for beginner gardeners or those looking to achieve specific gardening outcomes. Here, we explore why purchasing seeds is often a better choice than harvesting seeds from fruit.

1. Guaranteed Germination and Purity

Guaranteed Germination and Purity

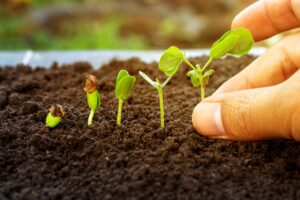
One of the primary reasons to purchase seeds from reputable suppliers is the assurance of high germination rates and seed purity. When you harvest seeds from fruit, there’s no guarantee that the seeds will germinate, as they might not be mature enough or could have been damaged during extraction. On the other hand, purchased seeds undergo rigorous testing to ensure they meet high standards of germination success and are free from contamination with other plants’ seeds. This is crucial for gardeners who want to maximize their planting efforts and ensure that every seed has the potential to flourish into a healthy plant.

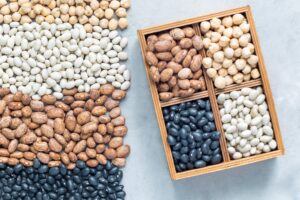
2. Access to a Wide Variety of Species and Cultivars

Access to a Wide Variety of Species and Cultivars

Purchasing seeds allows gardeners access to a broader range of species and cultivars than what might be available through local fruits or even in local markets. Many seed suppliers offer an extensive catalog of options, including heirloom varieties, hybrids, and those suited for specific climates and soil conditions. This diversity enables gardeners to experiment with new types of plants that are not native to their area, or that offer better resistance to local pests and diseases. Additionally, some plants, especially hybrids, do not produce seeds that retain the parent plant’s desirable characteristics, making purchased seeds the only way to ensure the quality and traits of what you grow.

3. Disease-Free Assurance

Disease-Free Assurance

Purchased seeds typically undergo treatments to be disease-free, minimizing the risk of introducing pathogens into your garden that could spread to other plants. When you harvest seeds from fruit, there’s always a risk that these seeds carry diseases, which can devastate both new and established gardens. These diseases can remain dormant within the seed and then manifest once the plant begins to grow, potentially leading to widespread infection that can be difficult to control. Buying seeds from a reliable source ensures they have been screened and treated for common pathogens, offering a safer start for your plants.

4. Cost-Effectiveness and Time Efficiency

Cost-Effectiveness and Time Efficiency

While harvesting seeds from fruit might seem like a cost-saving measure, it can often be more time-consuming and less efficient, particularly if the seeds fail to germinate. The process of extracting, cleaning, and storing seeds properly is labor-intensive and requires precise conditions to maintain their viability. Purchased seeds, in contrast, come ready to plant and are packaged in quantities that match gardeners’ needs, eliminating the guesswork and inefficiency. This convenience can be particularly beneficial for those with limited time or those new to gardening, allowing them to focus more on the growing process rather than the preliminary steps of seed preparation.

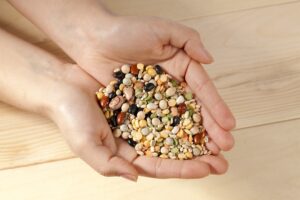
5. Supporting Agricultural Biodiversity

Supporting Agricultural Biodiversity

By choosing to purchase seeds, particularly those that are organic or heirloom, gardeners can support agricultural biodiversity. Many seed suppliers play a role in preserving rare or endangered plant varieties by encouraging gardeners to cultivate them. This not only helps to maintain genetic diversity within plant species but also supports small and independent seed farmers who rely on the sales of unique and diverse seeds. In contrast, harvesting seeds from commonly available fruits often perpetuates the cultivation of a limited range of plant varieties, which can contribute to genetic erosion over time.

Purchase Seeds Instead of Harvesting from Fruits

Purchase Seeds Instead of Harvesting from Fruits

Numerous benefits – including guaranteed germination, access to a wide variety of plant species, disease prevention, cost-effectiveness, and the support of agricultural biodiversity – support the decision to purchase seeds rather than harvesting seeds from fruit. These factors make purchasing seeds an appealing option for both novice and experienced gardeners alike, ensuring a more successful and rewarding gardening experience. As the gardening community continues to grow, the choice of seeds will play a pivotal role in shaping the health and diversity of gardens around the world. Whether you’re looking to explore new plant varieties or achieve a bountiful harvest, purchasing seeds is a wise investment that can yield significant returns in the long term.

Read More:

5 Fast Growing Seeds for Beginner Gardeners

10 Techniques to Increase Germination Rate of Seeds


Buying Seedlings: Getting Your Money’s Worth


Buying Seedlings Getting Your Money's Worth

I am exhausted to the bone. Normally, at this time of year, I get excited about seed starting. I take stock of my seed supplies, order seeds I’m missing, and start planning out my garden. This year, I’ve yet to do any of that. I’m too overwhelmed and tired, so I’ve decided to forego starting seeds indoors. Instead, I’m planning on buying seedlings. It wasn’t a decision I made lightly. But I just couldn’t burden myself with yet another task. I’ll still be gardening this year, just a little differently. I’ll stick to quick-growing crops for the most part, and I’ll be grabbing seedlings from my local nursery—here’s hoping they offer contactless delivery this spring!

I figured some people might be in the same boat as me. Tired. Unmotivated. There are also plenty of gardeners who don’t have room or time to start seedlings indoors. Buying seedlings is totally fine! Unfortunately, it can get expensive if you don’t plan correctly. Here are a few tips to getting the most out of your money when shopping for seedlings.

Shopping for Seedlings on a Budget

Here’s how to get the biggest bang for your buck when buying seedlings for your garden this year.

  • Set a budget. It’s really easy to go overboard when shopping for plants in the spring. The nursery is full of beautiful lush plants, and the temptation can be overwhelming. Have a budget in mind before you head out and be strict with keeping to it. You can always go back and get more plants if you need to!
  • Make a plan. Don’t go to your local nursery without a plan. Sketch out your garden and figure out what you plan to put where. Are you growing square-foot-style? Know how many varieties of each plant you need per square.
  • Stick to slow-growing plants. Unless you have the budget, stick to buying slow-growing plants like tomatoes, eggplants, and peppers. Lettuce and other greens are easy to grow from seed, so don’t bother wasting money on those.
  • Cap the number of new-to-you plants. Don’t blow your budget on exotic plants or varieties you’ve never grown before. Buy one or two new options but overall, stick to tried-and-true stuff.
  • Avoid large plants. You’ll pay a premium for very large plants, but you don’t need to start with a giant tomato plant to get a decent crop. The advantage to buying an oversized plant is that you can harvest earlier, but that privilege will cost you.
  • Prepare in advance. Prep your garden before you head out to the nursery. Have everything ready so you can bring your plants home and transplant them straight away. Amend your beds with compost, get some mulch ready, and make sure the soil is moist. If it’s still early in the spring, prepare space for your new plants inside your home.

Don’t forget that you can also find seedlings for a steal around your neighborhood. Check Facebook Marketplace listings for gardeners who are selling (or giving away!) their extra seedlings. Ask gardener friends to share their extra seedlings with you. Inquire with local gardening clubs to find out if they have any upcoming seed swaps or seedling sales.

Or alternatively if you need to raise some extra money to buy seeds, you have lots of options. Seeds cost less than $10, so you can always sell some of your old stuff on Facebook Marketplace, Offer up Craigslist. Old toys, comic books stored in bins or tools you arent using usually do pretty well.


7 Plants You Can Direct Seed


7 Plants You Can Direct Seed

Recently, I’ve mentioned that this year I just don’t have the bandwidth to garden like I usually do. But that doesn’t mean I’m completely abandoning my favorite hobby. Although I didn’t start seedlings indoors, I still have a vast collection of seeds at my disposal, and I’ve already started sketching a plan for what I want to plant. There are plenty of things I can direct seed and grow without much intervention. A bit of thinning here and there is all that’s required.

Some plants are great for direct seeding because they grow quickly. Others do best direct-seeded because they don’t transplant well. When I started gardening, I direct seeded everything. I didn’t have the space to commit to starting seeds indoors, and I didn’t really understand that some plants needed long growing seasons to reach maturity. Through the years, though, I’ve learned about the best plants to direct seed—with a lot of trial and error.

I’ve even had success direct seeding some dwarf tomato varieties! With gardening, the sky’s the limit. But to get you started off on the right foot this year, here are 10 plants you can direct seed just before or after your last frost date.

Plants You Can Direct Seed

Here are some of the easiest plants to direct seed in the garden.

  • Radishes. These pungent, crispy root vegetables are one of the quickest growing edibles in the garden. Like most root veggies, they don’t transplant well. If you’re going the square foot garden route, plant 16 or 9 per square.
  • Carrots. I just sowed my carrot seeds in the garden. I normally plant 16 per square, but this year I decided to broadcast sow the seeds because I’m planting so many, and I didn’t feel like carefully pinching seeds into hundreds of holes. Carrots grow slowly, but they’re really easy to grow given the right soil conditions. Once they sprout, all you need to do is thin out the seedlings. After that, regular watering is really all that’s required.
  • Kale. Another slow-growing one. BUT kale does exceptionally well when direct-seeded. You can sow kale in the spring before your last frost date. I like the interplant kale with herbs and flowers to entice pollinators and beneficial bugs to settle in. Most years, cabbage loopers decimate my kale crops not under protection. But last year, I had a lot of success pairing my brassicas with flowers and flowering herbs.
  • Spinach. This crop is another easy one to grow. You’ll have the best results sowing early in the spring as soon as the soil is workable. Spinach bolts when the weather gets warm, so early plantings can mitigate premature bolting. Grow spinach in partial shade. The hot afternoon sun, even on a cool day, can trigger bolting.
  • Asian greens. There are many delicious Asian greens out there, but some of my favorites include bok choy, Chinese broccoli, and frilly mustards. Most of these grow well from seed. You can also harvest them early as baby greens.
  • Summer squash. I’m not planting squash this year because I have a squash bug problem. But if you’re lucky enough not to have to deal with these irritating insects, summer squash is an excellent plant to grow from seed. It grows exceptionally fast, and once it starts to produce, you’ll have plenty of food to eat. My favorite variety is patty pan. Sow summer squash right after the last frost date.
  • Beans. Beans grow so quickly I never bother starting them from seed. They also don’t love to be moved around. I prefer bush varieties because they don’t require supports, but if you space them too closely, you can end up with a tangled mess. Sow bean seeds right after the last frost date.

Read More

Yes, you can garden for free

Ten ways to get free plants for your garden

How to get free plants


10 Top Reasons Why Seeds Don’t Germinate


10 Top Reasons Why Seeds Don't Germinate

There are a lot of reasons why seeds don’t germinate. Knowing what can go wrong is the first step in solving the problem. If you’re struggling to start seeds this spring, here are a few things to look out for.

Why Aren’t Seeds Germinating?

Here are a few common reasons why seeds don’t germinate.

    • It’s too hot. It’s a common misconception that seeds require heat to germinate. Not all seeds like it hot. Some germinate best when the soil is cool. The ideal temperature for lettuce seeds, for instance, is between 40 to 85 degrees Fahrenheit. Closer to 80 degrees means seeds are less likely to emerge.
    • It’s too cold. Similarly, some seeds require plenty of warmth to germinate. Things like tomatoes, eggplant, and peppers do best if you use a heat mat. If you don’t provide extra warmth, your seeds may take longer to germinate or not germinate at all.
    • The soil is too wet. Seeds and seedlings need air to survive. If you drown your seeds in water, they may not be able to access oxygen, and they’ll eventually rot. When starting seeds, you want your soil to be moist but not overly so.
    • Damping-off. This is a fungal disease that commonly affects seeds and seedlings. Avoid it by using sterilized seed starting mix, disinfecting tools, and using quality seed. If you notice your seedlings continually succumbing to damping-off, it might be wise to throw out that seed packet.
    • Seeds are getting eaten. In some areas, you may already be direct seeding outside. It’s a great way to get a jump start on the season. Unfortunately, some animals, like birds and small mammals, don’t really care that you’re excited about the gardening season. If you plant seeds and wonder why they aren’t germinating, it might be because critters are eating them when you’re not around. You can use netting or other protective covers, like cloches, to keep your seeds away from hungry mouths.
    • You’ve got duds. Sometimes, seeds, even from quality retailers, just aren’t going to germinate. Most reputable seed companies have a germination percentage figure on their seed packets to let you know how many seeds are expected to germinate. The lower the percentage, the more likely you are to have a few non-starters. If you continually find yourself with duds on your hands, it’s time to find a new seed supplier.
    • Your seeds are too old. Seeds don’t last forever. They’ll last a shorter time if they’re stored haphazardly. Some types of seeds also last longer than others. If your seeds aren’t sprouting, check the date on the packet. I often buy packets of seed that contain way more seed than I know I’ll be able to use. I like to share seeds with other gardening pals to make sure they don’t go to waste.
    • You’re not being patient enough. Some seeds take a while to germinate. While lettuce seedlings usually pop up within less than a week, many herbs take a lot longer to sprout. Others can take months. Seeds will also take longer to germinate if the conditions aren’t quite right.
    • Your seeds need an extra helping hand. Some seed types require periods of freezing weather or soaking in water to sprout. Always carefully read the back of a seed packet to check if this needs to be done. Some flower seeds have hard coatings, so you need to go through these steps to weaken the coating.
    • You’ve planted them too deep. This is more of an issue when direct sowing. Only plant as deep as the length of the seed. So for small seeds like carrots, you want to make sure you’re sowing them very shallowly.


Hardening Off Plants Headache-Free

Hardening off plants

Hardening off plants is one of my least favorite gardening tasks. It requires a lot of care and attention, and it’s really easy to mess it up. I’ve yet to perfect the shuffle that involves bringing trays of seedling outside then back in. There’s always something that goes wrong. So let me help you avoid mistakes of your own by sharing all of mine, past, and present. 

What is hardening off?

Hardening off plants involves acclimating your indoor-grown seedlings to the outdoor climate and conditions. Inside your house, your baby plants are given plenty of tender, love, and care. If you don’t take the time to harden off your seedlings here’s what can happen:

  • Seedlings die because it’s too cold. 
  • Seedlings experience leaf burn because the sun is a whole lot stronger than any indoor lights your plant has previously been exposed to.
  • Seedlings die or become sickly because of transplant shock.
  • Seedlings topple over and stems break because it’s windy. 

How do I harden off my seedlings?

First, you should have an idea of when it’s appropriate to transplant your seedlings. Peppers and eggplants won’t be heading outside anytime soon in my climate because it’s still way too cold at night. 

Hardening off plants involves exposing them, little by little to outdoor temperatures, and, of course, the strong rays of the sun. In my experience, it takes a little over a week to complete the process because not every day looks the same weather-wise. Today, for instance, I didn’t bother putting my transplants outside for their second day of hardening off because the weather is stormy. I didn’t want to risk harming my tender starts.

Here’s a handy guide for hardening off seedlings

  • Day 1: Set out in the shade for 1-2 hours. Make sure the plants aren’t exposed to direct sunlight on their first day out in the wild.
  • Day 2: Increase outdoor plant time slightly, keeping them in shade.
  • Day 3: Increase time outdoors again with a little bit of time in the sun—make sure they’re not exposed to the sun at the hottest part of the day. They’re still not ready for that.
  • Day 4 and 5: Increase time outside in shade and sun incrementally. 
  • Day 6 to 7: Keep plants outside almost all day but bring them in at night.

Once that week of hardening off is complete, it’s time to transplant your starts in the garden. 

Errors to Avoid

There’s a lot of juggling around when hardening off plants. Set yourself a timer, so you don’t forget to bring plants inside, especially in the first few days. It’s easy to accidentally leave a tray of seedlings out in the hot afternoon sun and oops! You have a tray of burned plants on your hands. 

Don’t forget to water your plants! And if it rains, watch that your plants don’t stay sitting in a puddle of water all day. Drain the trays accordingly. 

Check the forecast, too. You don’t need to stick to a strict hardening off schedule. Adjust if you need to. Will it be unexpectedly chilly tomorrow? Don’t set out heat-loving starts until a day later when the warmth has returned. 


Soil Block Success!!!

Soil Block

Flickr via Kevin Doncaster

Whenever I experiment with something new during the seed starting season, I feel incredibly anxious. What if it goes wrong? What if I end up with unhealthy starts? Believe me. I’ve made my fair share of mistakes that have resulted in disaster. 

I tried using jiffy pellets one year, and my seedlings were stunted. Another year, I tried plastic pots. It was a slightly pricier endeavor than the peat pellets, but I hoped that it would result in more vigorous seedlings. It ended up being a frustrating experience. The pots were flimsy, and many of my seedlings became root-bound.

Another year, everything was going great, but the humidity levels in my basement grow space were less than ideal. I ended up trashing most of my seedlings because of damping off. 

I’ve done things to kill seedlings, and I’ve had things happen that were totally outside of my control. Needless to say, I was really nervous about trying something new, but I was excited to see if it would make this part of the gardening process a bit easier and a bit kinder on my wallet. 

Creating Soil Block

Last weekend, after a particularly long day and a week that felt like it was never going to end, I finally decided to start some seedlings—early March is the time to start tomatoes, peppers, and eggplants if you’re in Zone 5. 

I was exhausted but determined to get going. Nightshades are notoriously slow to germinate, so I didn’t want to wait any longer. 

I dumped some soil mix into a bucket (I bought a specialty sterile mix this year because honestly, a few extra bucks seemed worth it to avoid the massacre of seedlings I dealt with last spring) and added water until I got a goopy consistency. 

What I Learned

In retrospect, I don’t think I added enough water. Lesson learned. For the next batch of seedlings, I’ll aim for a slurry and not a goop.

Soil blocking was less messy than I envisioned, but you definitely get your hands dirty! I rolled up my sleeves and pushed the metal blocking tool into the soil goop until there was water seeping out a bit. 

Then, I popped the perfectly formed blocks onto my tray. 

I was amazed at how well-formed the blocks were and still are. A few are crumbling slightly, but all in all, they’re doing fine.

https://www.instagram.com/p/B9Nma-3DeSG/

I definitely have to work on my technique—the mix should have more water and I need to compress the blocks a bit more, too—but I feel confident that this is a method I’ll be using from now on. I’m so grateful not to have to deal with pots ever again. What a relief!

Looking Forward

I’ve been misting the blocks and watering from underneath (something I usually do with all my plants) and I’m eager to see how things go when it’s time to transplant the seedlings. Though perhaps that’s thinking too far ahead. Maybe I’ll just wait and see if anything actually sprouts! 


A New Seed Starting Adventure With Soil Blocks

Soil Blocks

I’m rushing to set up my grow shelves and get going with seed starting this year. I came down with another illness over a week ago and it hit me hard. The second time this winter! And it was a nasty bug that left me unable to move from the couch. I spent my time laid up thinking about how I was running behind with all my seed starting activities. As soon as I felt better, I began an inventory of my seeds and ordered seed starting mix. 

I also decided to invest in a whole new seed starting tool this year: a soil blocker. 

I’m tired of buying crappy pots and DIY vessels to start seeds. Even when I locate a good deal, it always seems insane to spend money on containers that are difficult to sanitize and keep looking like new. I abhor having to re-pot tiny seedlings into bigger pots, too. In my quest to simplify the process, I decided to experiment with something new — soil blocks.

What are soil blocks?

Instead of filling pots and containers with soil mix, soil blocking involves a metal press-like tool that compresses wet dirt into manageable, uniform clods. Plant seed directly into the cube and never have to deal with pots again! 

Soil blockers are available in multiple sizes, and it’s possible to pot a smaller soil cube onto a larger one. A significant advantage of this seed-starting method, though, is that plants are much more unlikely to become root-bound than their potted counterparts. 

A breakdown of soil block advantages 

Soil blocking certainly involves some up-front costs. I spent about $40 for a metal blocker that will create blocks of 2-inches by 2-inches. I intend to purchase another block to make 4-inch by 4-inch blocks, as well. You’ll also need trays to house your finished soil block seedlings—this is something I already have. If you need a quick, cheap solution, head to the Dollar Store and grab some inexpensive baking sheet packs to house your blocks. Once you’ve purchased these supplies, however, the only renewable costs involved are seed and soil mix. Here’s why I’ve decided to switch to this method:

  • No more pots. They’re costly and aren’t always re-usable. Quality varies significantly, and for those with limited storage space, they take up a whole lot of room. No more time is wasted sanitizing pots each winter in preparation for seed starting. 
  • Quick and efficient. Making blocks is easy and a lot less time consuming than filling small awkward-shaped pots.
  • No-fuss transplanting. Potting up is a pain in the butt with containers but with soil blocks, it’s incredibly straightforward. Moving plants into the garden is similarly easy. Plants are a lot hardier and since they’re never removed from their containers, they experience far less transplant shock than potted seedlings.
  • Space-saving. In previous years, the cheapest pots I could find were round in shape, and it was difficult to make efficient use of my shelving space. Soil blocks don’t take up as much space. 
  • Healthy, strong starts. Plants never become root-bound and roots are much healthier than with plants left in pots. Far less handling and moving around during the seed starting process produces robust seedlings. 

I’m looking forward to sharing my progress with soil blocks this season! Here’s hoping it goes smoothly.